The All-In-One Device
Making Camper Electric Installation Easy
The Problem with Camper Electrics


Only a few of us who convert vehicles into campers have experience with electrical installations. Therefore, when it comes to camper electrics, we likely need professional help for the installation. Not only that, but it can also take weeks to figure out which components are suitable, necessary, and which are overkill.
Then, many of us are on a budget, and hiring an electrician to install the entire electrical setup can quickly exceed our planned conversion budget.
So, is there a solution that works for everyone?
The answer is yes! A German company recently introduced an all-in-one device to the market (click to see device). This product includes everything I previously had to install and wire myself, as seen in my Ducato conversion (click) or Caddy conversion (click). In both cases, the job took me more than two weeks.
Appearance: This device resembles a guitar speaker, making it a portable, stand-alone solution. This means it can operate anywhere without any external connection, a truly self-sufficient device. In essence, it is a lithium battery with all other components smartly incorporated.
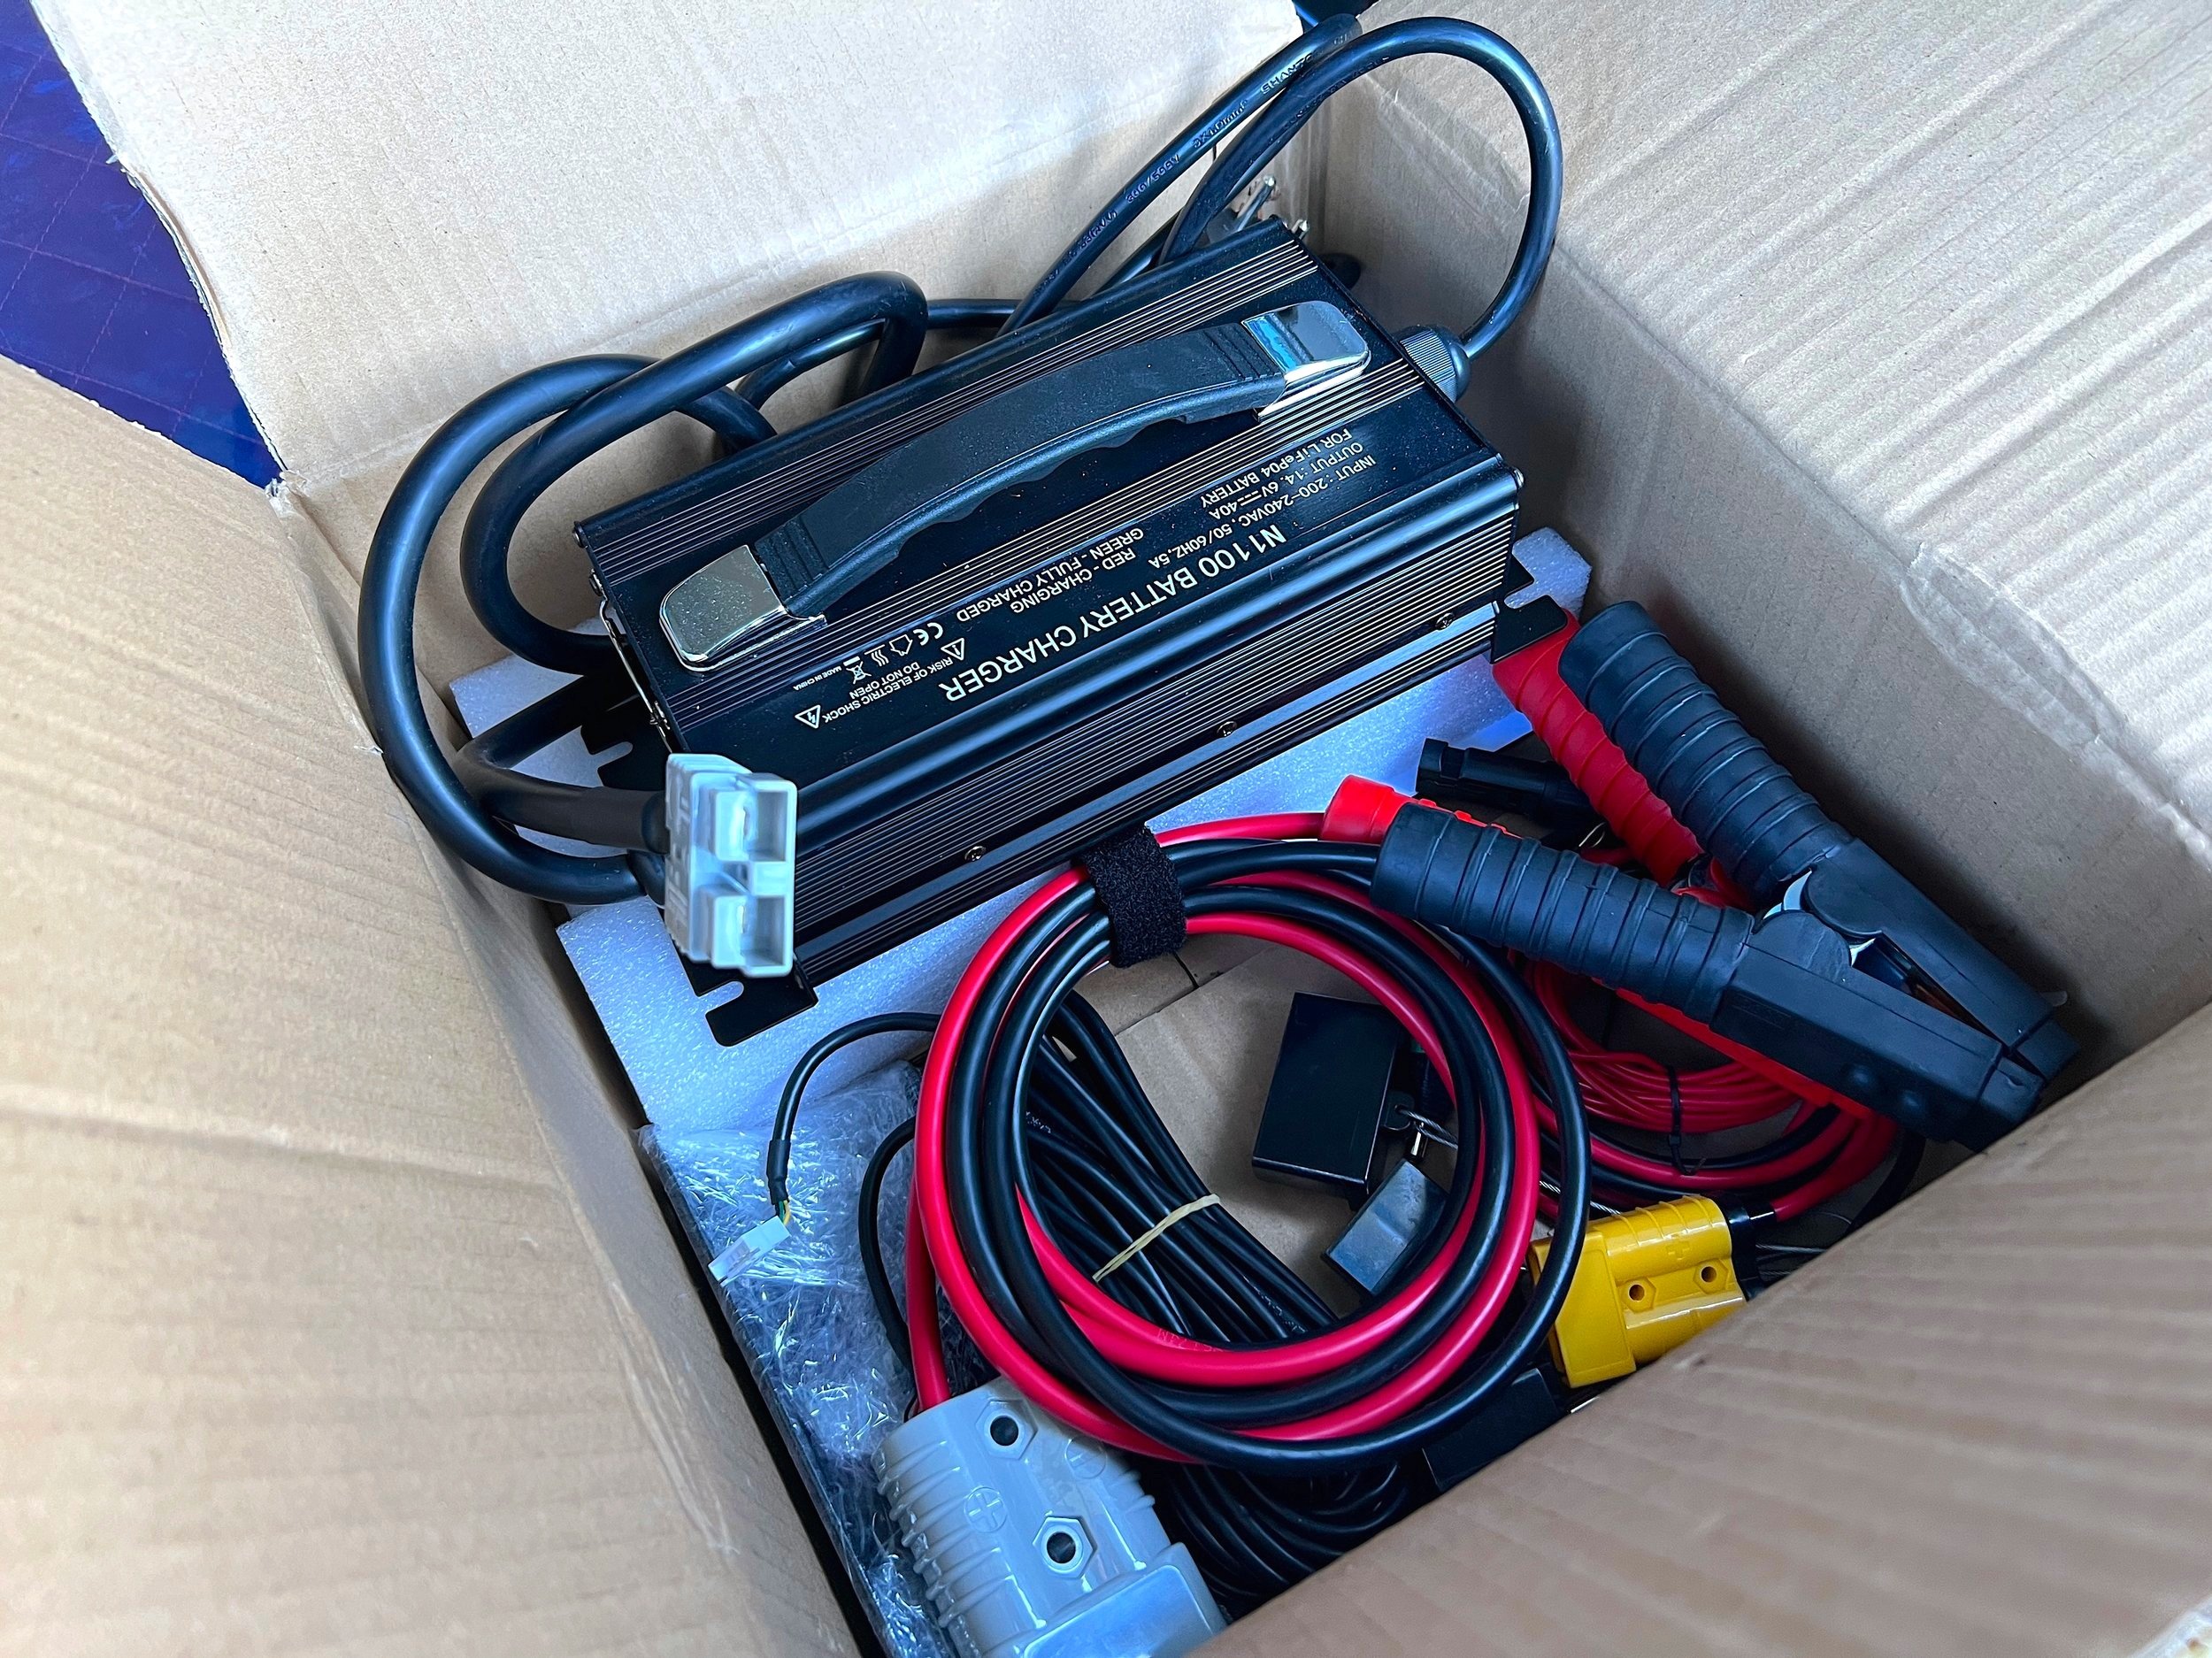
Charging: The device includes a charger, allowing you to plug it into a standard 230V outlet for charging. It remains usable until the energy in its lithium battery is depleted. However, it also has a built-in charging booster, so you can connect it to your car and it will charge when the engine is running, just like your engine battery. Let's explore this in more detail in the following steps.
My Recommendation
The time has come where camper electronics installation can be managed by anyone. No prior knowledge is required; simply place an order, and your camping adventure can begin! Just lift the device (click) into your vehicle, and you are all set.
2. Tech Talk - What Can It Do?

Battery Capacity: 3 Models available with 120 Ah (1536 Wh), 200 Ah (2560 Wh), 300 Ah (3840 Wh).
Battery Technology: Uses LiFePO4 (Lithium-Iron Phosphate) technology, known for its longevity and safety.
Continuous Power: Offers a constant power output of 3000 W.
Peak Power: Capable of a peak power output of 6000 W for 2 seconds.
Cycle Life: 4000 cycles at 80% DoD.
Temperature Range: Operable from -10 °C to 50 °C.
Warranty: 3-year coverage.
Charging Options: Mains (230V outlet), solar, charge booster, external (up to 150A).
MPPT Solar Controller: Maximizes solar panel efficiency.
Charge Booster: 30A charging during driving.
Inverter: 3000W pure sine wave.
FI Switch: Provides additional safety for the integrated inverter.
Display/App: Color display and Bluetooth connectivity.
Versatile Use: Suitable for diverse settings and applications.
Battery Management: Protection against overuse and malfunctions.
Design: Portable and adaptable for multiple uses
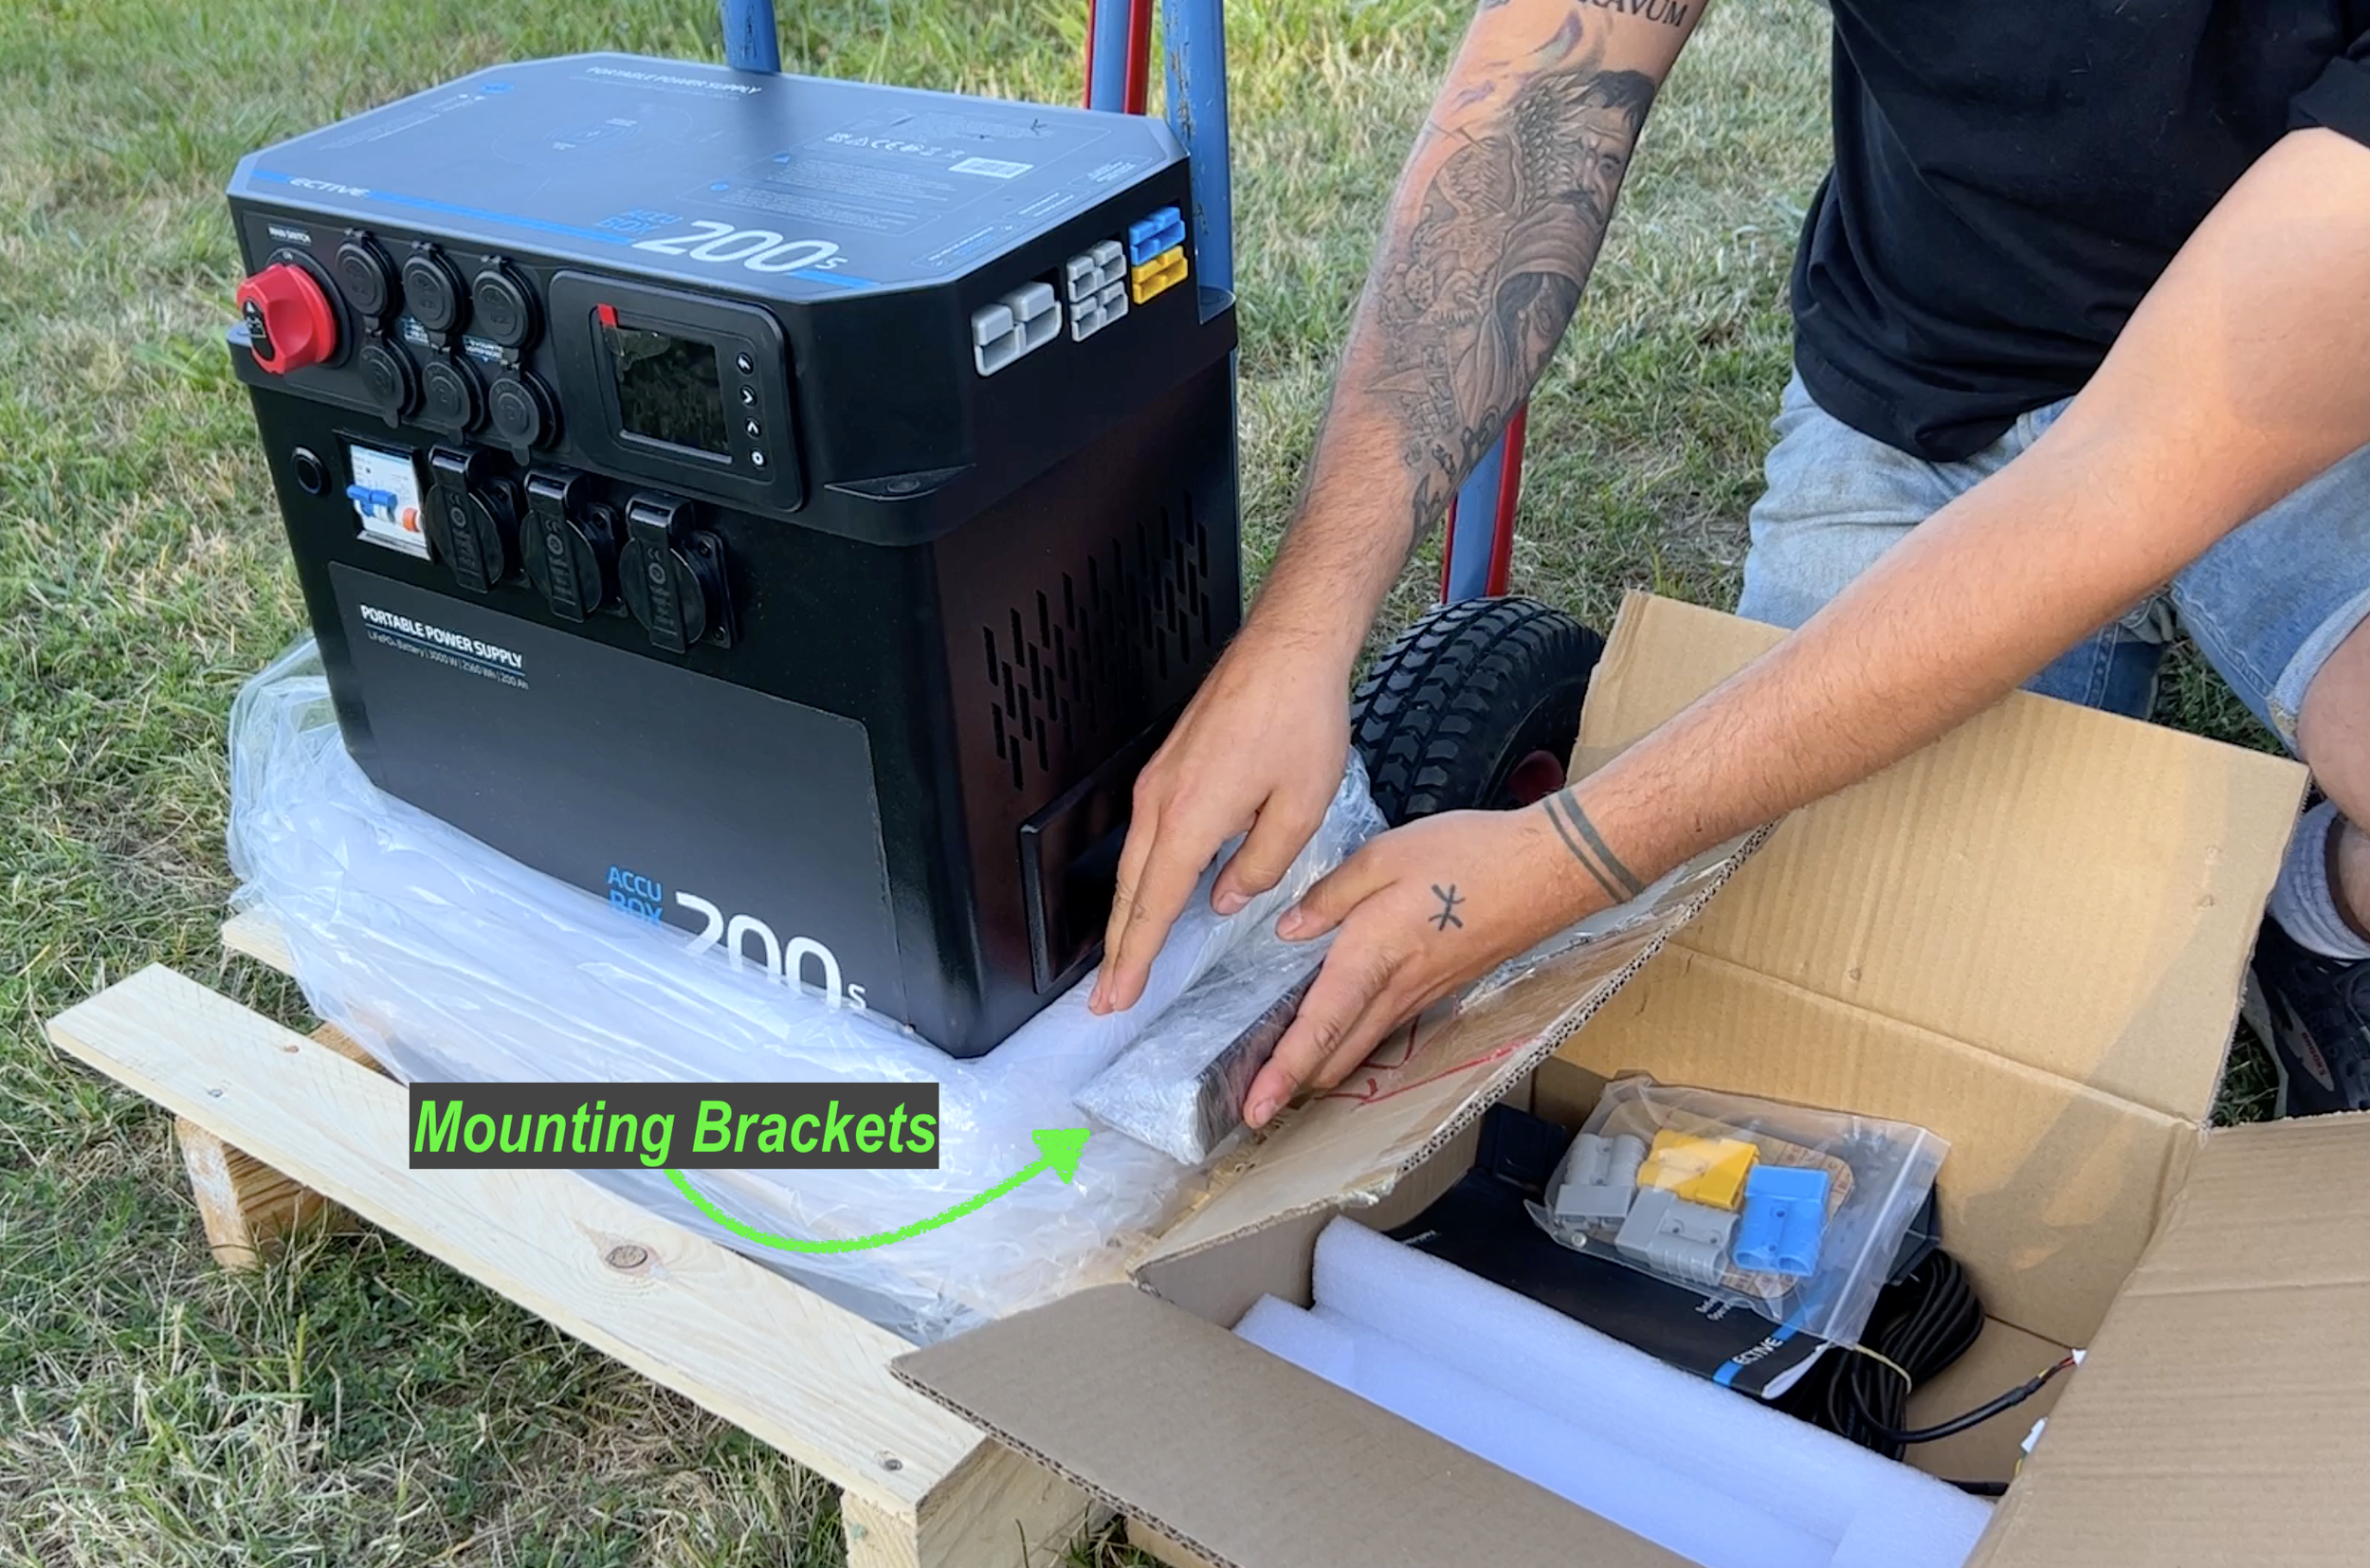
Mounting Brackets: For secure and easey installation.
Jump Start Function: For emergency vehicle starts.
Cables: Many included, including for jump starting.
In Short
The all-in-one device (click) genuinely replaces all components that I previously had to install individually. Moreover, it leaves no wishes unfulfilled; the specification sheet closely aligns with what I would want separate devices to perform…


3. Real-World Performance: Time to Test!

Setting all discussions aside, let's put this all-in-one power unit (click) to the test.
Test 1: Powering a bench grinder and grinding some metal parts. Result: The device handled it with no problem.
Test 2: Operating a hot air gun. Result: Again, no problem for the device.
Test 3: Running a bench grinder, a vacuum cleaner, and a spotlight simultaneously. Result: The device performed flawlessly.
I can confirm that this power unit works like a charm, and it will likely be my go-to choice for future camper conversions.
My Recommendation:
If you're looking for a one-stop solution for camper electronics that can effortlessly power high-energy-consuming devices, this is the device (click) you should consider.


4. Installation Example (VW T5)
Now, let's demonstrate how easy it is to install this device.
It includes a pair of mounting brackets, although a simple strap belt works just as well. Once you find a suitable spot, you're all set.
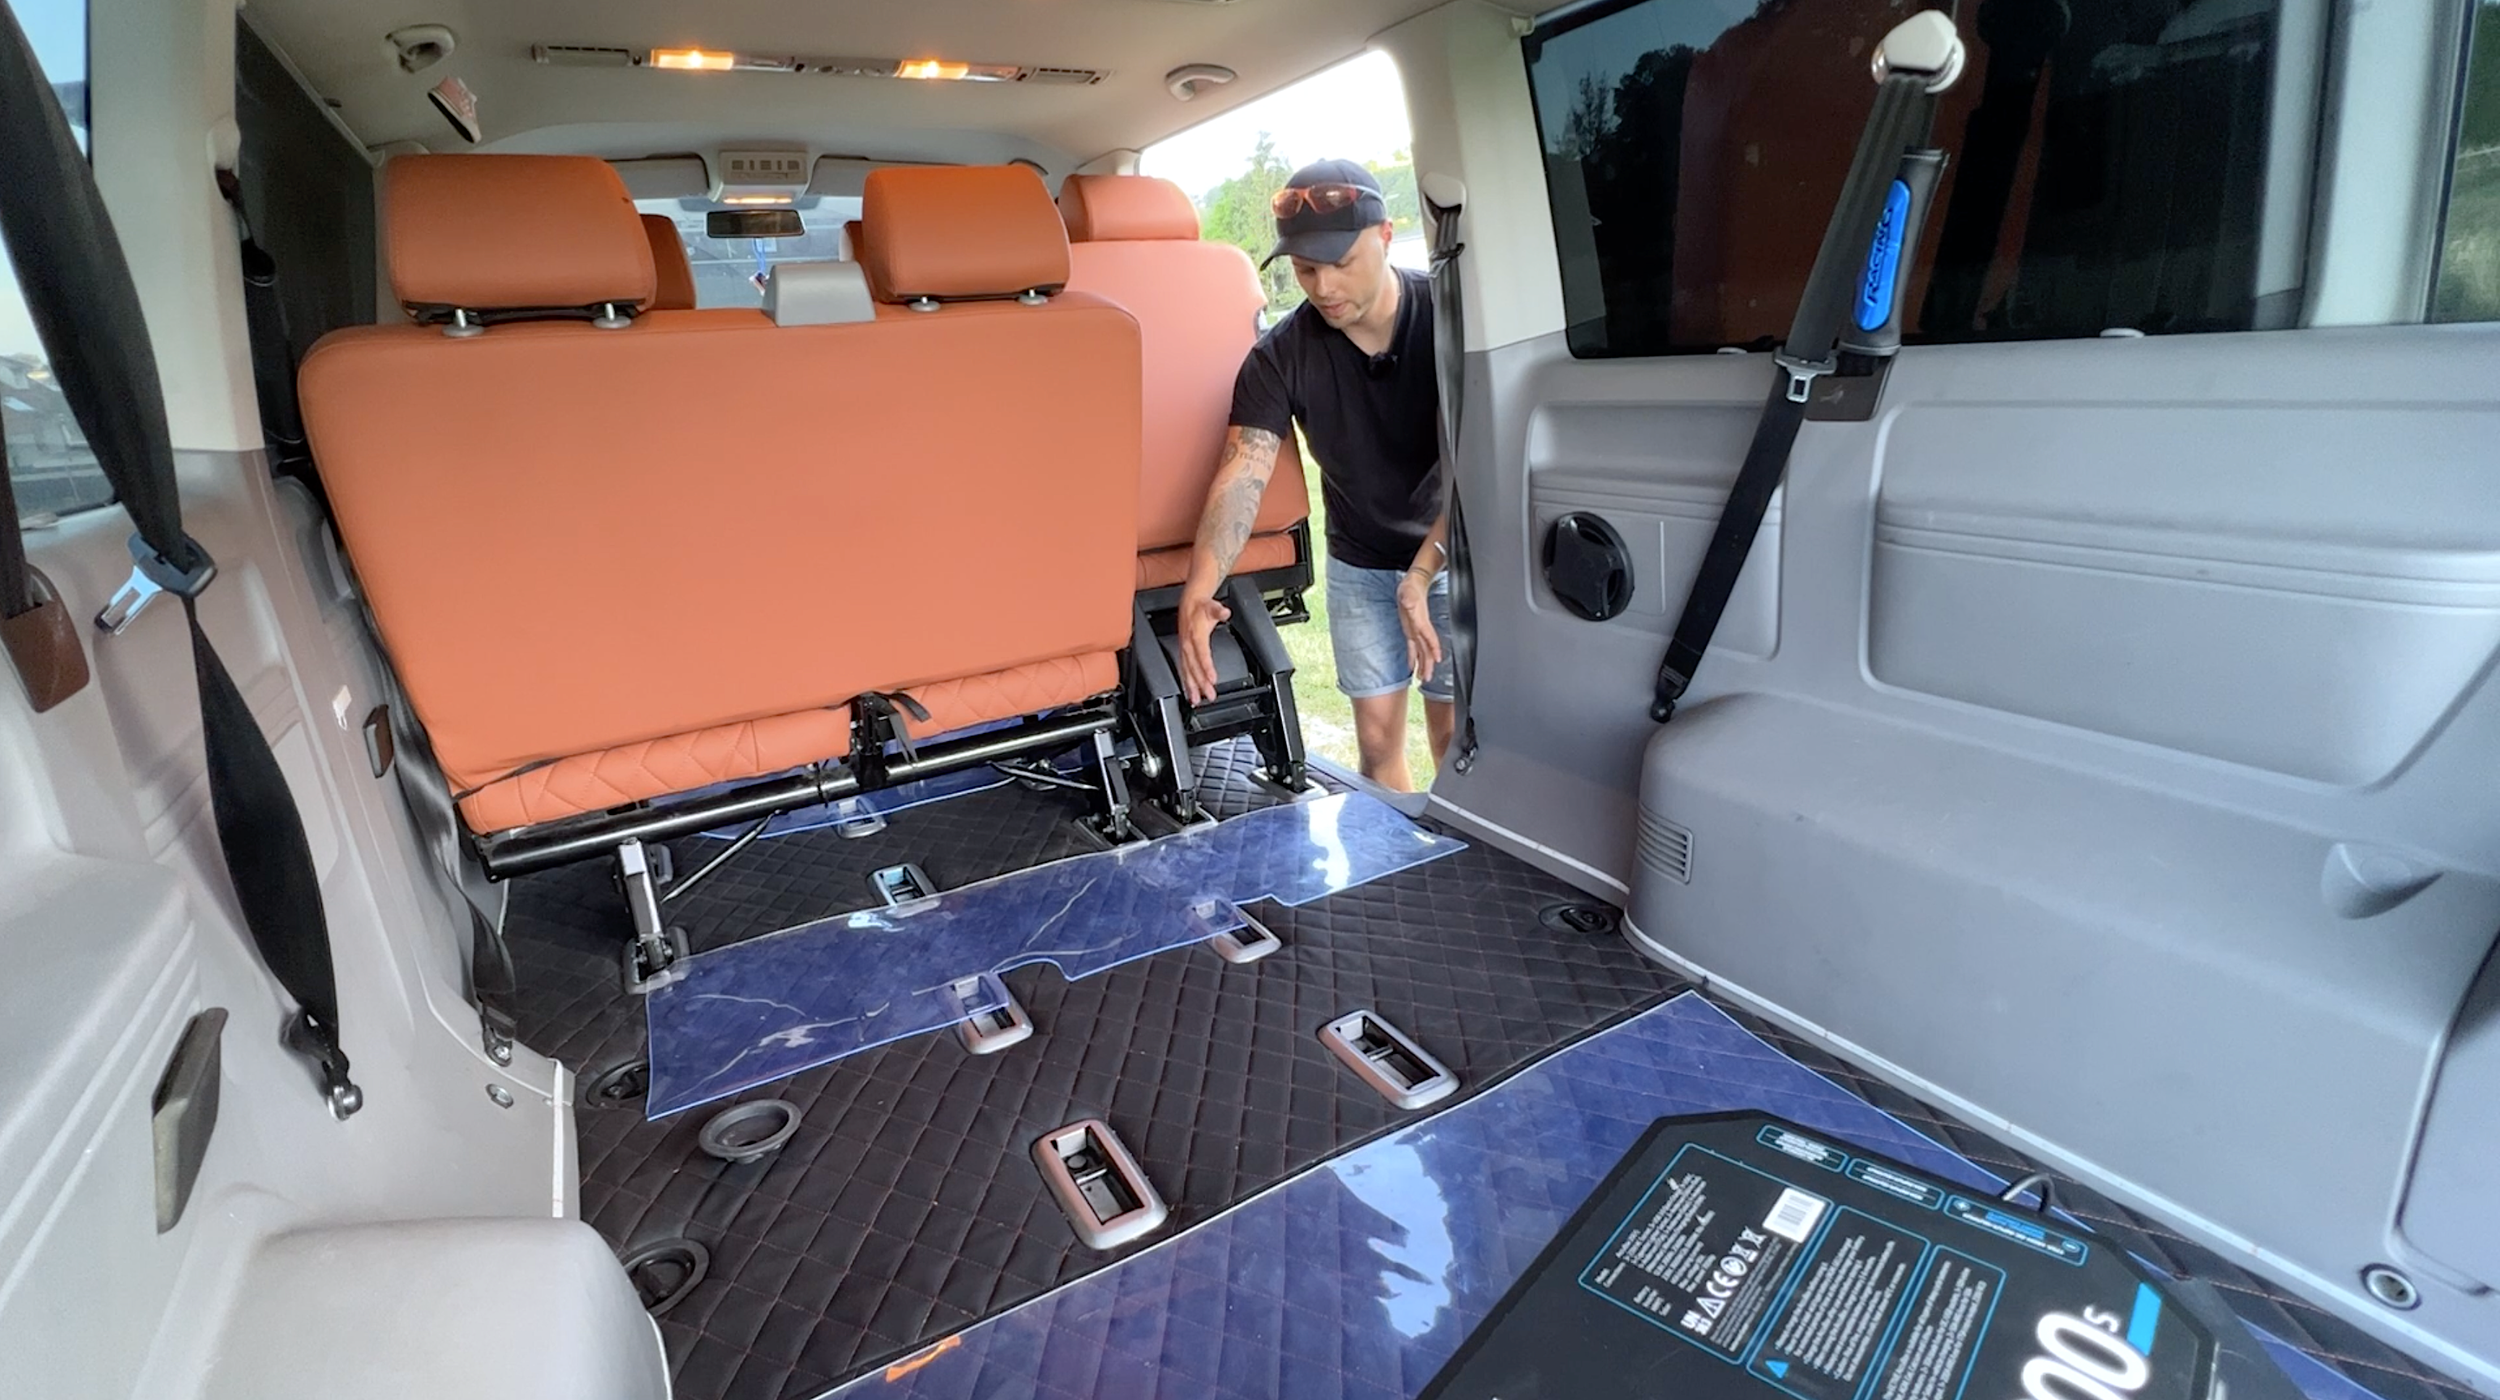
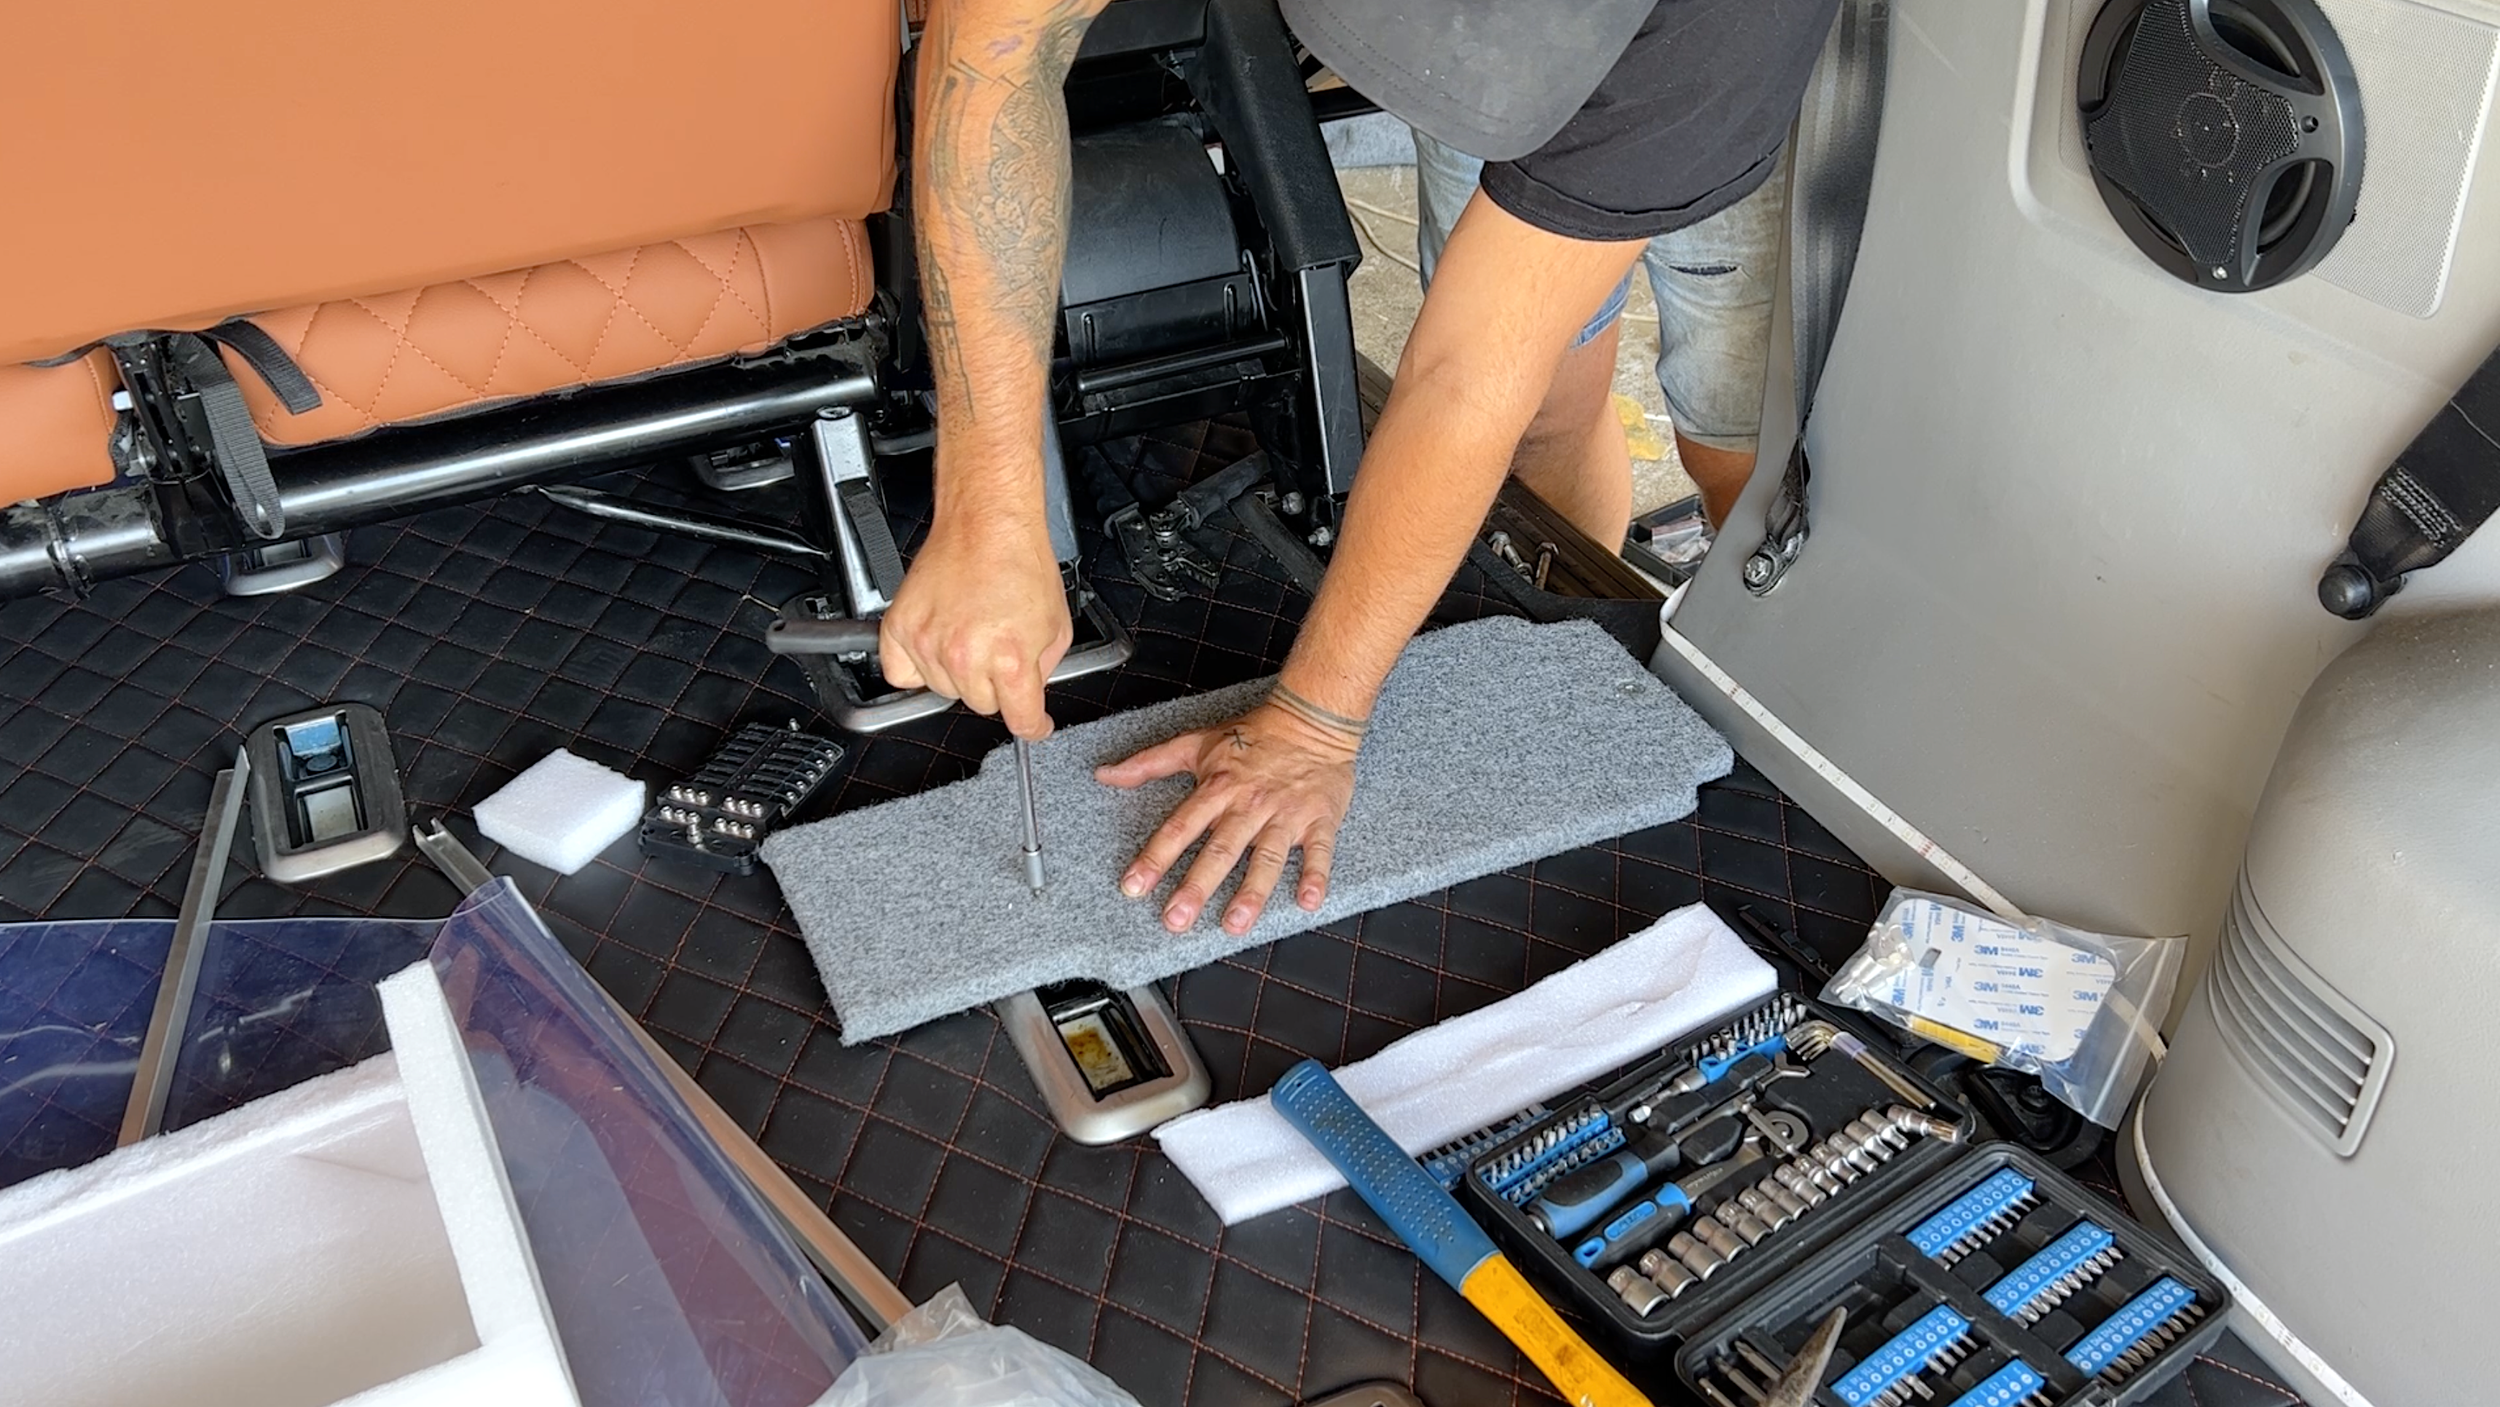
In this VW T5, I made use of the folding seat. This setup keeps the all-in-one device out of sight, and a gentle push on the seat lever exposes it, allowing easy access to all features. To avoid drilling into the floor plate, I built a platform for the power station.
Charging
Connect two wires to the car's alternator, similar to the engine battery. This setup ensures the device charges whenever the engine is running. The required connector is included in the set.
My Recommendation:
Although this power station is compact, it's best to place it where it minimally interferes with your camper lifestyle. In this T5, the perfect place was right behind the folding passenger seat.


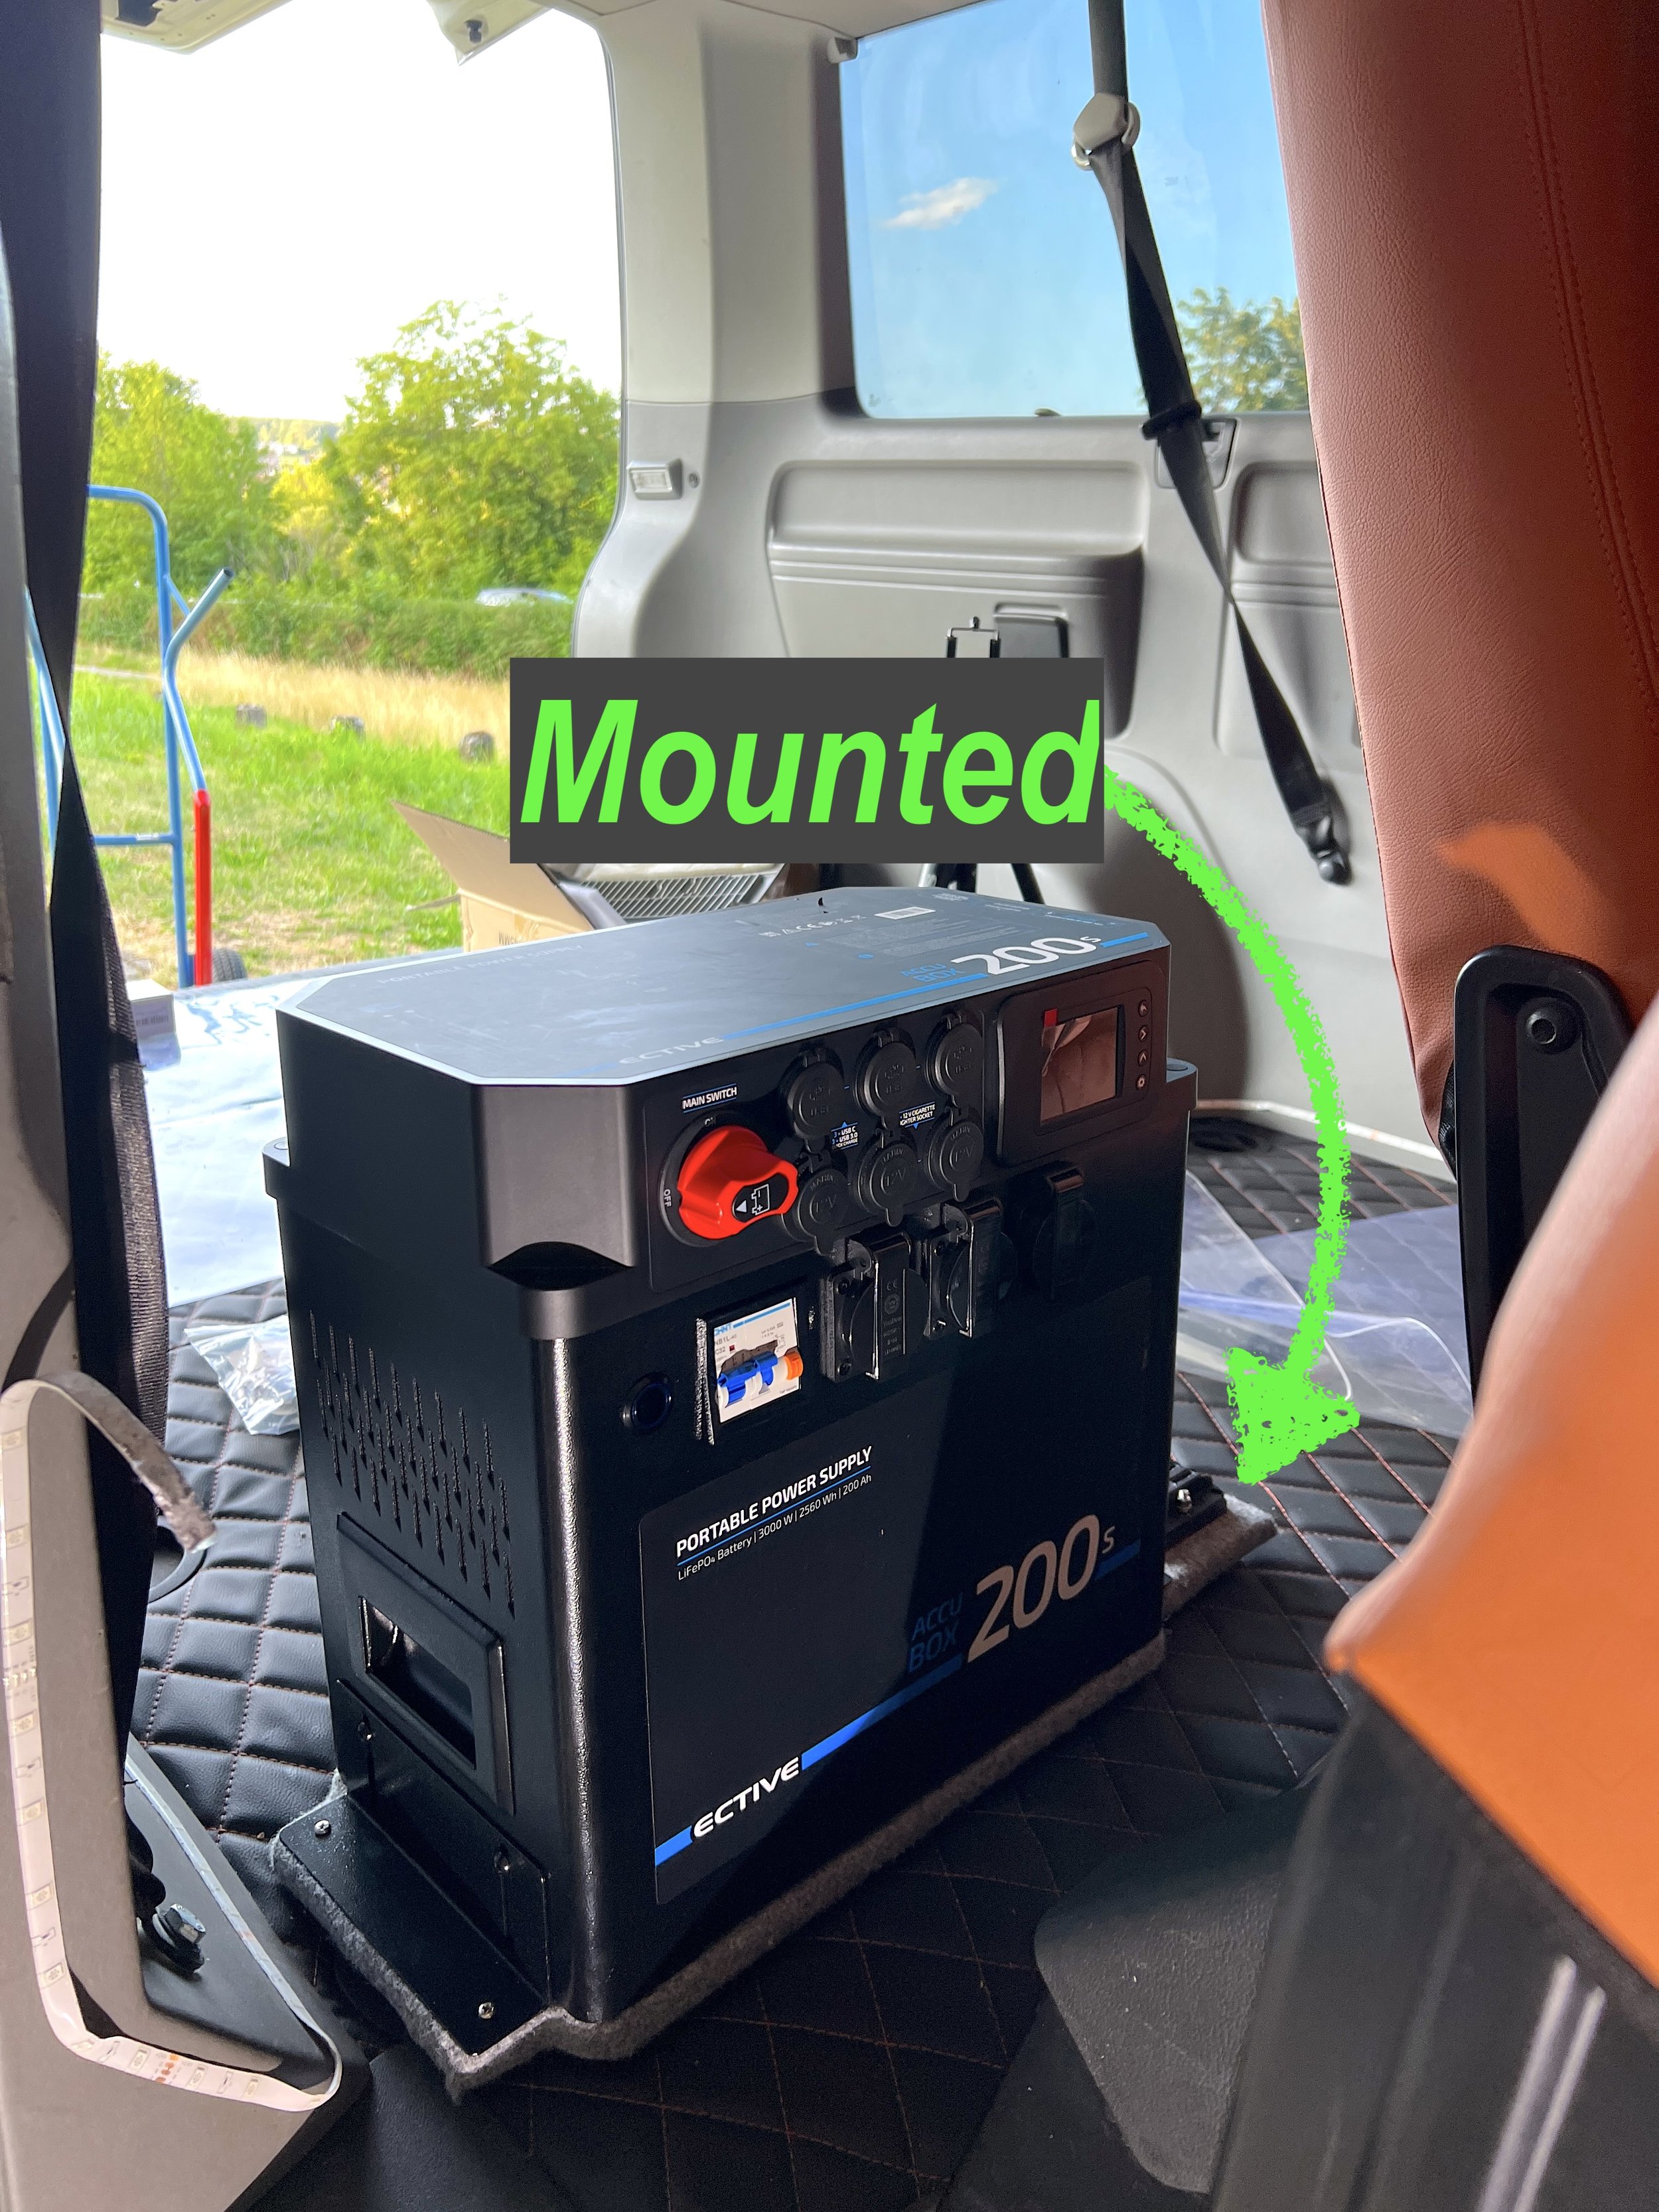
5. Camper Interior

The all-in-one power station (click) is now securely mounted in position. This entire VW T5 conversion is designed to demonstrate that camper conversions can be a truly plug-and-play approach. Similarly, the entire camper interior is an all-in-one solution, just like the power station. The interior, in the form of a camping box, is manufactured specifically for the model of car you order it for. It arrives as a single large package, and one simply needs to place the parts inside the car.
In less than 10 minutes, the entire camping box is installed in the vehicle.
For your convenience, I have prepared a video on the installation and removal of the camping box (click here).
My Recommendation:
If you don't have the time to build your own DIY camper, there's a solution for you. The all-in-one power solution (click), combined with the all-in-one camping box (click), transforms an ordinary car into a beautiful mini-camper with minimal effort or time. Having used the power station for almost a year now, I am still very satisfied with its performance. For more in-depth details about this power station and the camping box, check out my conversion eBook (click).


6. Final Step: Assessing Price vs. Value
The price of the device may stretch some conversion budgets, but make no mistake: simply calculate the cost of all individual components needed to build such a system yourself. Then, don't forget additional expenses for wires, wire connectors, crimp tools, time, and the costs of hiring an electrician (if necessary), along with extra materials like heat shrink tubing, fuses, a fuse box, an FI switch, jump-start cables, and much more. Consider just the price of a lithium battery, which is already built into this device. Plus, it comes with a 3-year warranty, something a self-made electrical system can't guarantee. All things considered, the price for its value is very reasonable. For me, it was a matter of a single click on my smartphone, followed by the arrival of a single package. After lifting it inside the vehicle, I was ready to go. The time saved is also unparalleled. I give it a definitive thumbs-up.
Attached, you can see the electro wall I have constructed for my latest Fiat Ducato camper conversion (click to see project). This wall has about the same number of components as this all-in-one device system. And don't forget about the orange battery, which is also included in the presented device. In contrast to my electro wall, this device can be removed and used as a standalone device in seconds. Think of garden work, or leaving this device for your kids at a campsite. The versatility of it makes it so valuable and practical, in my opinion. I think you can sense my excitement from reading through this article. For years, I have been searching for a solution like this, and it's finally here.
