Carbon Skinning (carbon motorcycle seat)
About the project
What is Carbon Skinning/Wrapping?
In short, carbon skinning/wrapping is the process of wrapping an object with a combination of real carbon fiber layers and epoxy resin to create stunning carbon fiber parts.
Carbon parts radiate a certain attraction to us. The carbon fibers are visible and arranged in a very satisfying fashion. The look of a carbon part alone gives the impression of superior quality and costly production.
Carbon parts are as premium as one can go regarding vehicle chassis parts.
However, there is a huge drawback… Carbon parts are fairly expensive due to the extensive production steps. This is why it is very unlikely to find a variety of available carbon parts for whatever project you might have in mind. The demand for such luxurious carbon vehicle parts is just too low.
But there is a great solution: Hand making your own carbon parts through a process called carbon skinning/carbon wrapping.
On this page, you will find enough information to gain enough confidence to create your own custom carbon parts. Believe me, it is more doable than you might anticipate.
My Recommendation:
The EasyComposites Starter Kit is a great way to start carbon skinning; it comes with everything you need to get started! I have no partnership whatsoever with this company but after having done extensive research into a good supplier and having used their skinning kit, I can wholeheartedly recommend this product. All materials are of superb quality and this seat is, after several years, as good as new.
2. Choosing a Mold Material
All the following steps can be followed for any project you have in mind. In this case, I built a carbon motorcycle seat.
As the names “skinning” or “wrapping” suggest, we need something to wrap the real carbon fiber around.
If you already have a part that you want to skin, you can skip step 2 and go straight to step 3.
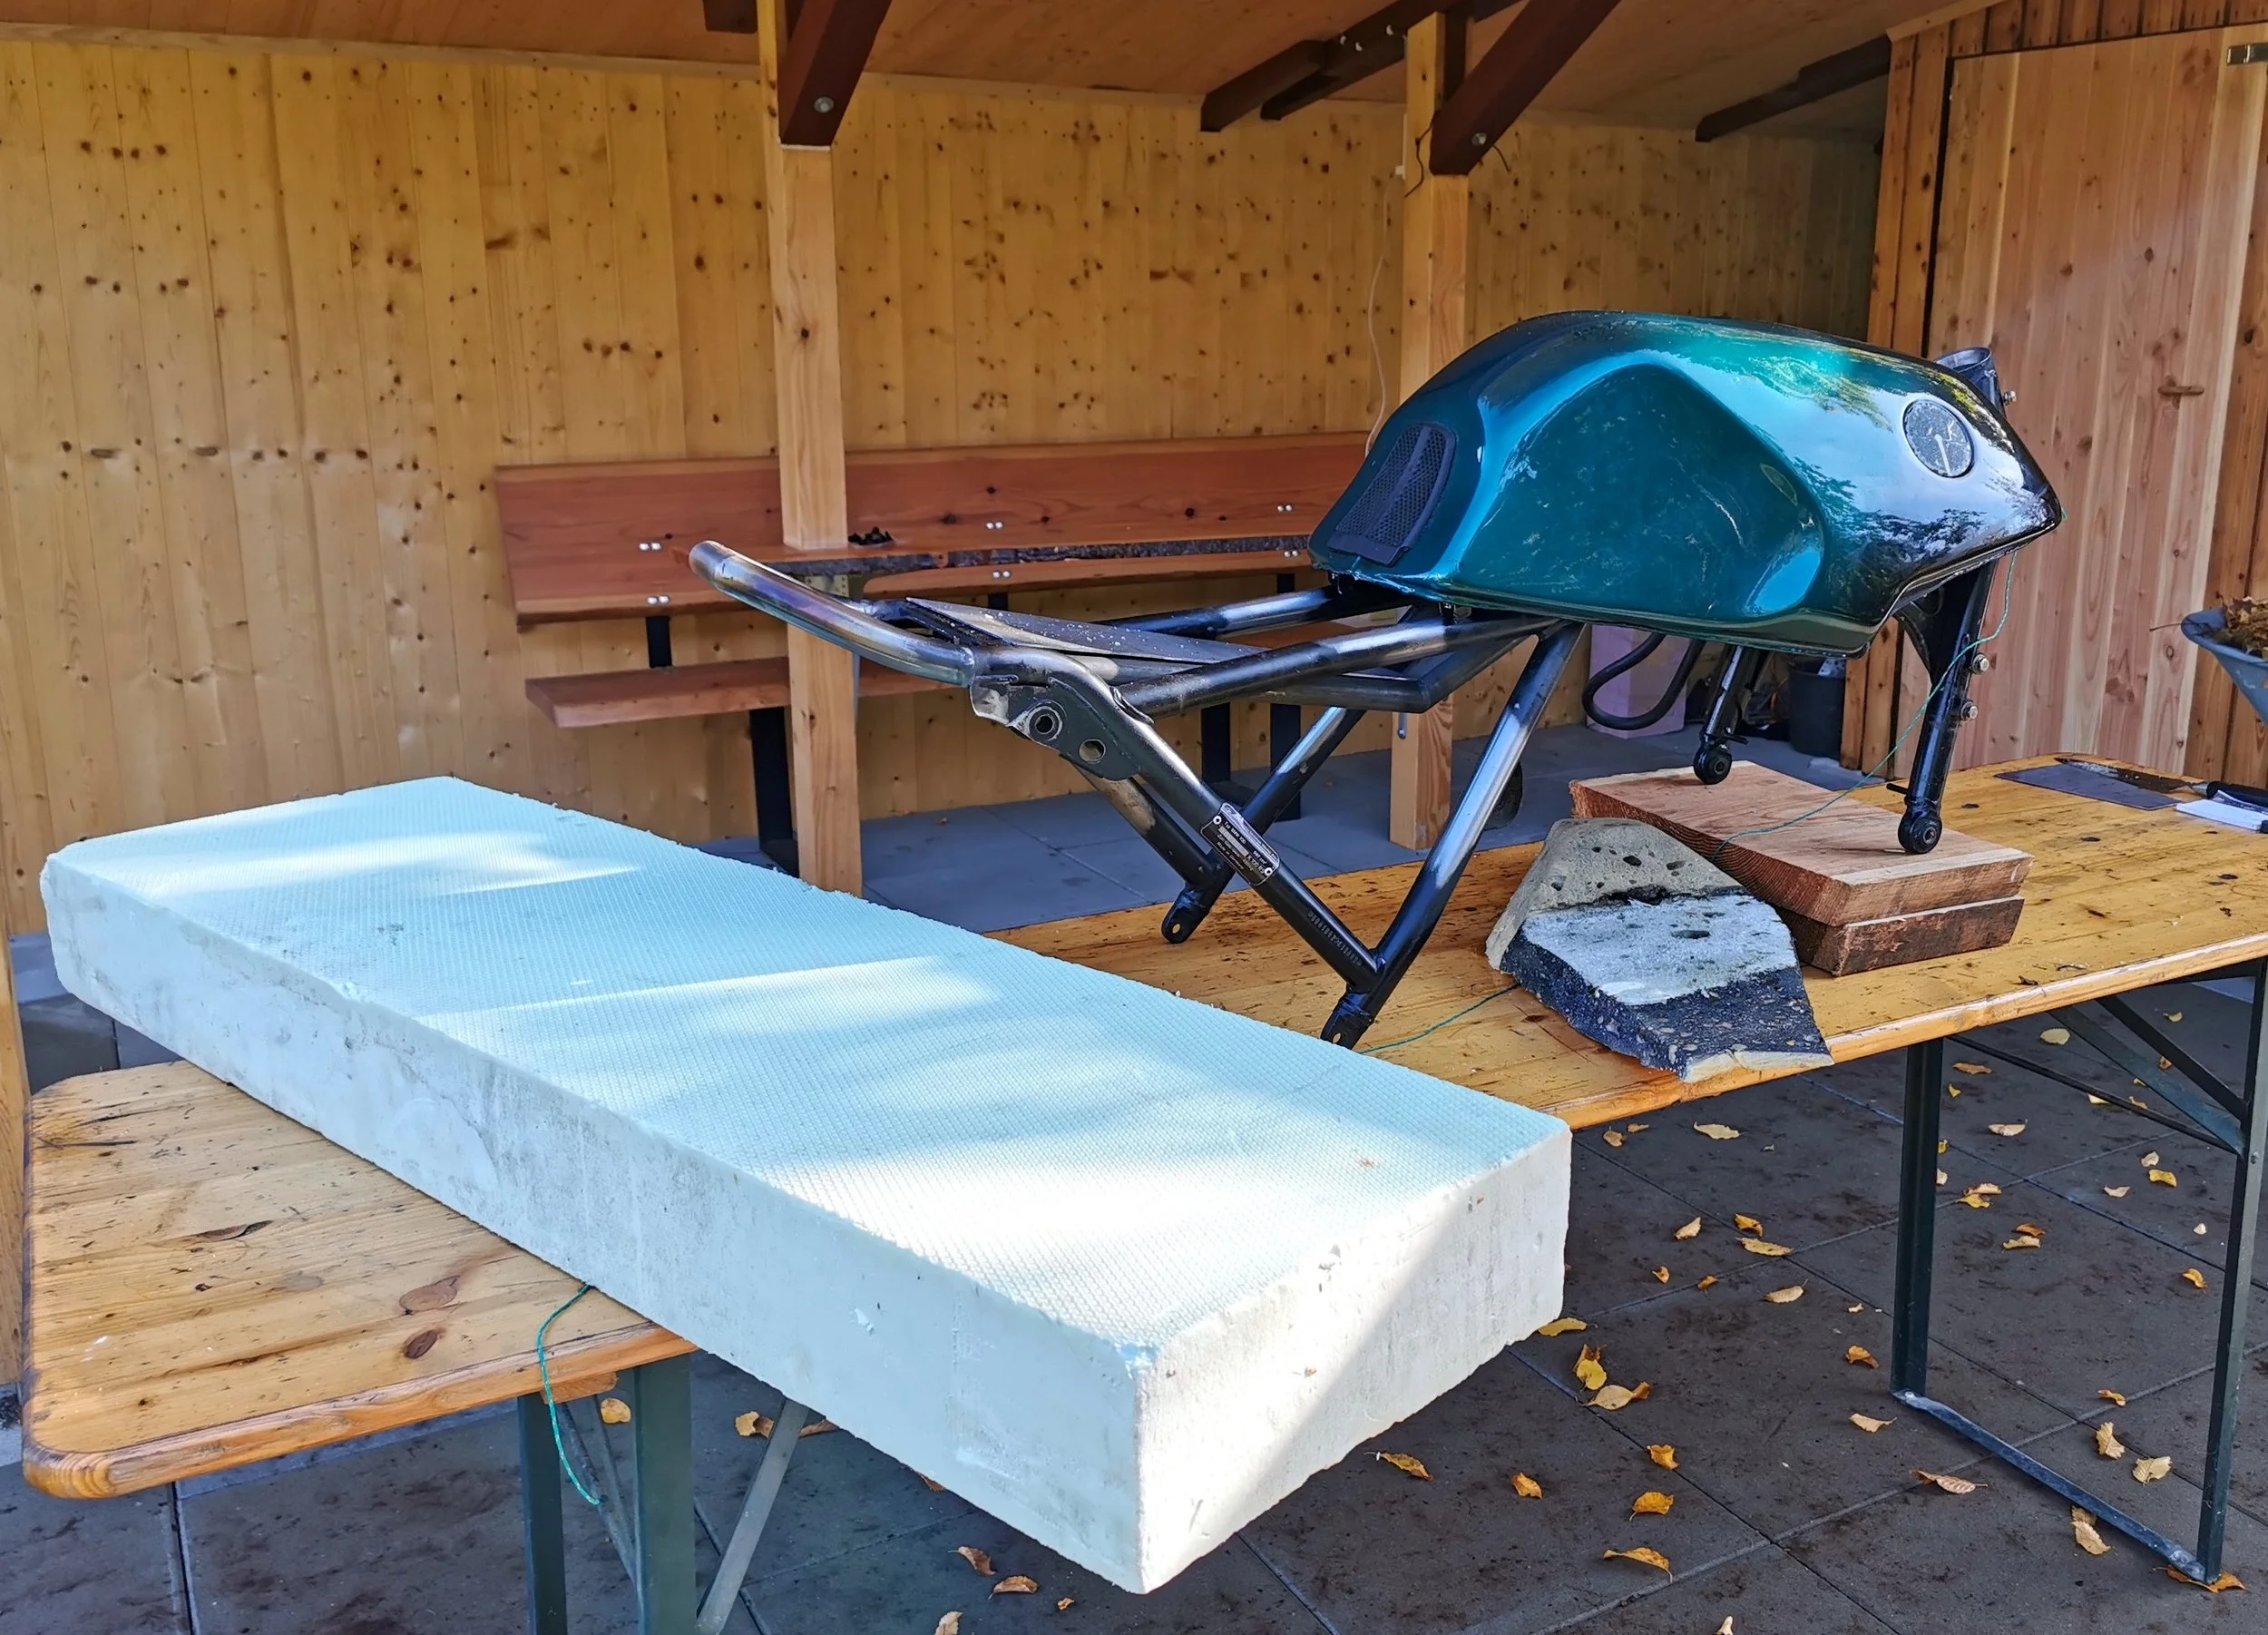
My material of choice is “Styrodur”, which is used for house insulation. Its pores are fairly small, making it perfect for shaping. Additionally, it is budget-friendly.
I knew that this material is used in large volumes in house construction, so I drove to the nearest construction site and asked the site manager if I could look in the waste container. He found the request amusing and it brought a little smile to his face. I found what I was looking for (the picture shows the piece).
My Recommendation:
Use Styrodur, typically employed for house insulation, to form your custom part.
2.1. Shaping a Form
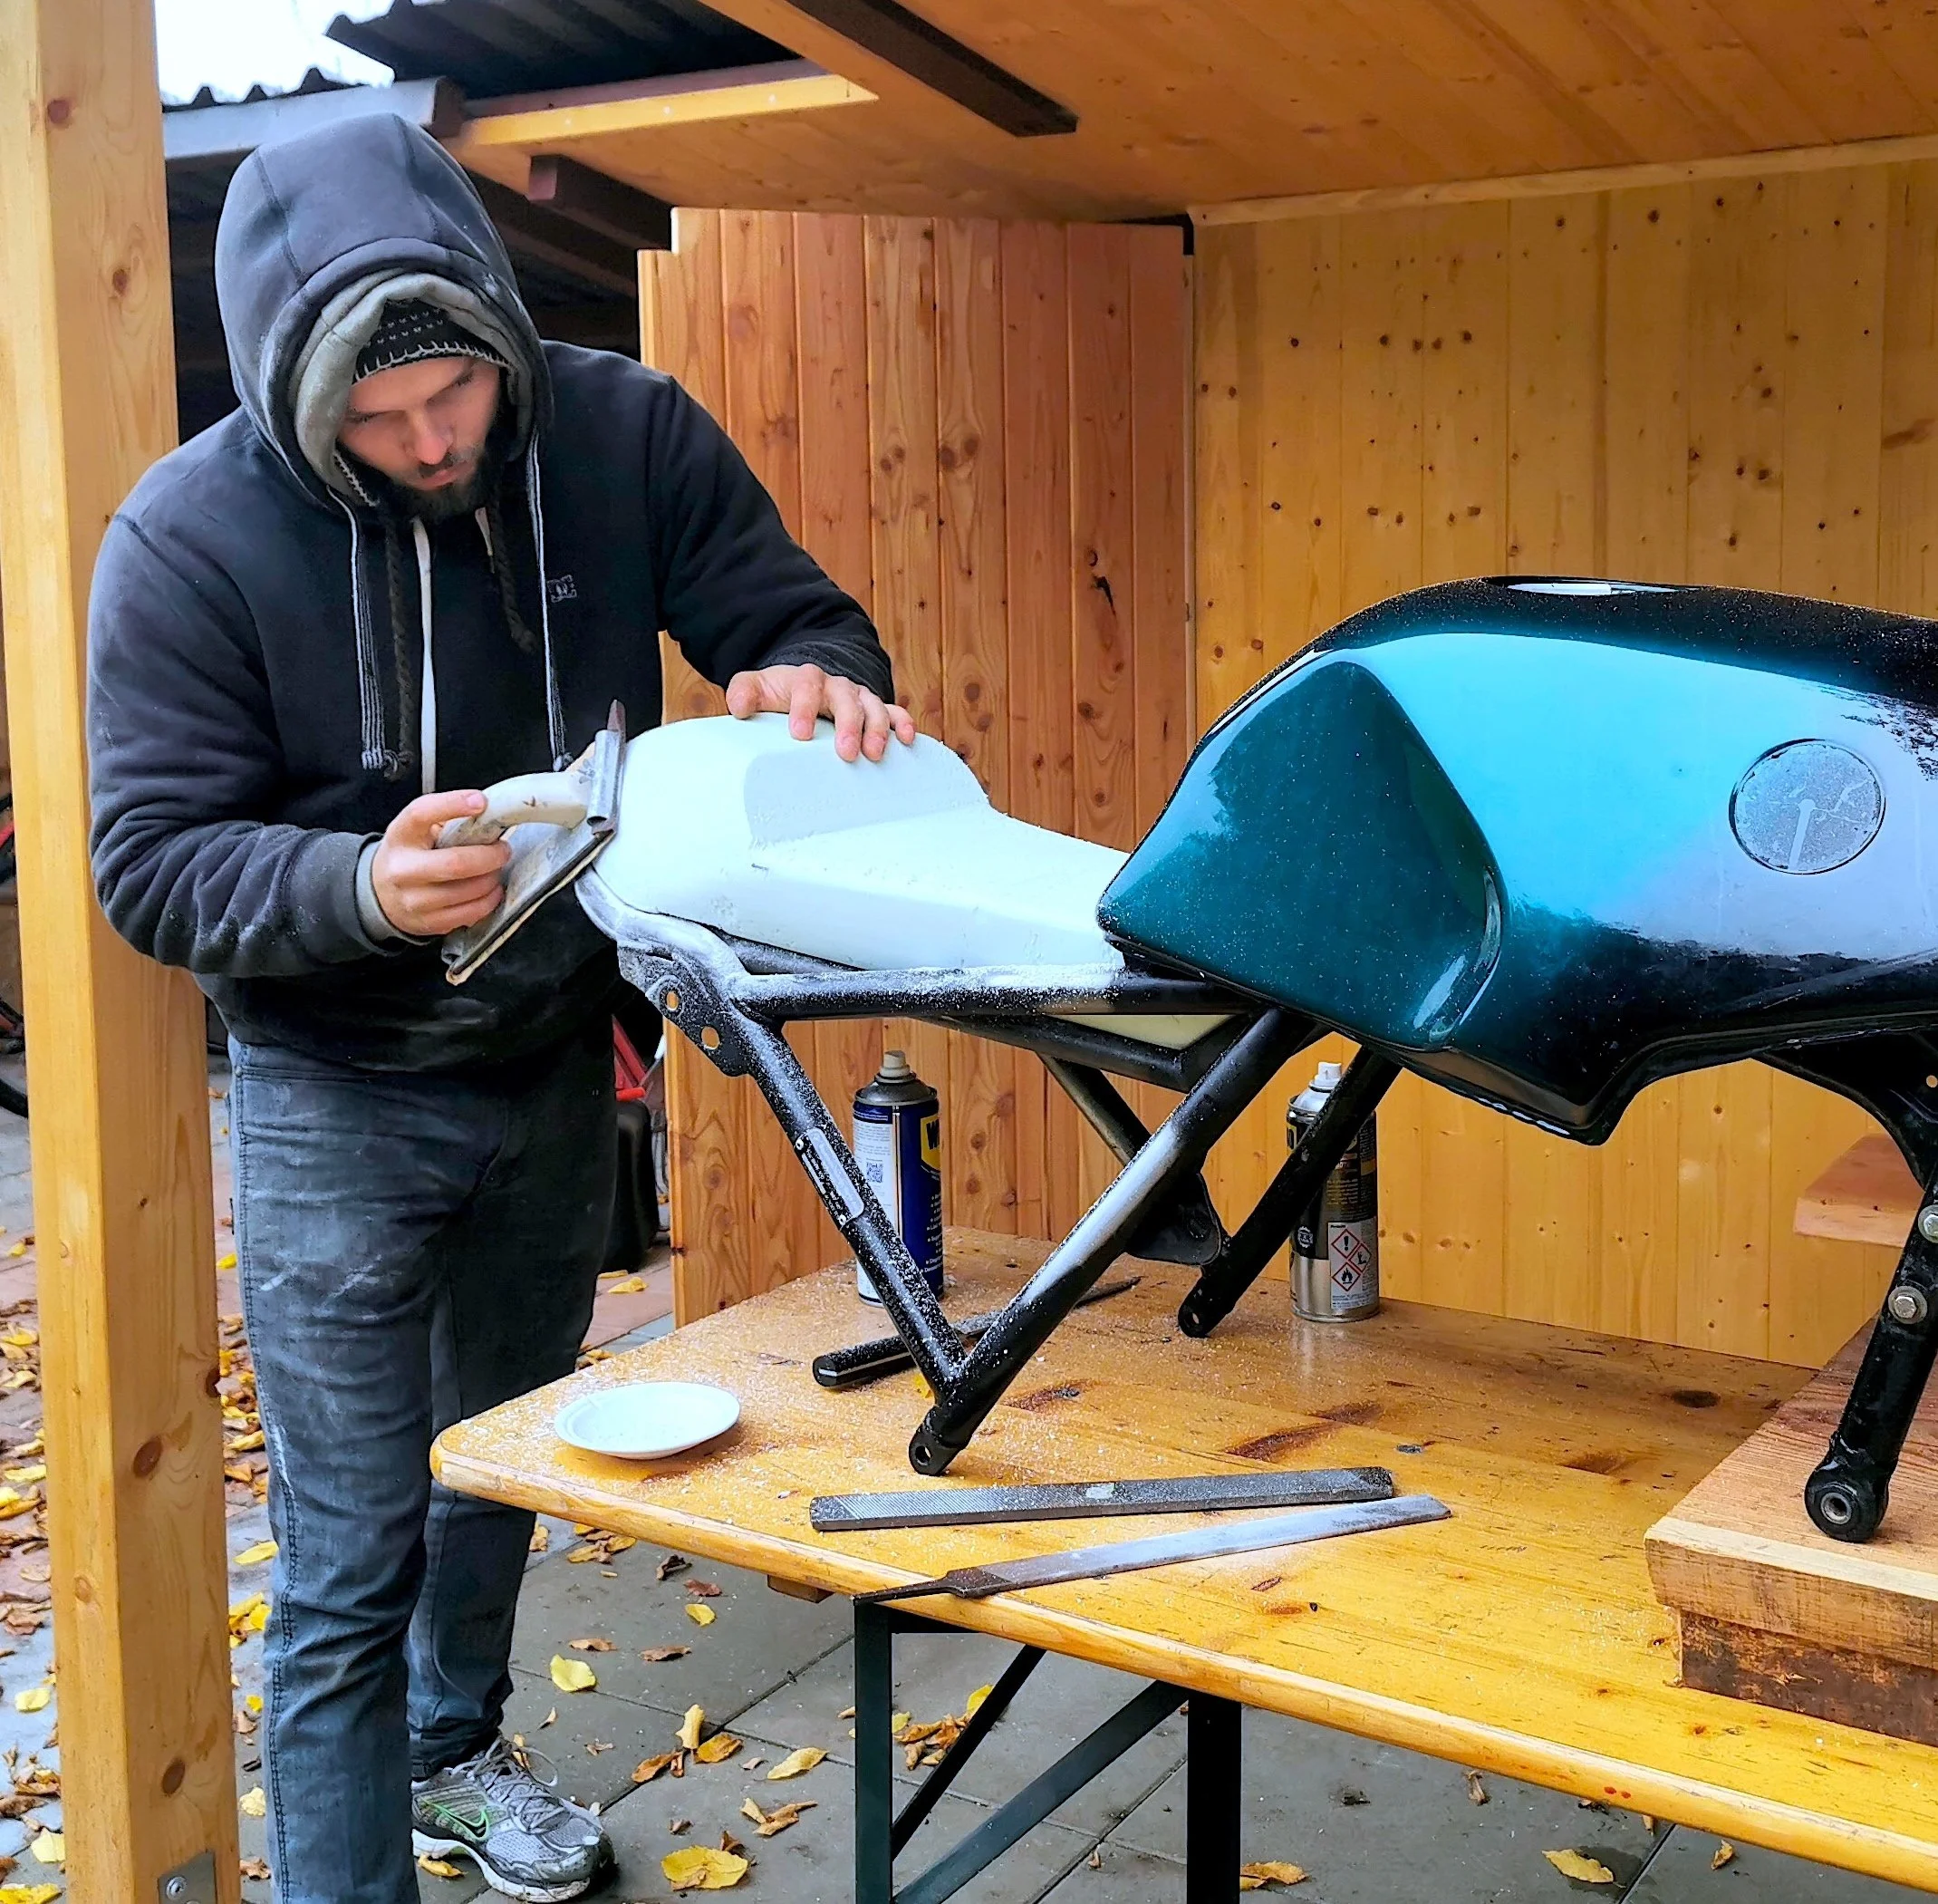
Basic tools such as a garden hacksaw, a kitchen knife, an old metal file, and some sandpaper are sufficient to shape the Styrodur into your desired form.
This step requires a lot of patience. Take it slow to avoid the need to start all over again.
Be Careful:
Fuel reacts instantly with Styrodur, melting your form like butter.
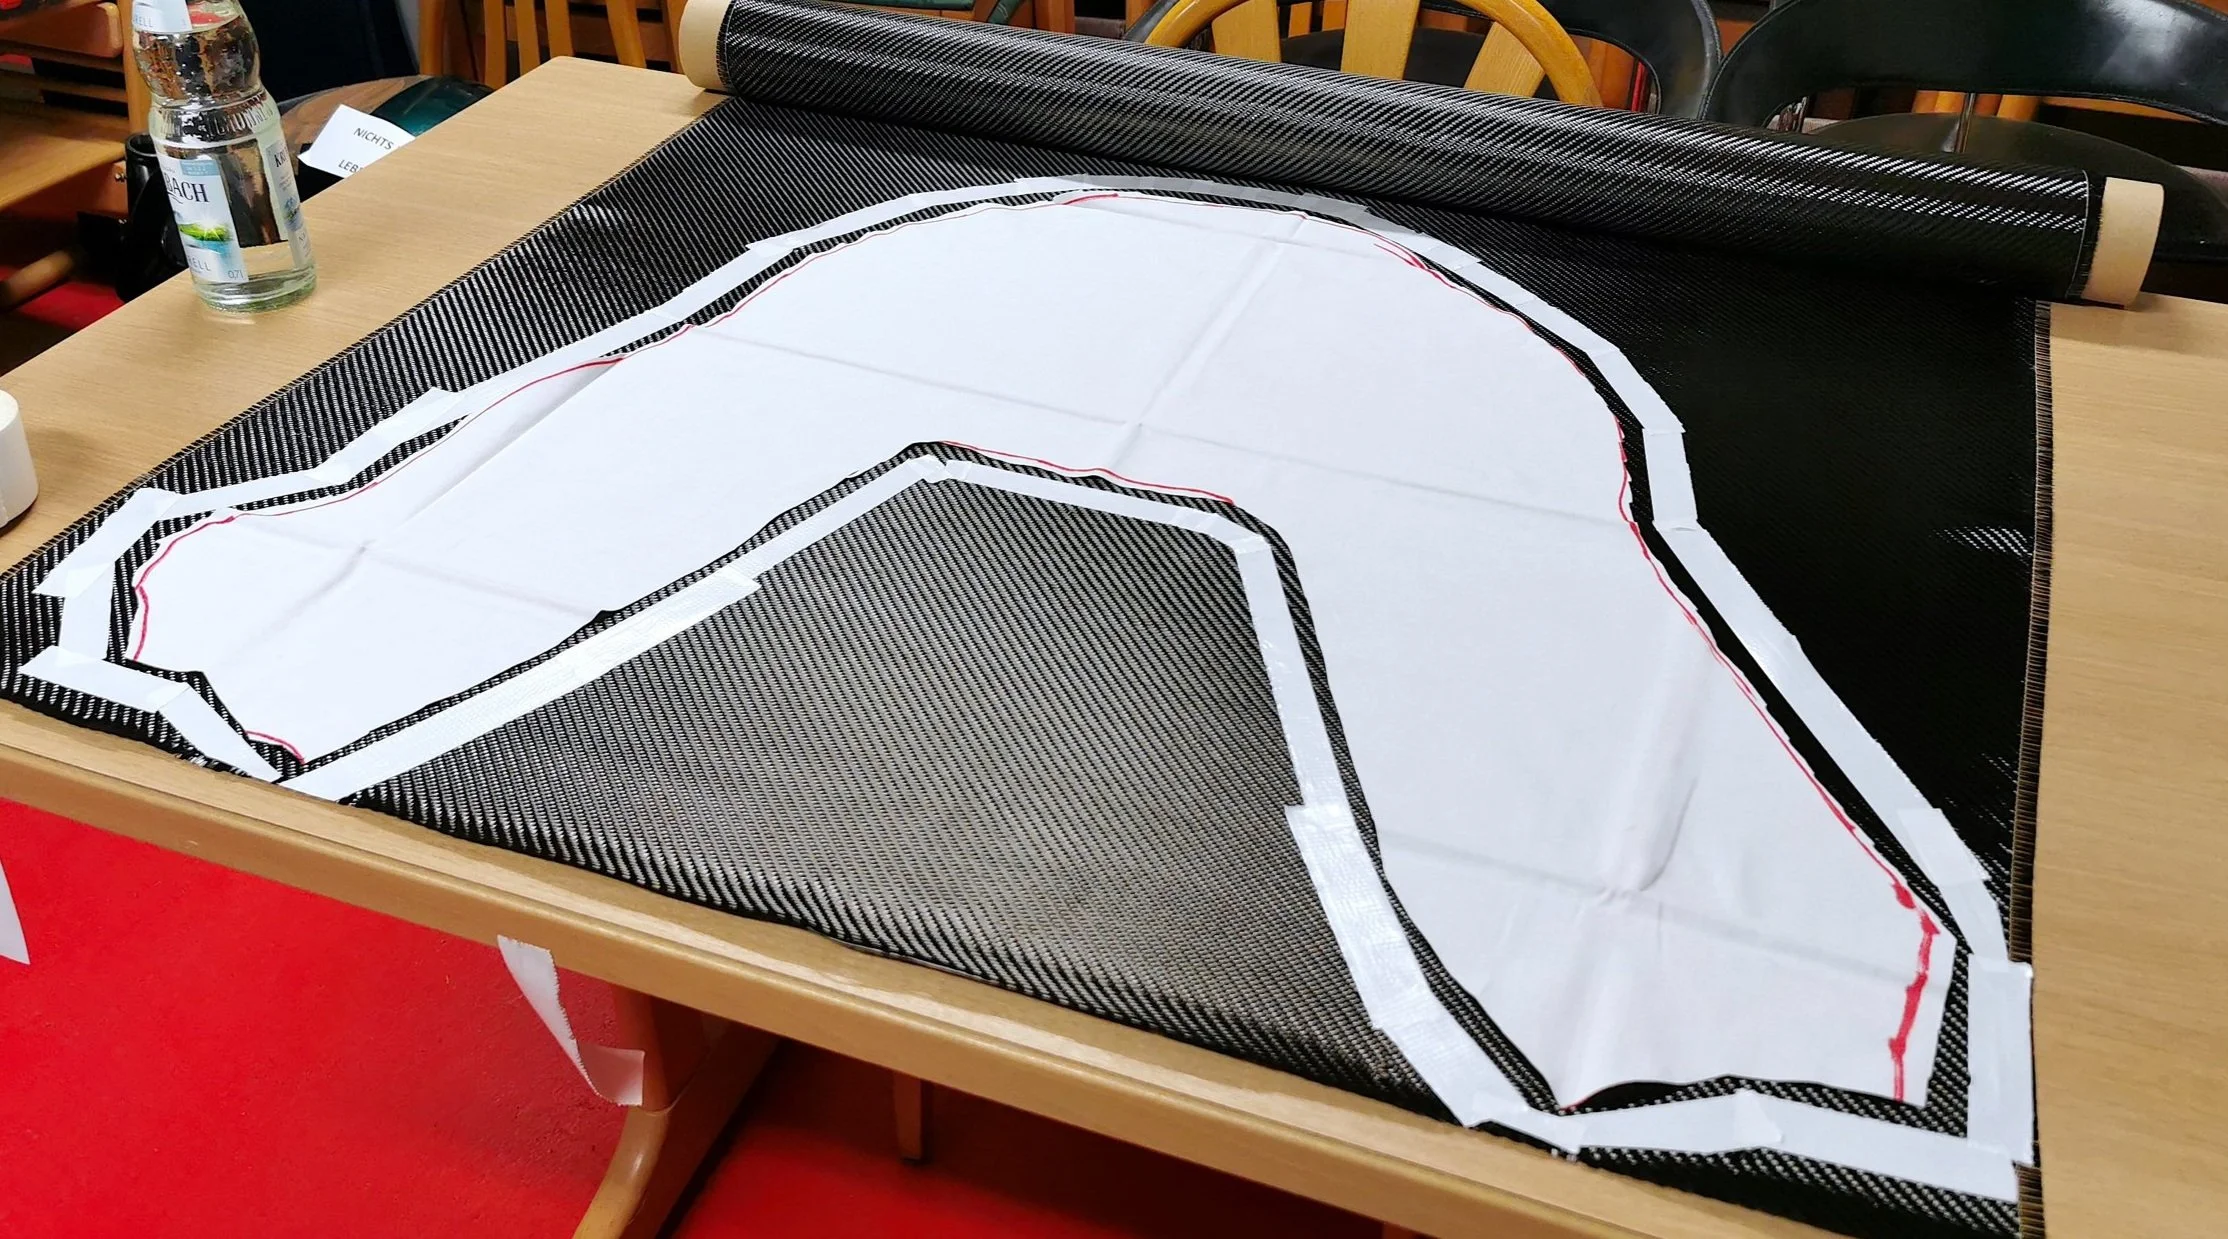
3. Creating Templates for Carbon Cut-Outs

I've found bed sheets to be a great material for creating carbon fiber cut-out templates.
Carbon fiber parts look stunning, but folds or cuts in visible areas can draw unwanted attention later, ruining the professional appearance of your part.
Therefore, creating templates to be transferred onto the carbon fiber mat later is a MUST!
See this process as practice for the next step. Soon, a base coat will be applied to the model to be wrapped. Once the carbon fiber mat touches the base coat, it can only be removed by severely distorting the fiber arrangement. Carbon fiber is extremely resilient in its final state but very fragile before the epoxy resin treatment.
My Recommendation:
Old bed sheets make an excellent template base. Use the template to practice laying the material to guarantee great results!

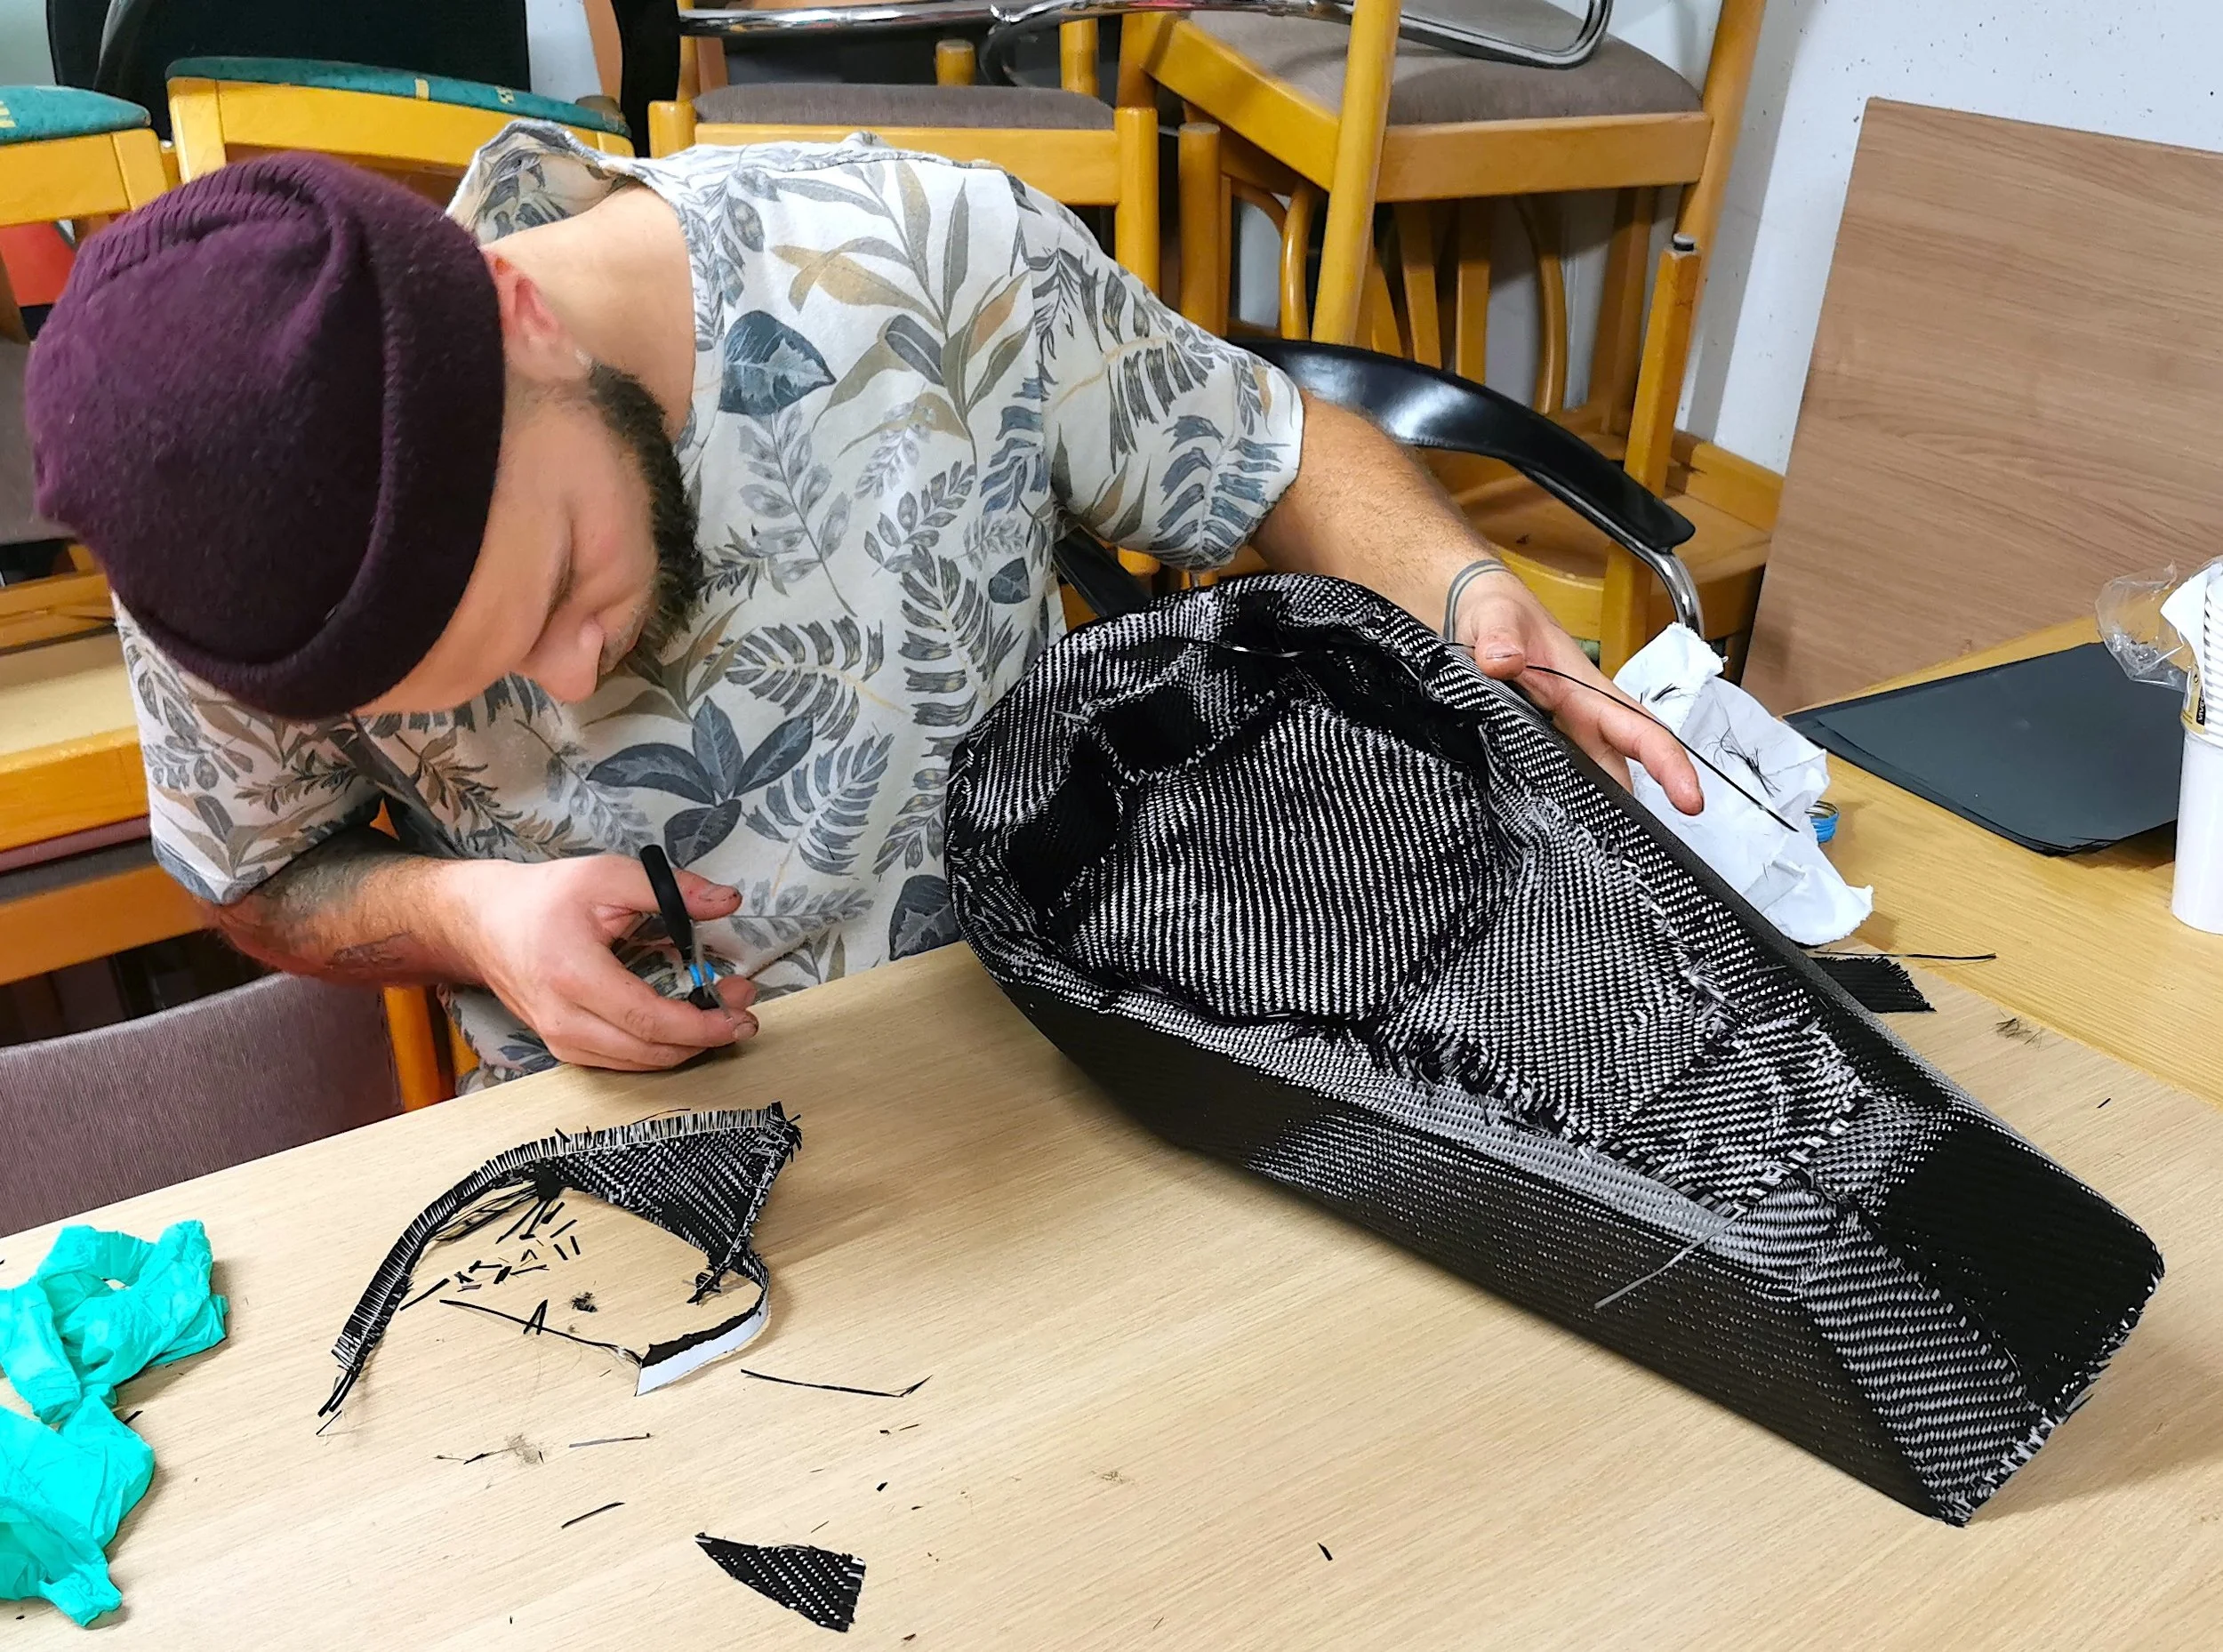
4. Cutting the Carbon Fibre
Transfer the templates onto the carbon fiber mat.
Carbon fiber is known to be a very strong material, but to my surprise, the raw carbon fiber mat was soft and seemingly fragile. When I pulled on the mat, the fibers immediately lost their original arrangement.
If you handle the mat roughly or lift it with just two fingers at a single point, the entire mesh around the point of force distorts instantly. Any damage to the original framework of the carbon fiber mat will be visible in the final result. Once the fiber is covered and locked with epoxy resin, there will be no way to correct any aesthetic damage.
My Recommendation:
Use tape on the edges of the mat and cut through the middle of the tape. This way, the fiber structure will be maintained.
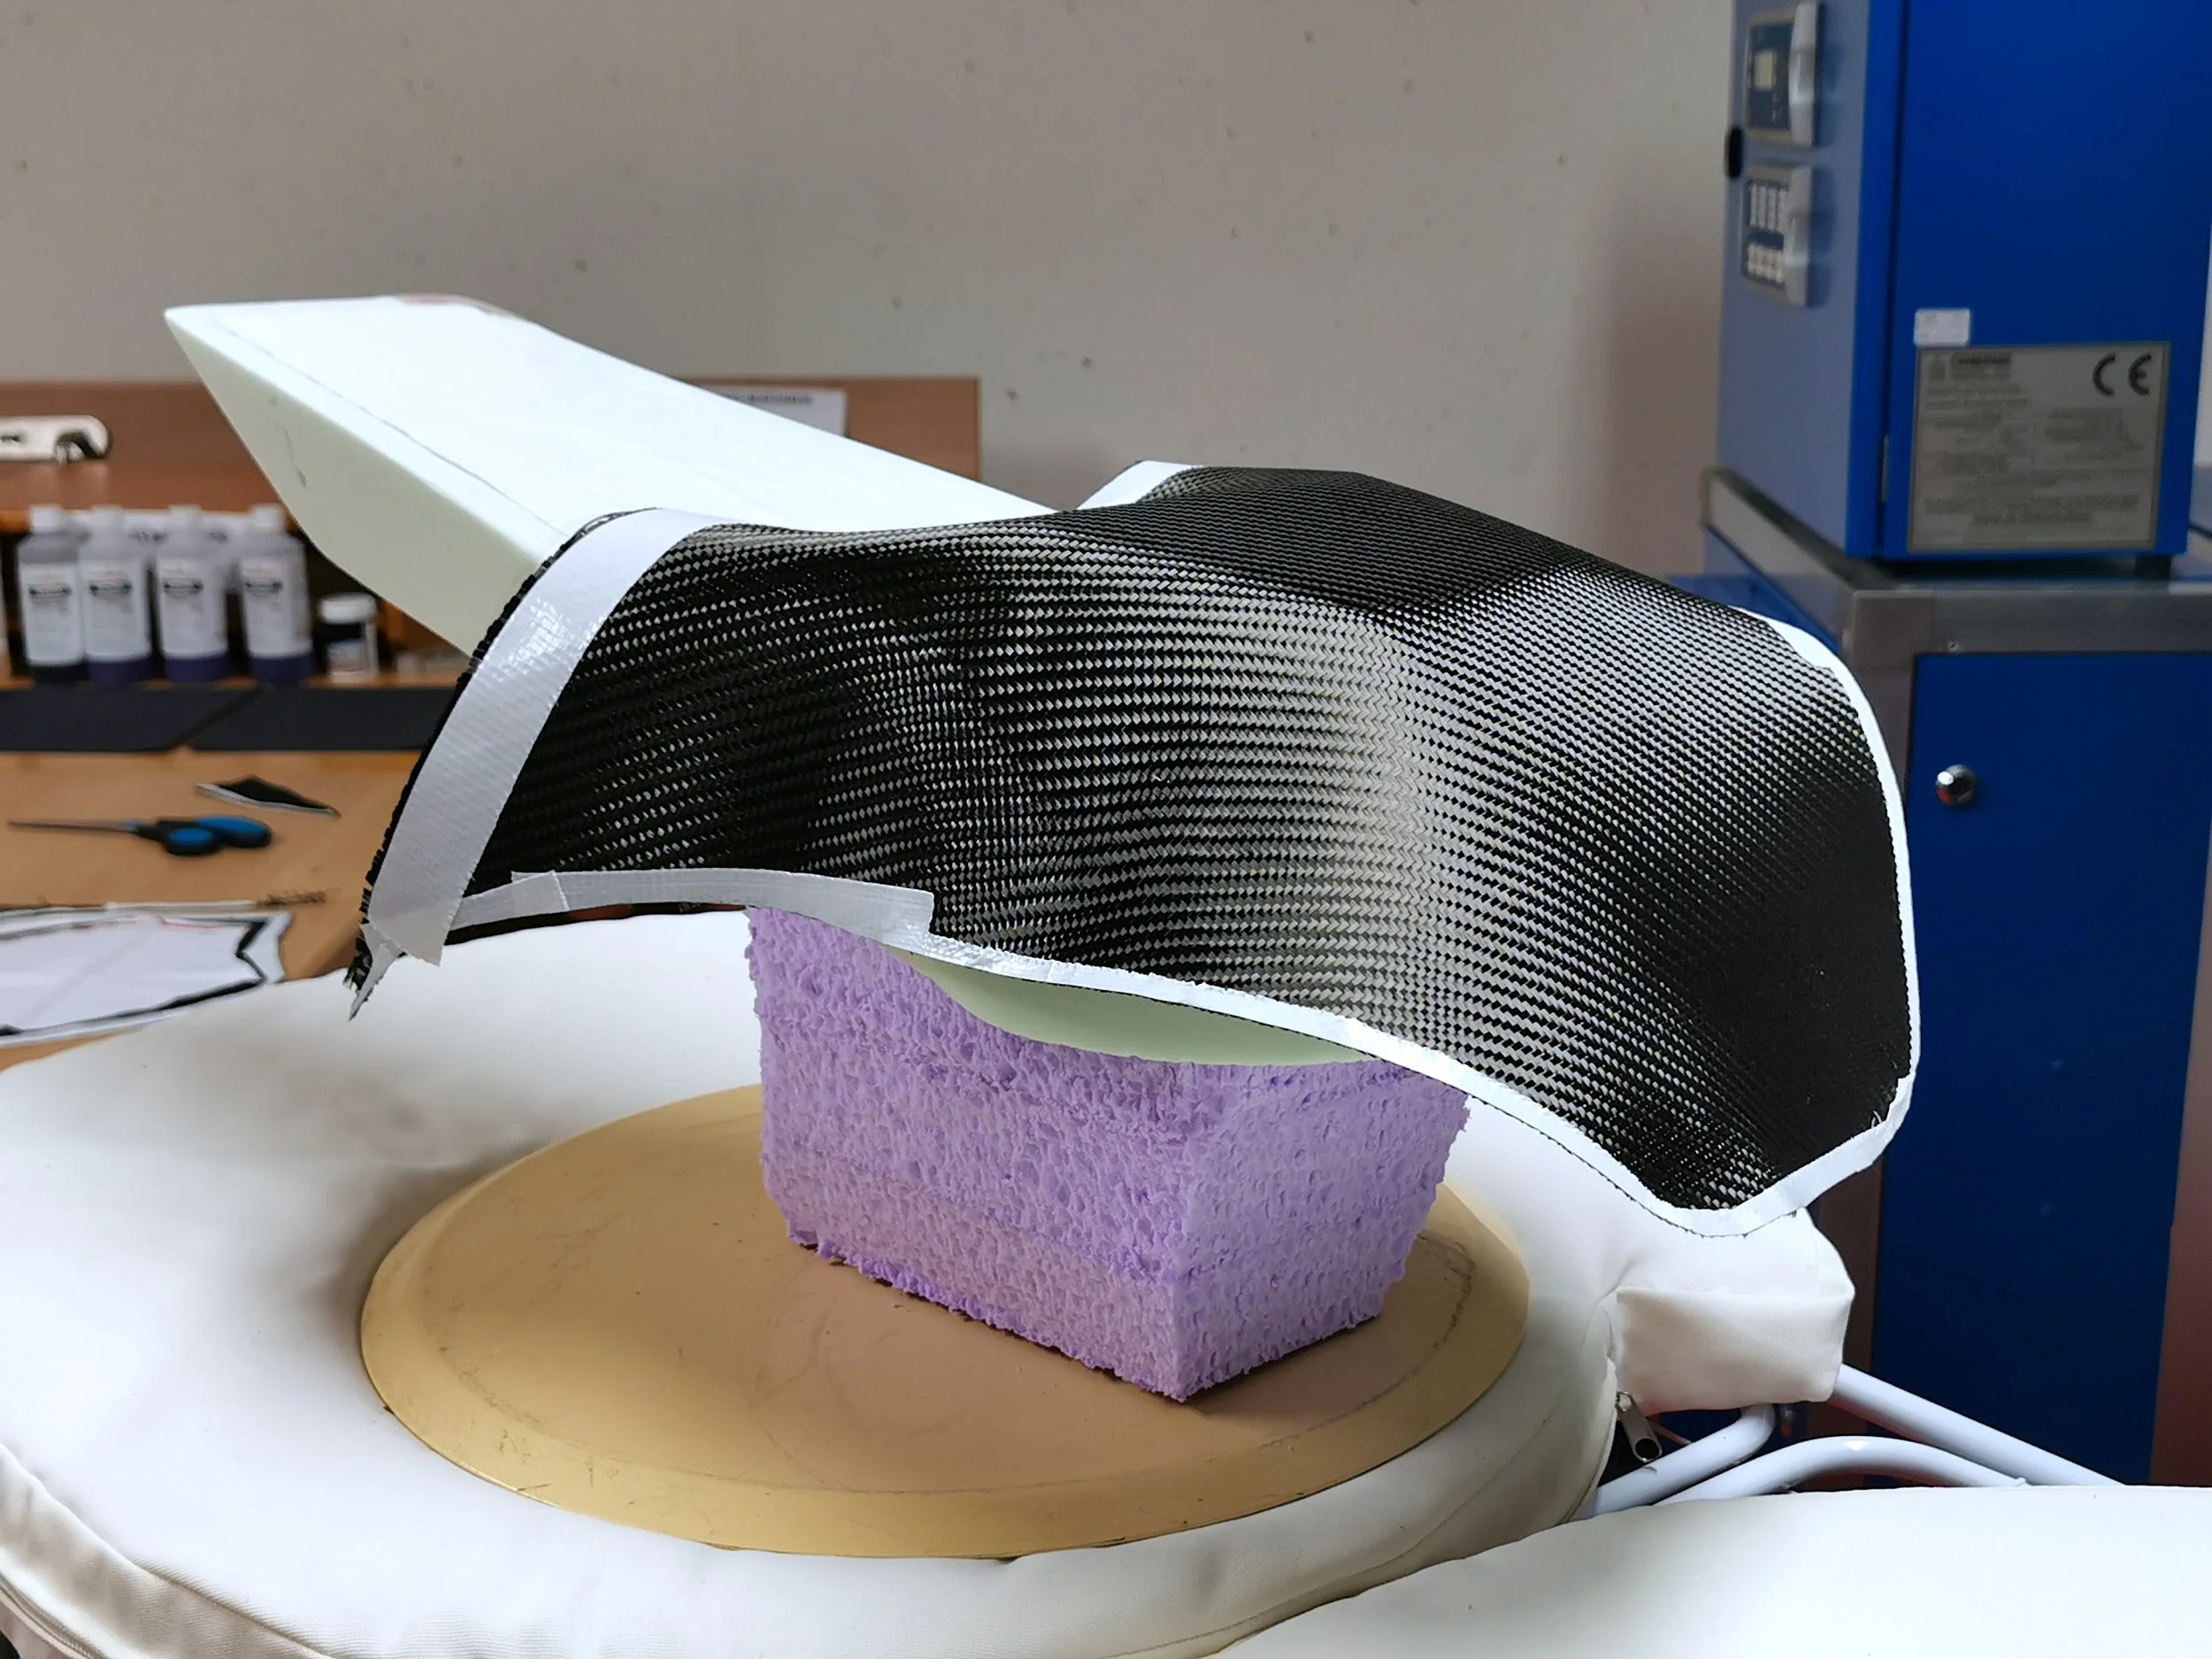
5. Applying the Base Coat

Now, I start using EasyComposites products to coat the shaped form with a black pigmented base coat. This is done to prevent the bright material from shining through the carbon fiber mesh.
This dark layer is key to a great-looking finish. Mix the pigmented resin with hardener in the correct proportions (using a digital gram scale is best).
Important: Thoroughly mix the hardener and resin, stirring more than you might think necessary. If any parts are not correctly mixed, it could cause the resin to never fully harden. Removing sticky, unhardened resin can be very problematic, potentially requiring as much time as shaping your part just to remove one layer of poorly or incorrectly mixed resin.
After applying the base coat, leave it to become tacky, which will take around 2-3 hours at room temperature. When you touch it and it feels sticky but not liquid, it's ready for the first carbon fiber layer. If you wait too long and it cures too much, the carbon fiber cuts won't stick as desired, potentially ruining your entire project. It's better to apply it a bit too early than too late.
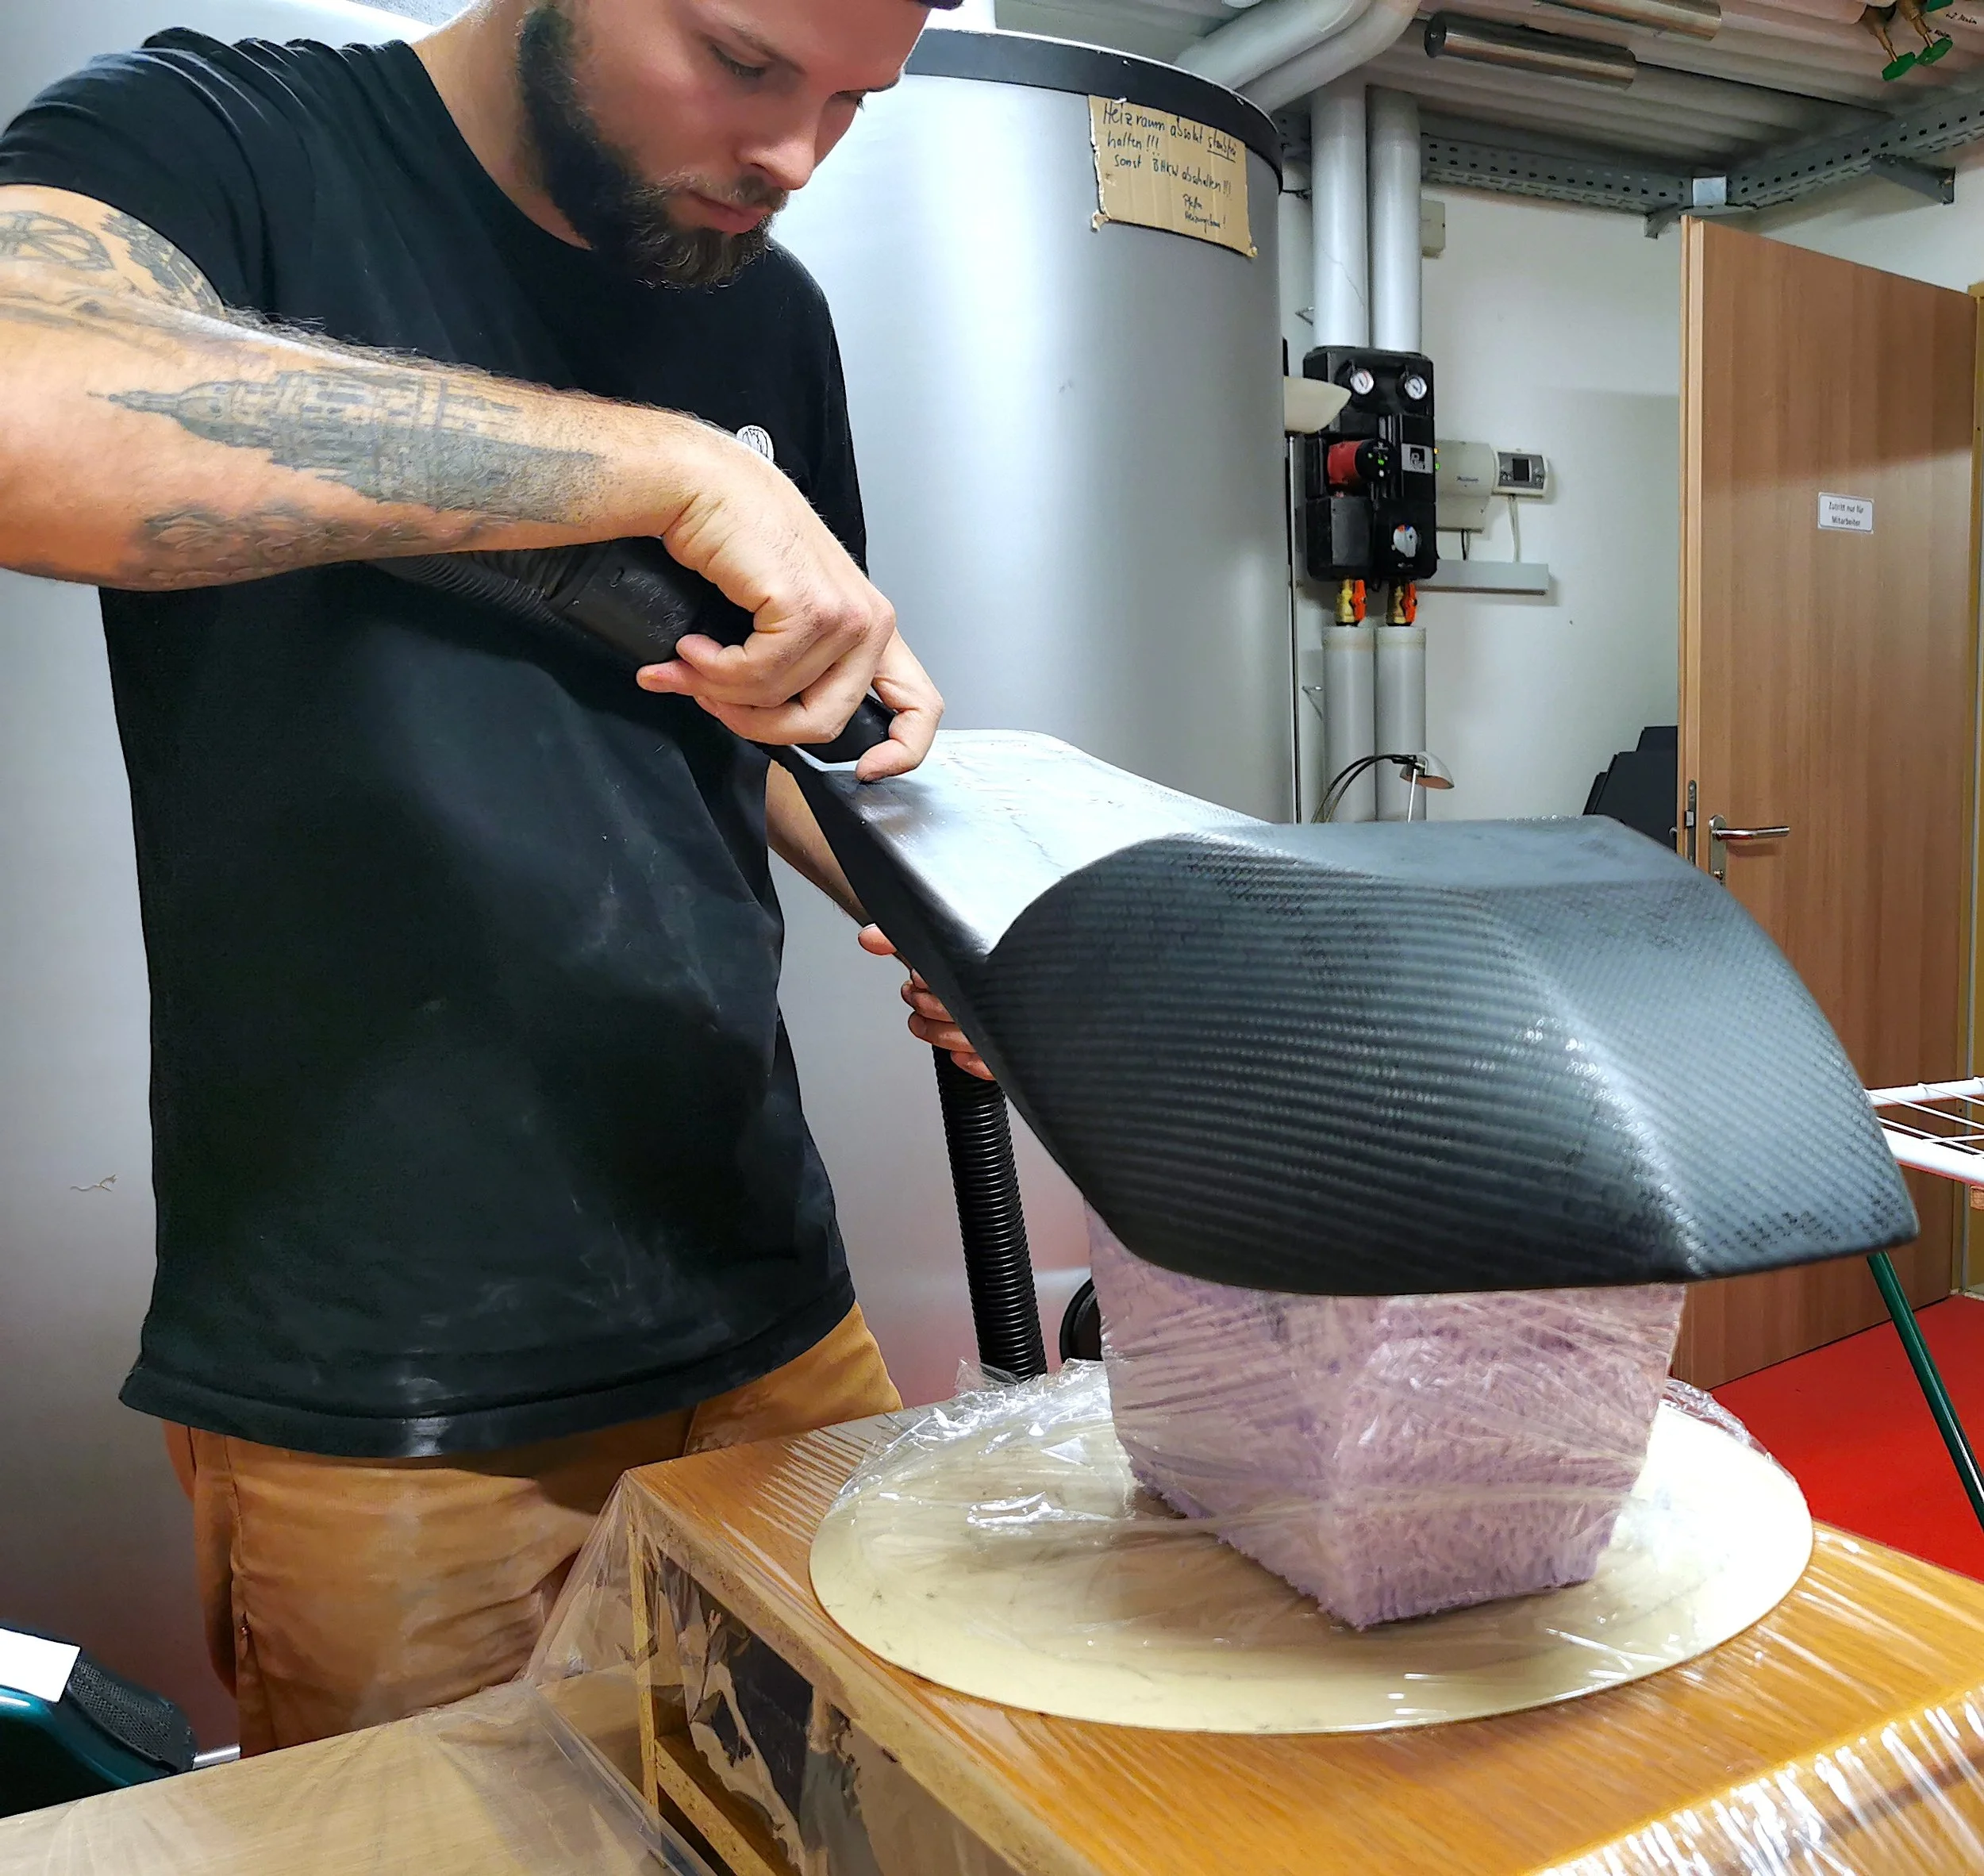
Now, you can lay the carbon fiber cuts on the tacky base coat. Ensure you plan the laying process very well, and have practiced doing so with the bed sheet templates. Once the carbon fiber touches the base coat, it does not reposition easily. Remember, pulling on the carbon fiber mat will distort the beautiful fiber arrangement, resulting in an undesirable finish.
My Recommendation:
Practice laying with bed sheets before applying the base coat. Create carbon cuts that are slightly larger than needed, so if you start imperfectly, you will have enough material to correct any missteps.

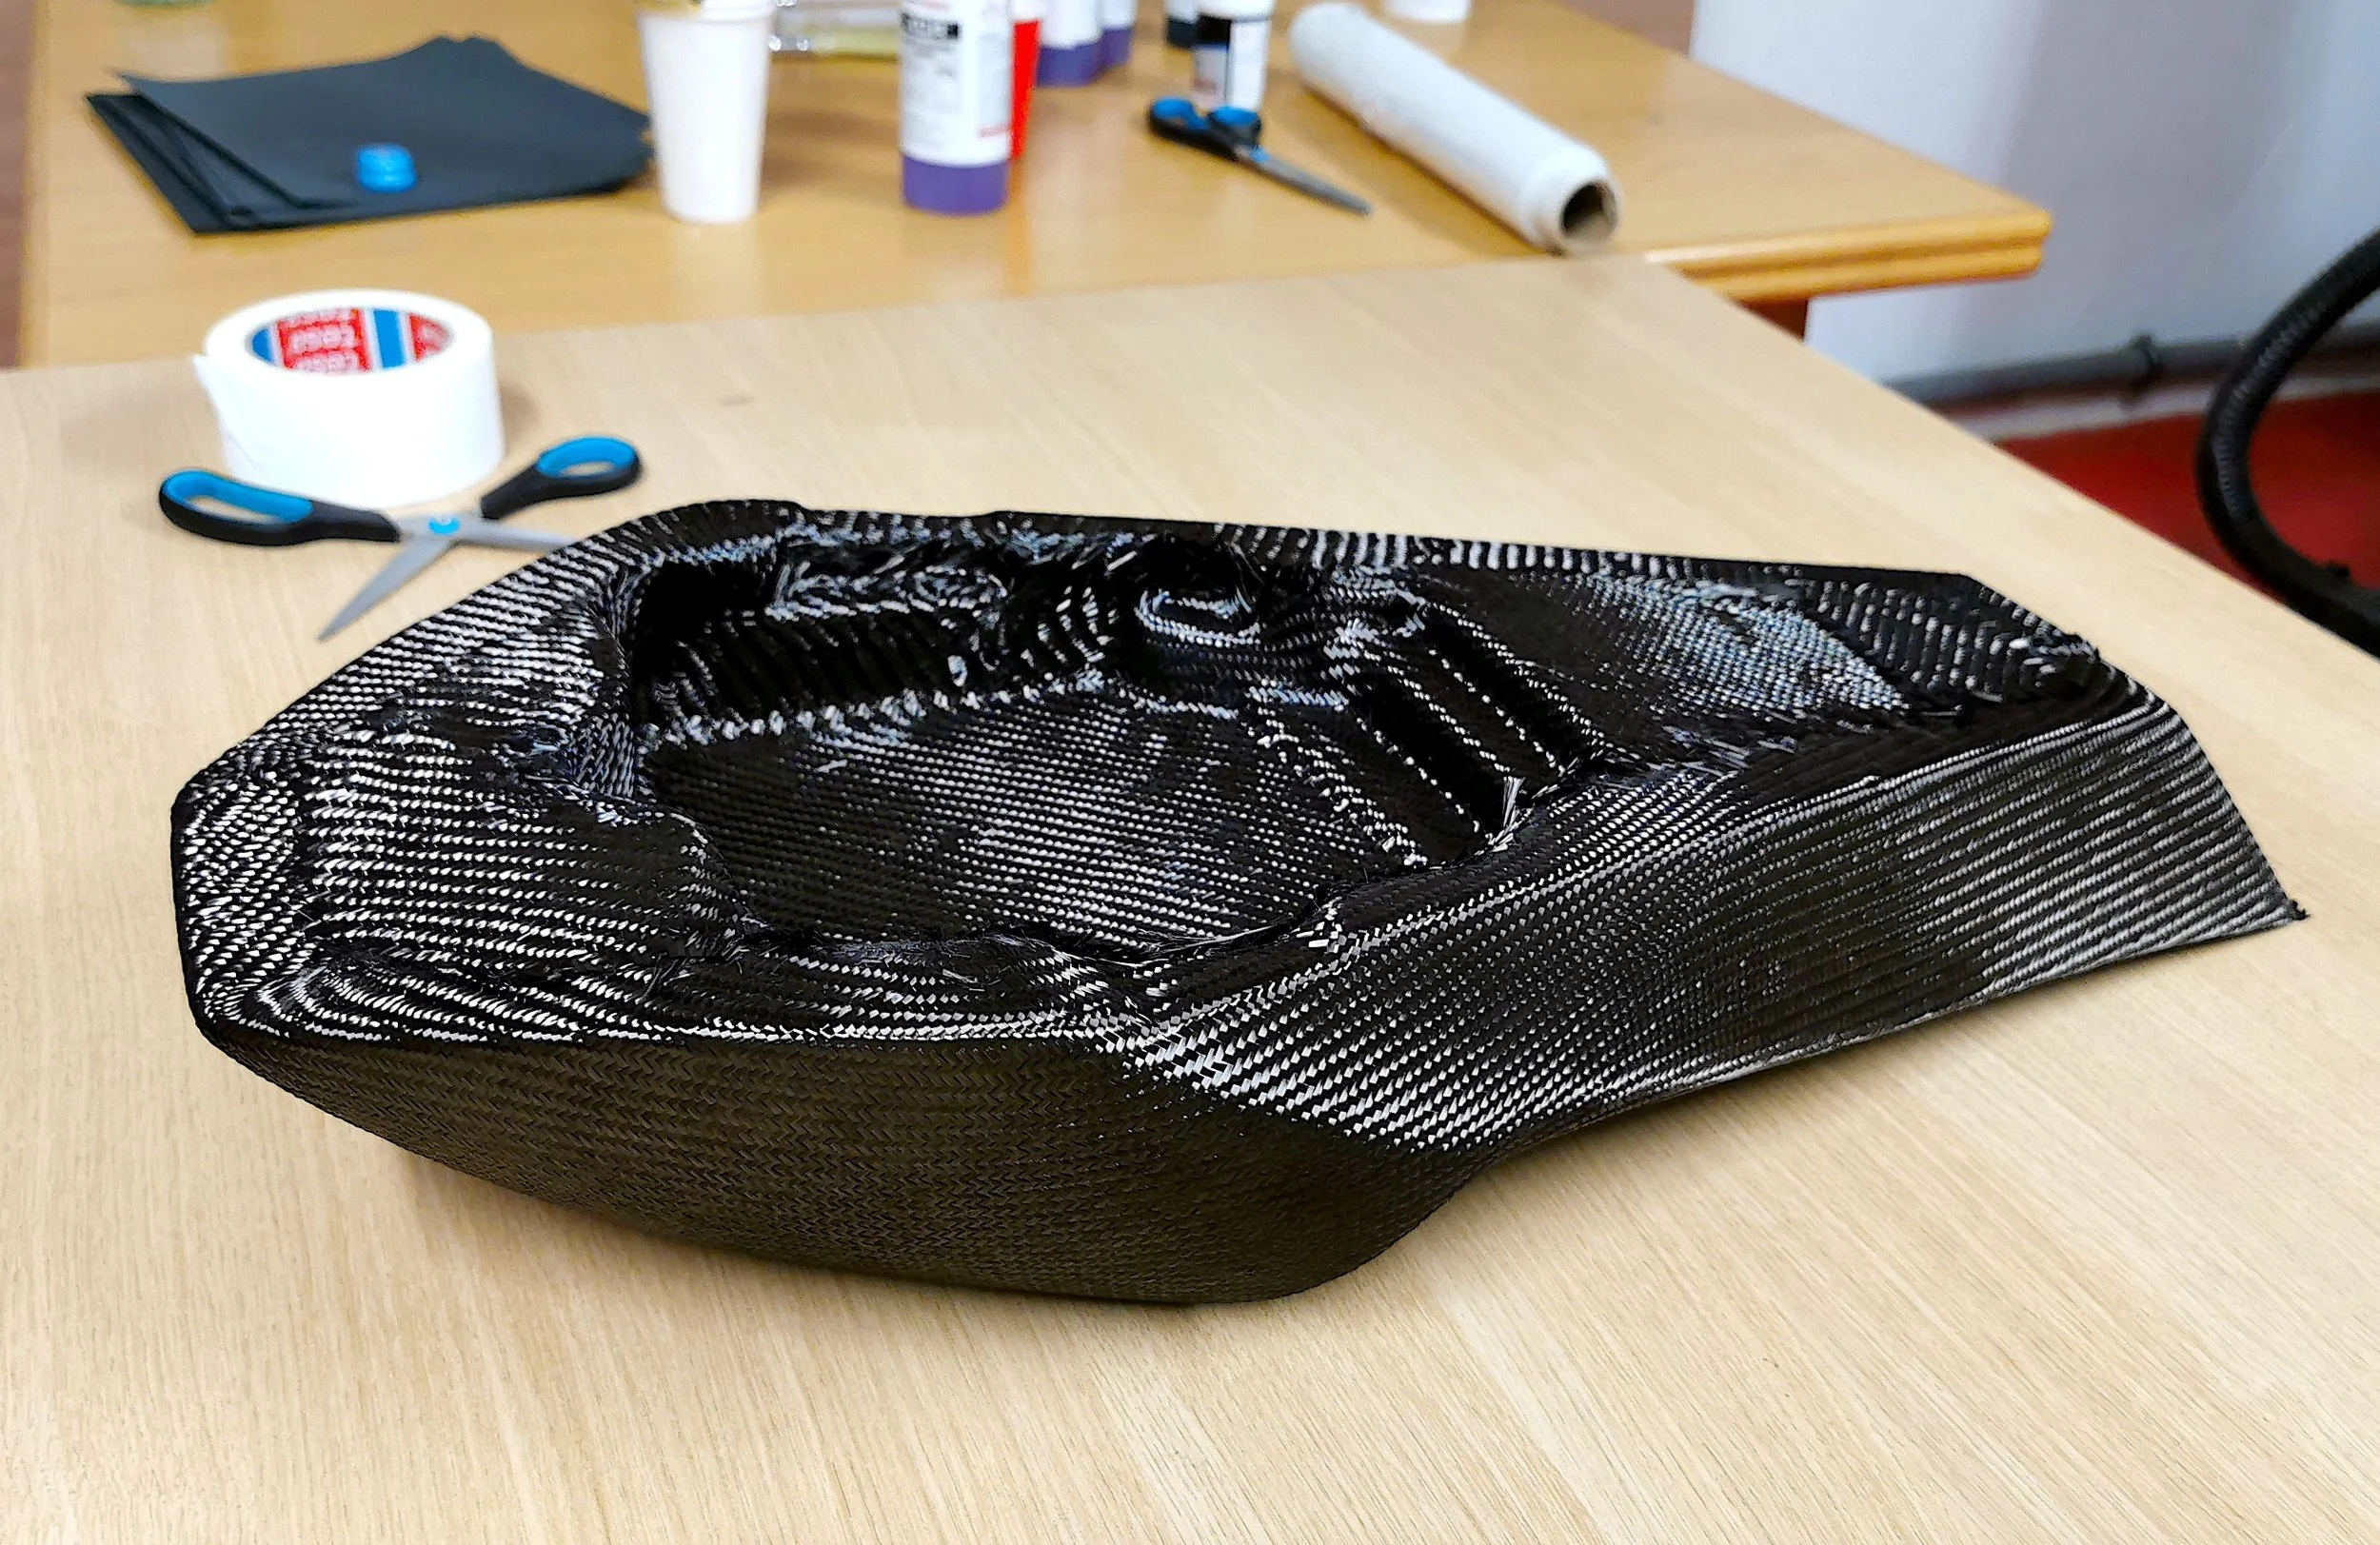
6. Laying the Carbon Fibre
Transfer the templates onto the carbon fiber mat.
Carbon fiber is known to be a very strong material, yet to my surprise, the raw carbon fiber mat was soft and seemingly fragile. When I pulled on the mat, the fiber arrangement immediately lost its original shape.
If you handle the mat roughly or lift it with just two fingers at a single point, the entire meshwork around the point of force distorts instantly. Any damage done to the original framework of the carbon fiber mat will be visible in the final result. Once the fiber is covered and locked with epoxy resin, there will be no way to correct the aesthetic damage.
All cuts and folds are now on the underside and topside of the seat, not visible once the seat is mounted.
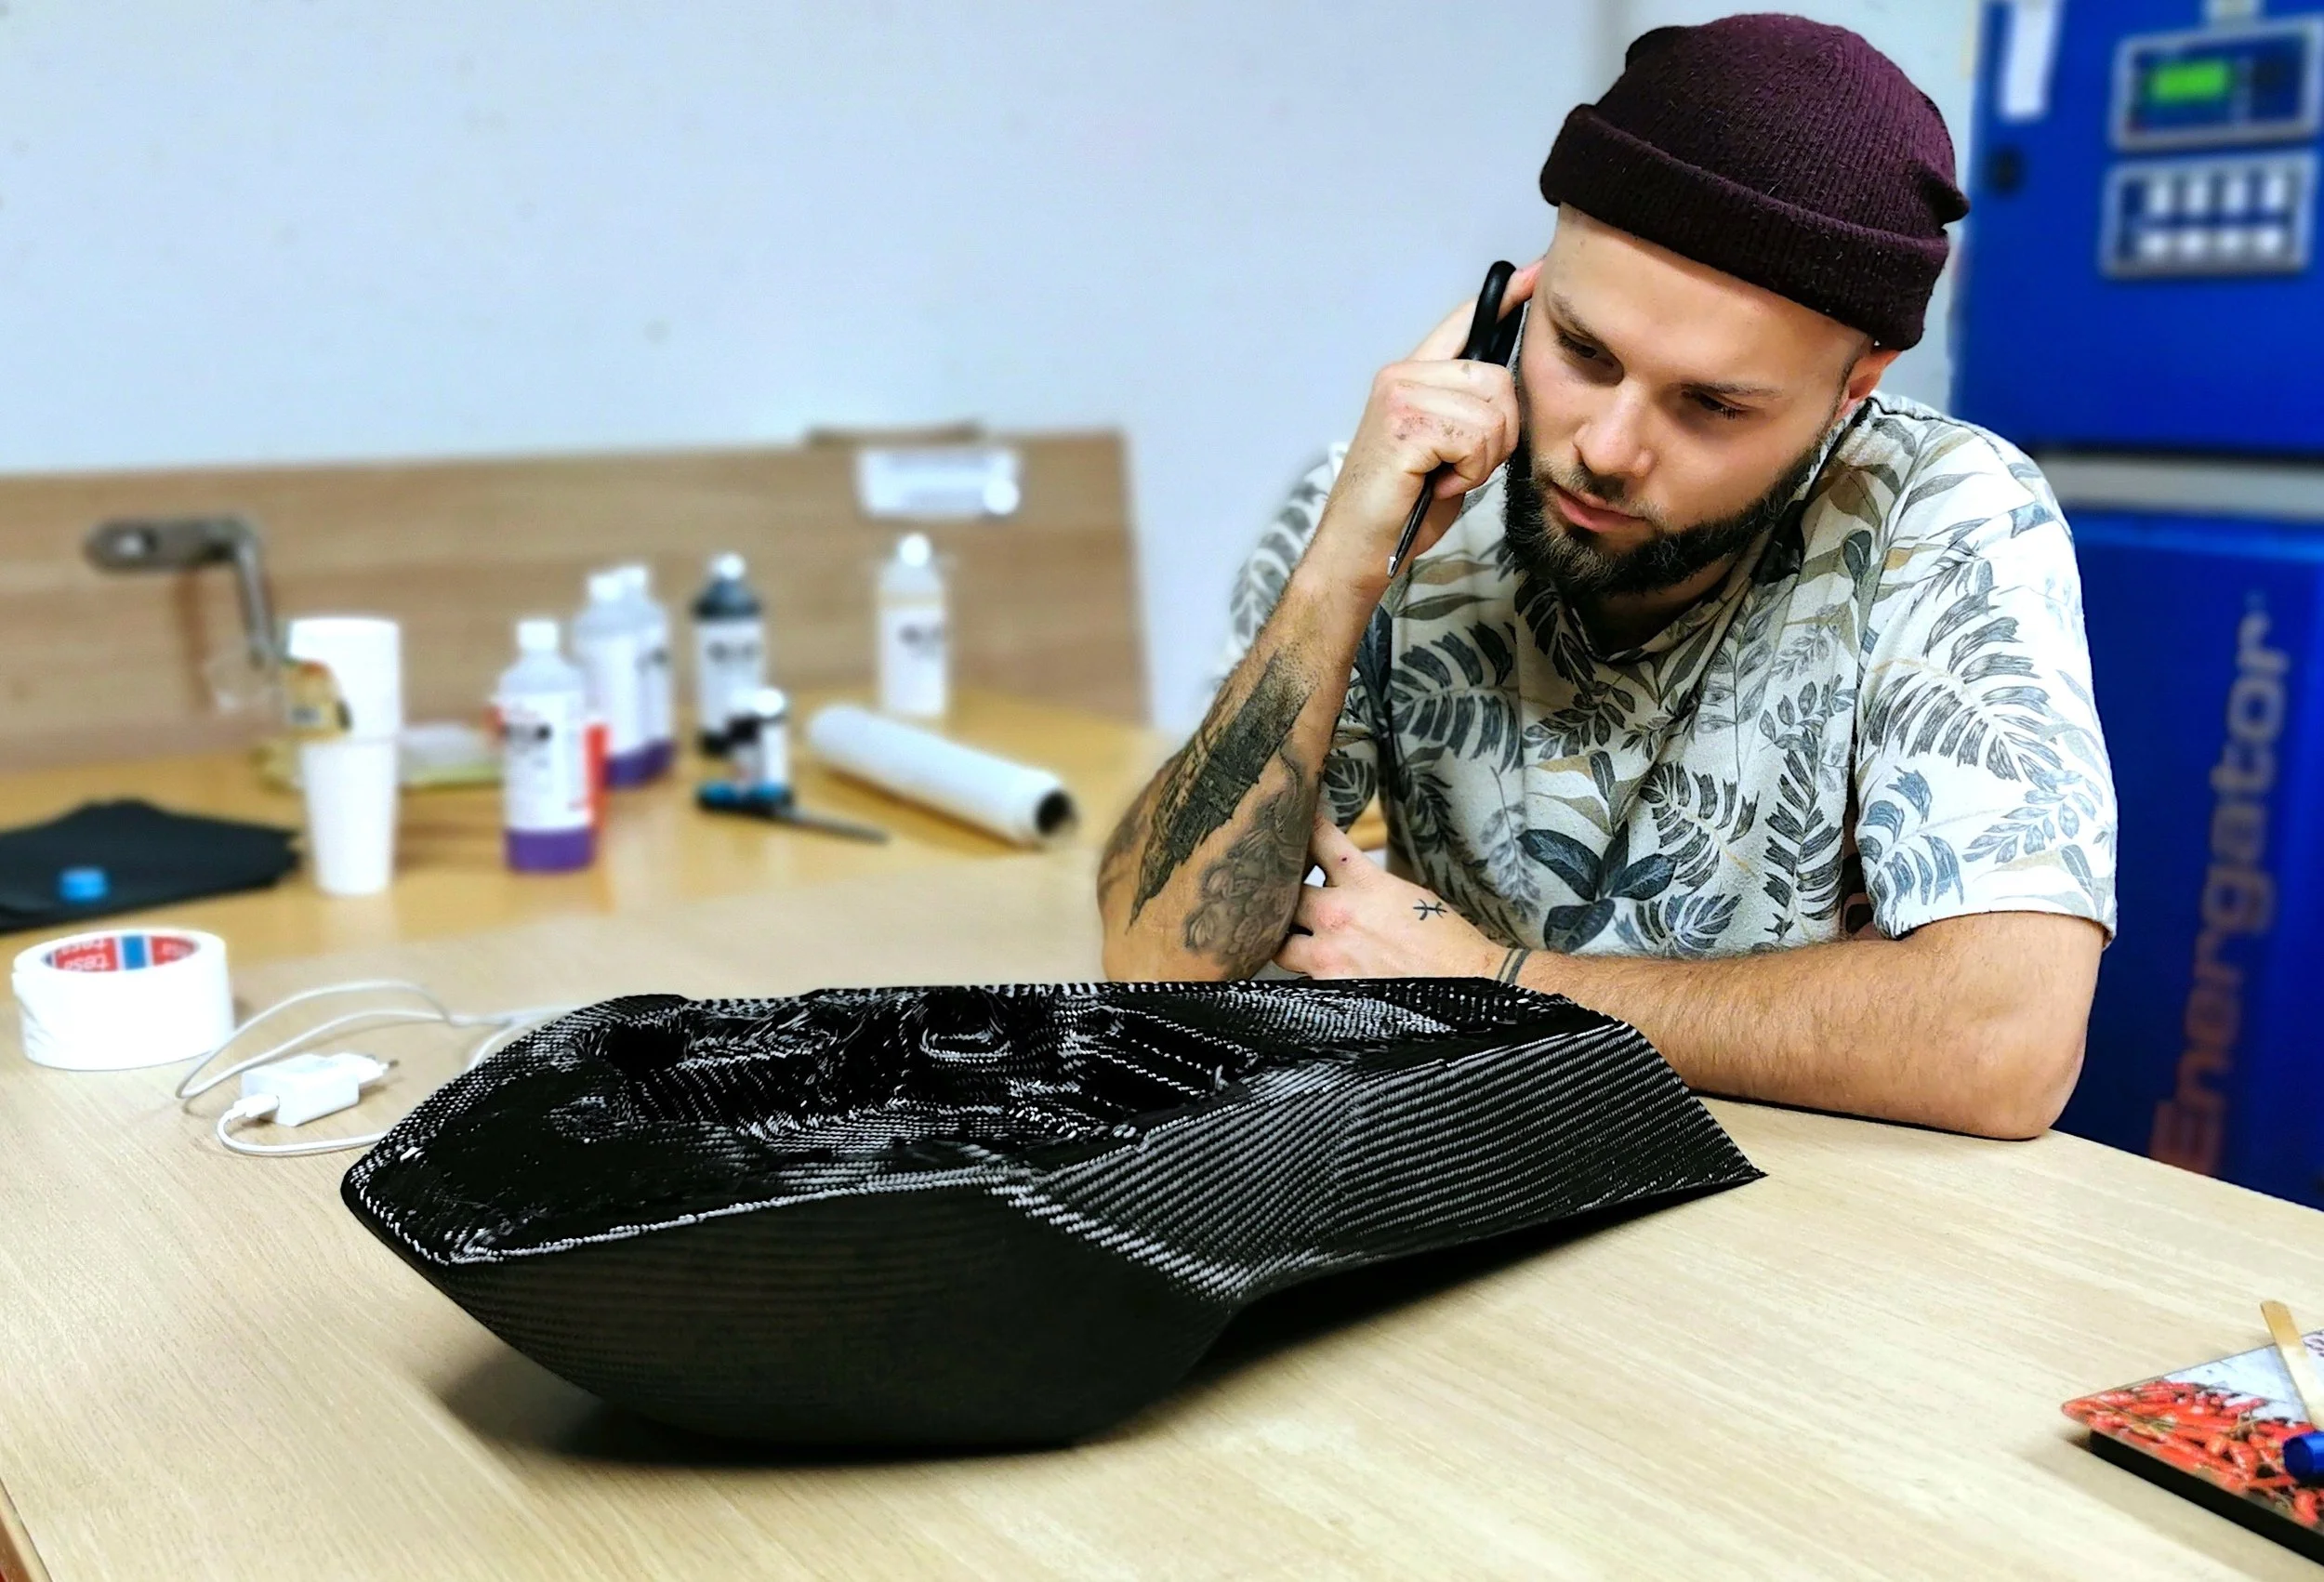
Now, you can enjoy your well-deserved coffee and take at least a 2-hour break to let the base coat cure some more.
Congratulations:
If you've come this far, you've already overcome the most difficult steps of carbon skinning.
7. Applying the First Clear Coat
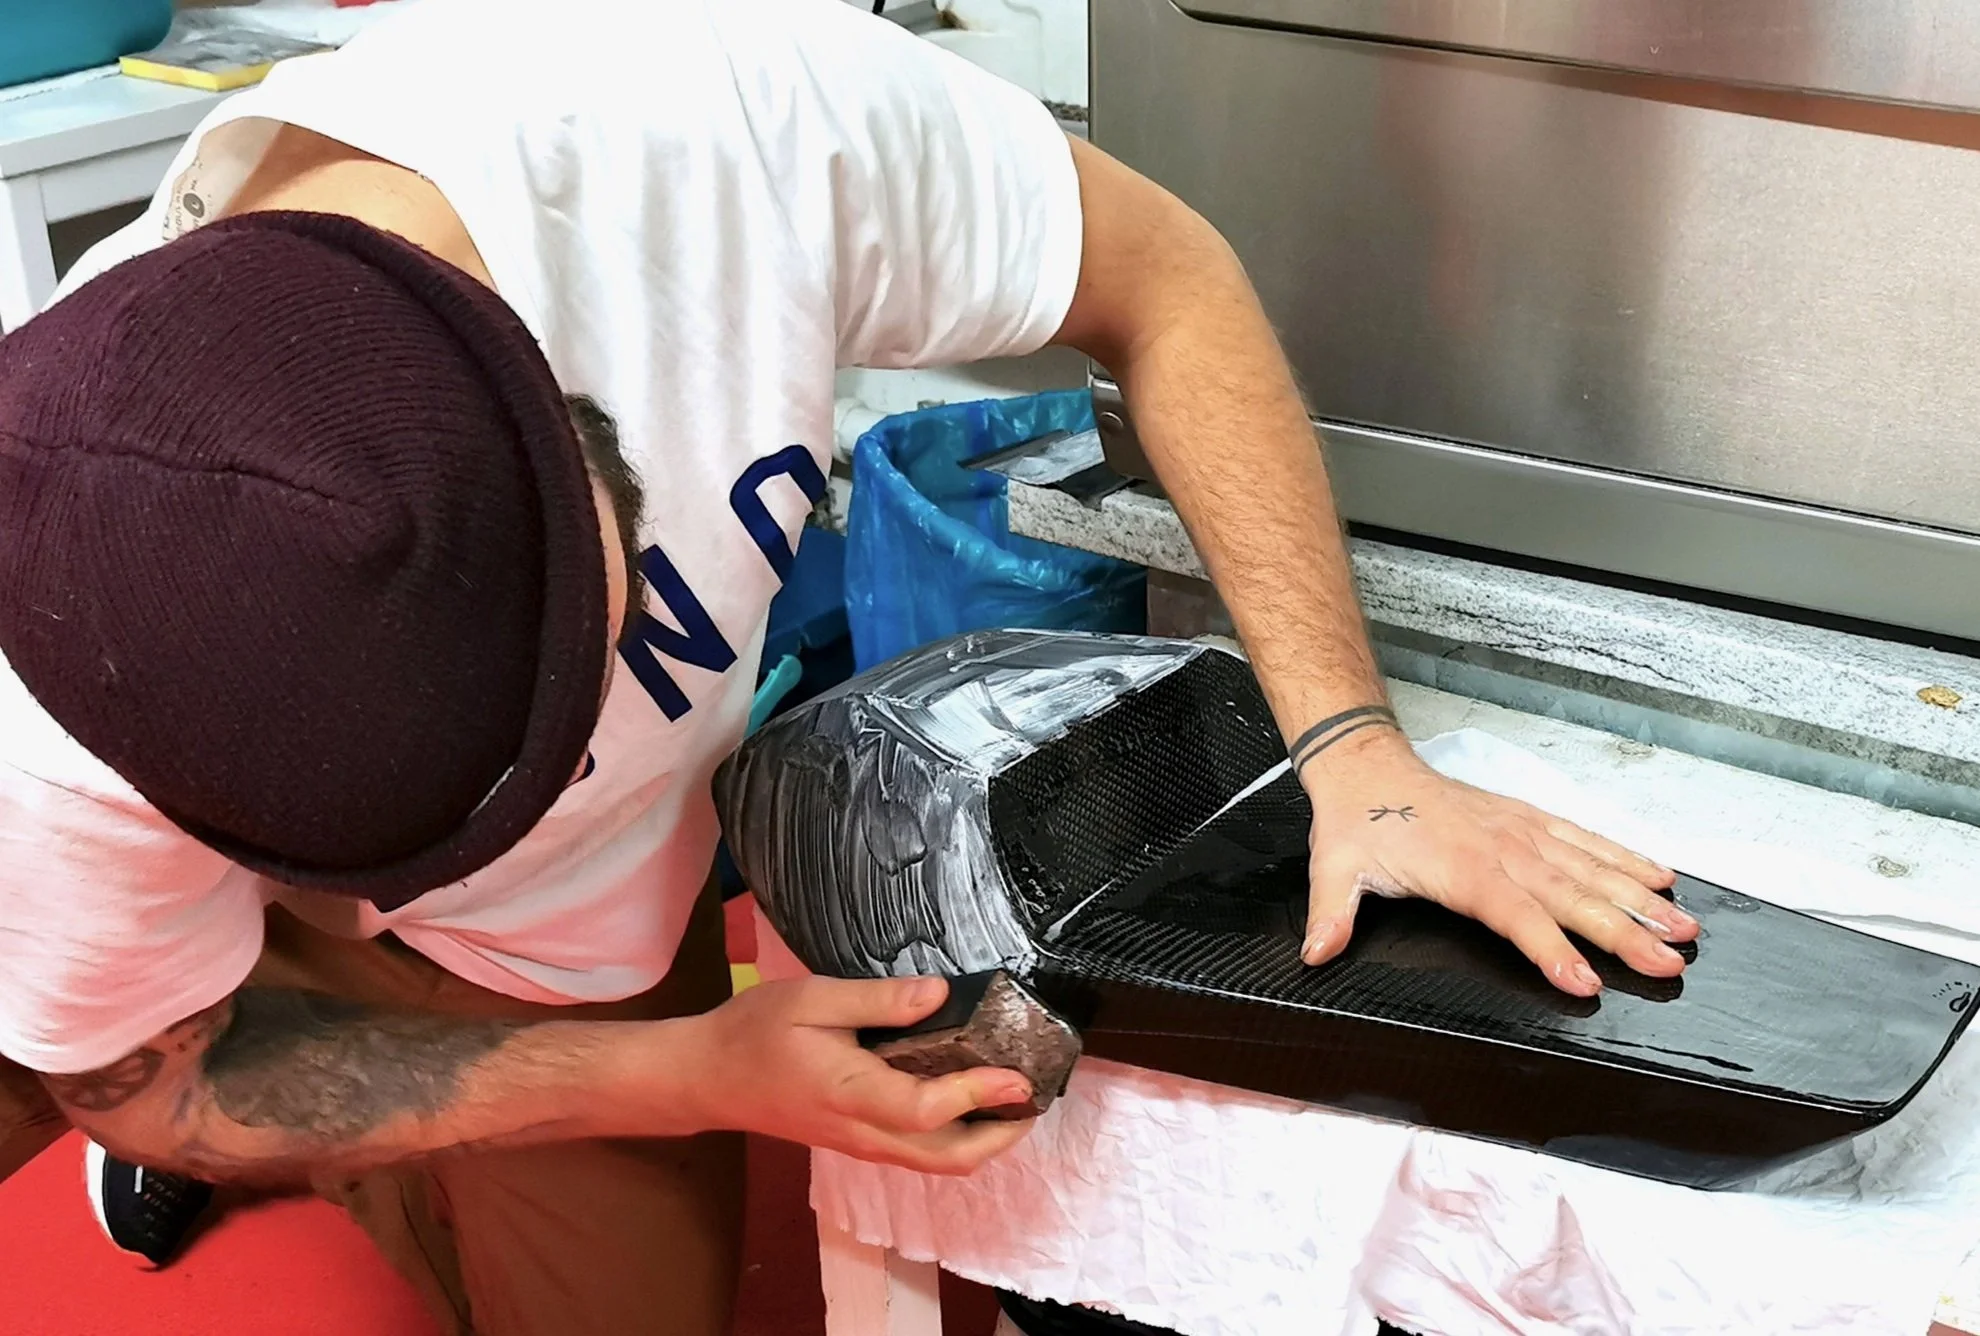
Time to really lock the carbon fiber into position with the first clear coat layer.
Now, you can mix clear epoxy with hardener (which is all supplied in the Kit from EasyComposites) and apply it to the carbon fiber. Be generous here, ensuring every corner and every inch of your object is coated.
Important: Double-check your resin mixing ratio. An incorrect ratio can often derail an epoxy-related project at the final stages.
Let it cure for a minimum of 8 hours before starting the sanding process.
At this point, the surface may not look or feel like it will achieve the typically perfect-looking carbon surface that we're all familiar with from carbon parts… But continue, and you might be pleasantly surprised at how your surface transforms through the next layers.
My Recommendation:
Invest in a digital gram scale. Simply place a paper or plastic cup on top and measure out the epoxy; this ensures perfect mix ratios. Afterwards, you can use the gram scale for baking in your kitchen. They are very affordable.

8. Applying Additional Clear Coats

In the next three layers, there is one important thing to pay attention to:
Layers 2, 3, and 4 must be applied on the same day. This method allows these layers to fuse together, creating the main thickness of the clear coats. This is necessary for a durable coating! If you let each layer fully cure before applying the next, you might risk the layers delaminating as they may not fully bond together.
Follow these steps:
Apply layer 2.
Leave it to get tacky (about 2 hours).
Apply layer 3.
Leave it to get tacky (about 2 hours).
Apply layer 4.
Leave it to fully cure (minimum of 8 hours).
After the 4th coat, sand the entire surface with 120 and 240 grit sandpaper.
7. Apply the final clear coat
My Recommendation:
There is no secret to achieving great results; one must simply follow the application steps provided by the company that produces the carbon skinning kit. To recap, you can find these instructions on their homepage, "EasyComposites”.
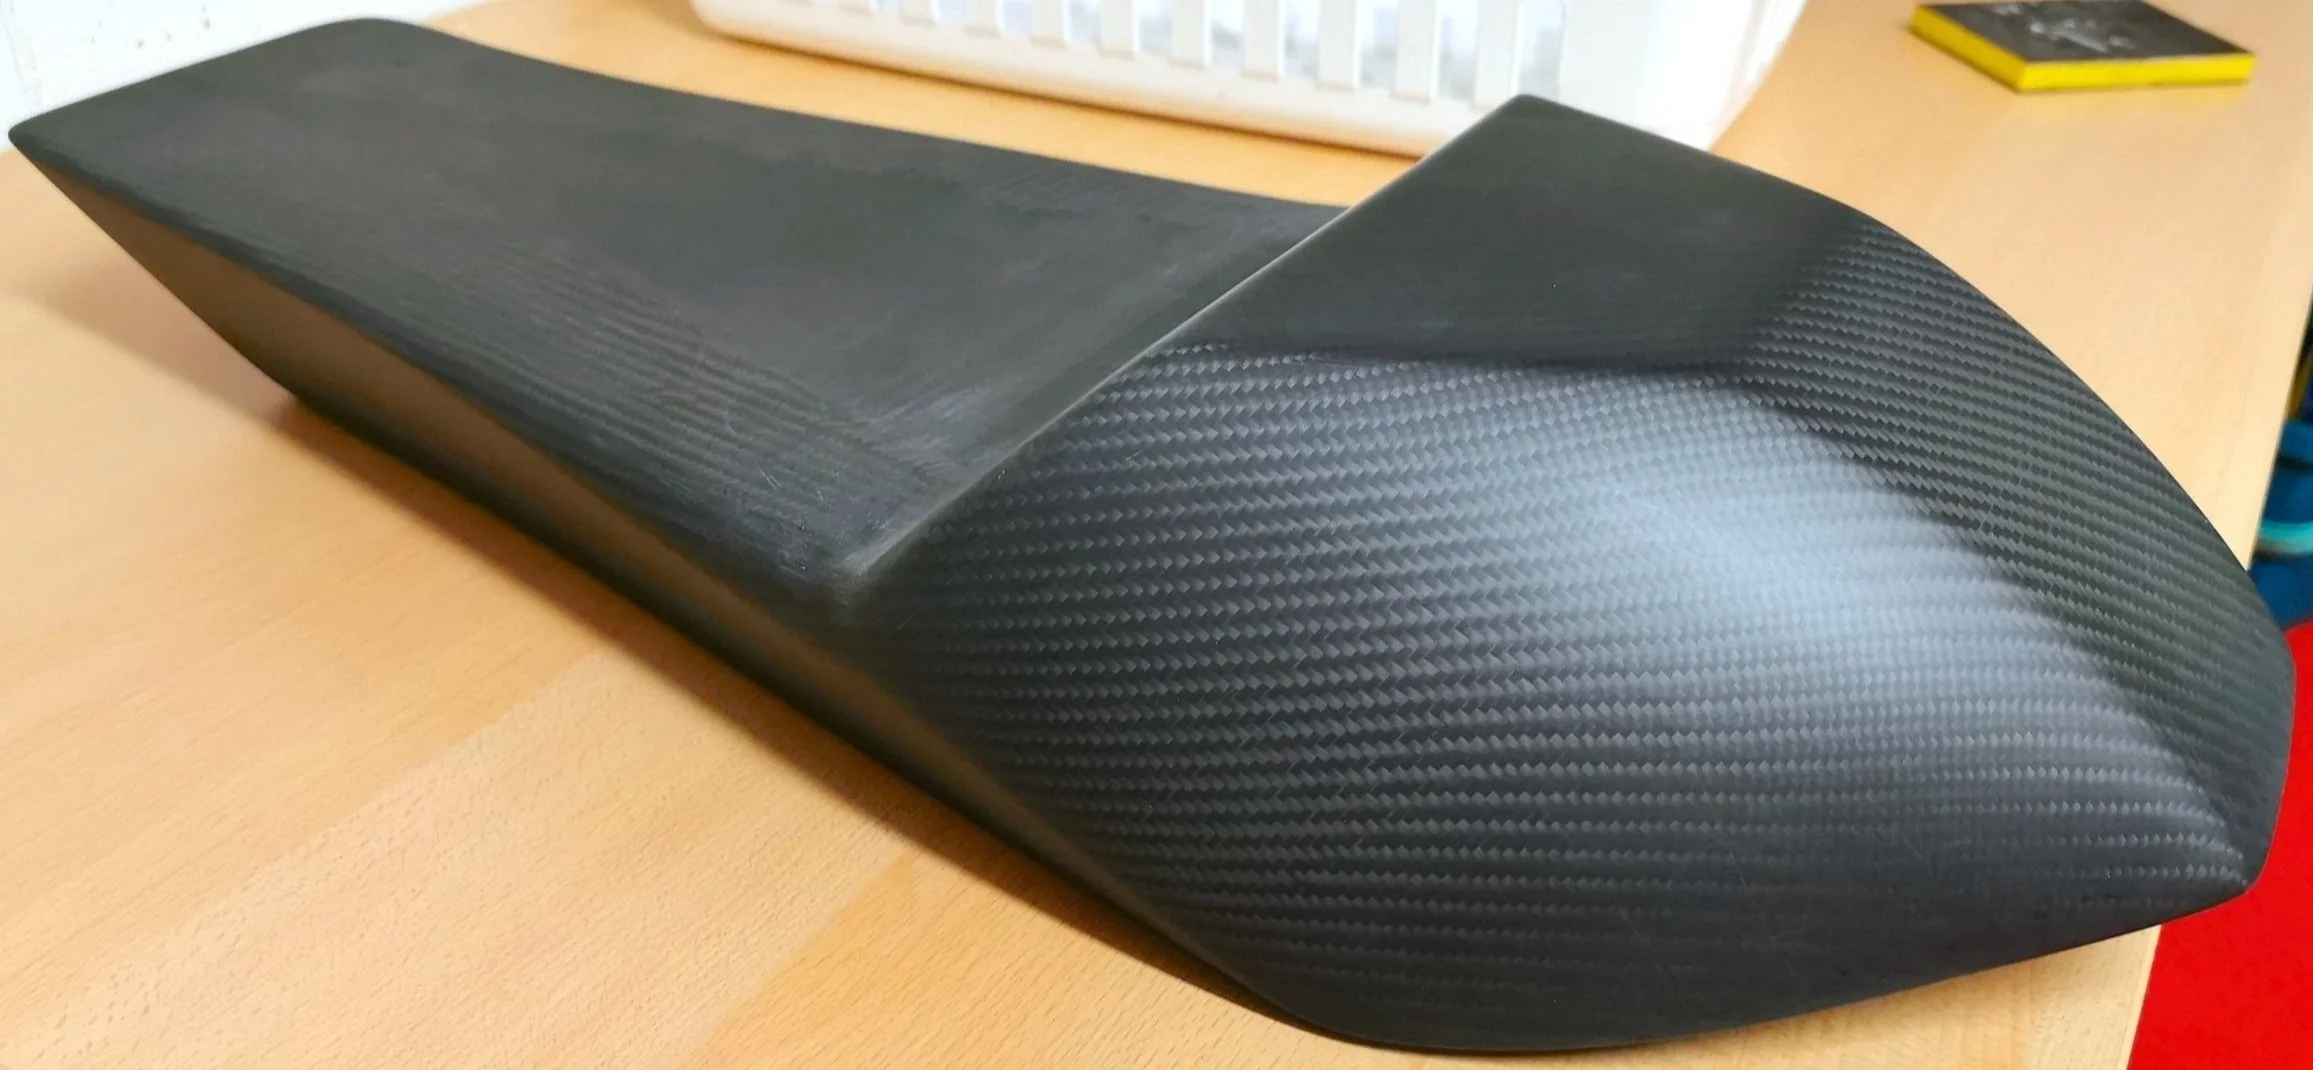
9. Wet Sanding and UV protection
In this step, you can finally achieve a factory-like quality finish.
Make use of wet sandpaper:
The water acts as a lubricant, thereby making the sanding less abrasive and resulting in an even finer, more homogeneous finish. Start with 400 grit and work your way up to 1200 grit.
My Recommendation:
Use a high-quality 2k spray clear coat on top of your creation. The EasyComposites epoxy is very UV resistant; however, you can give it extra protection with a 2k clear coat paint that is used for car bodywork.
Congratulations:
You have successfully handcrafted your own carbon fiber part!

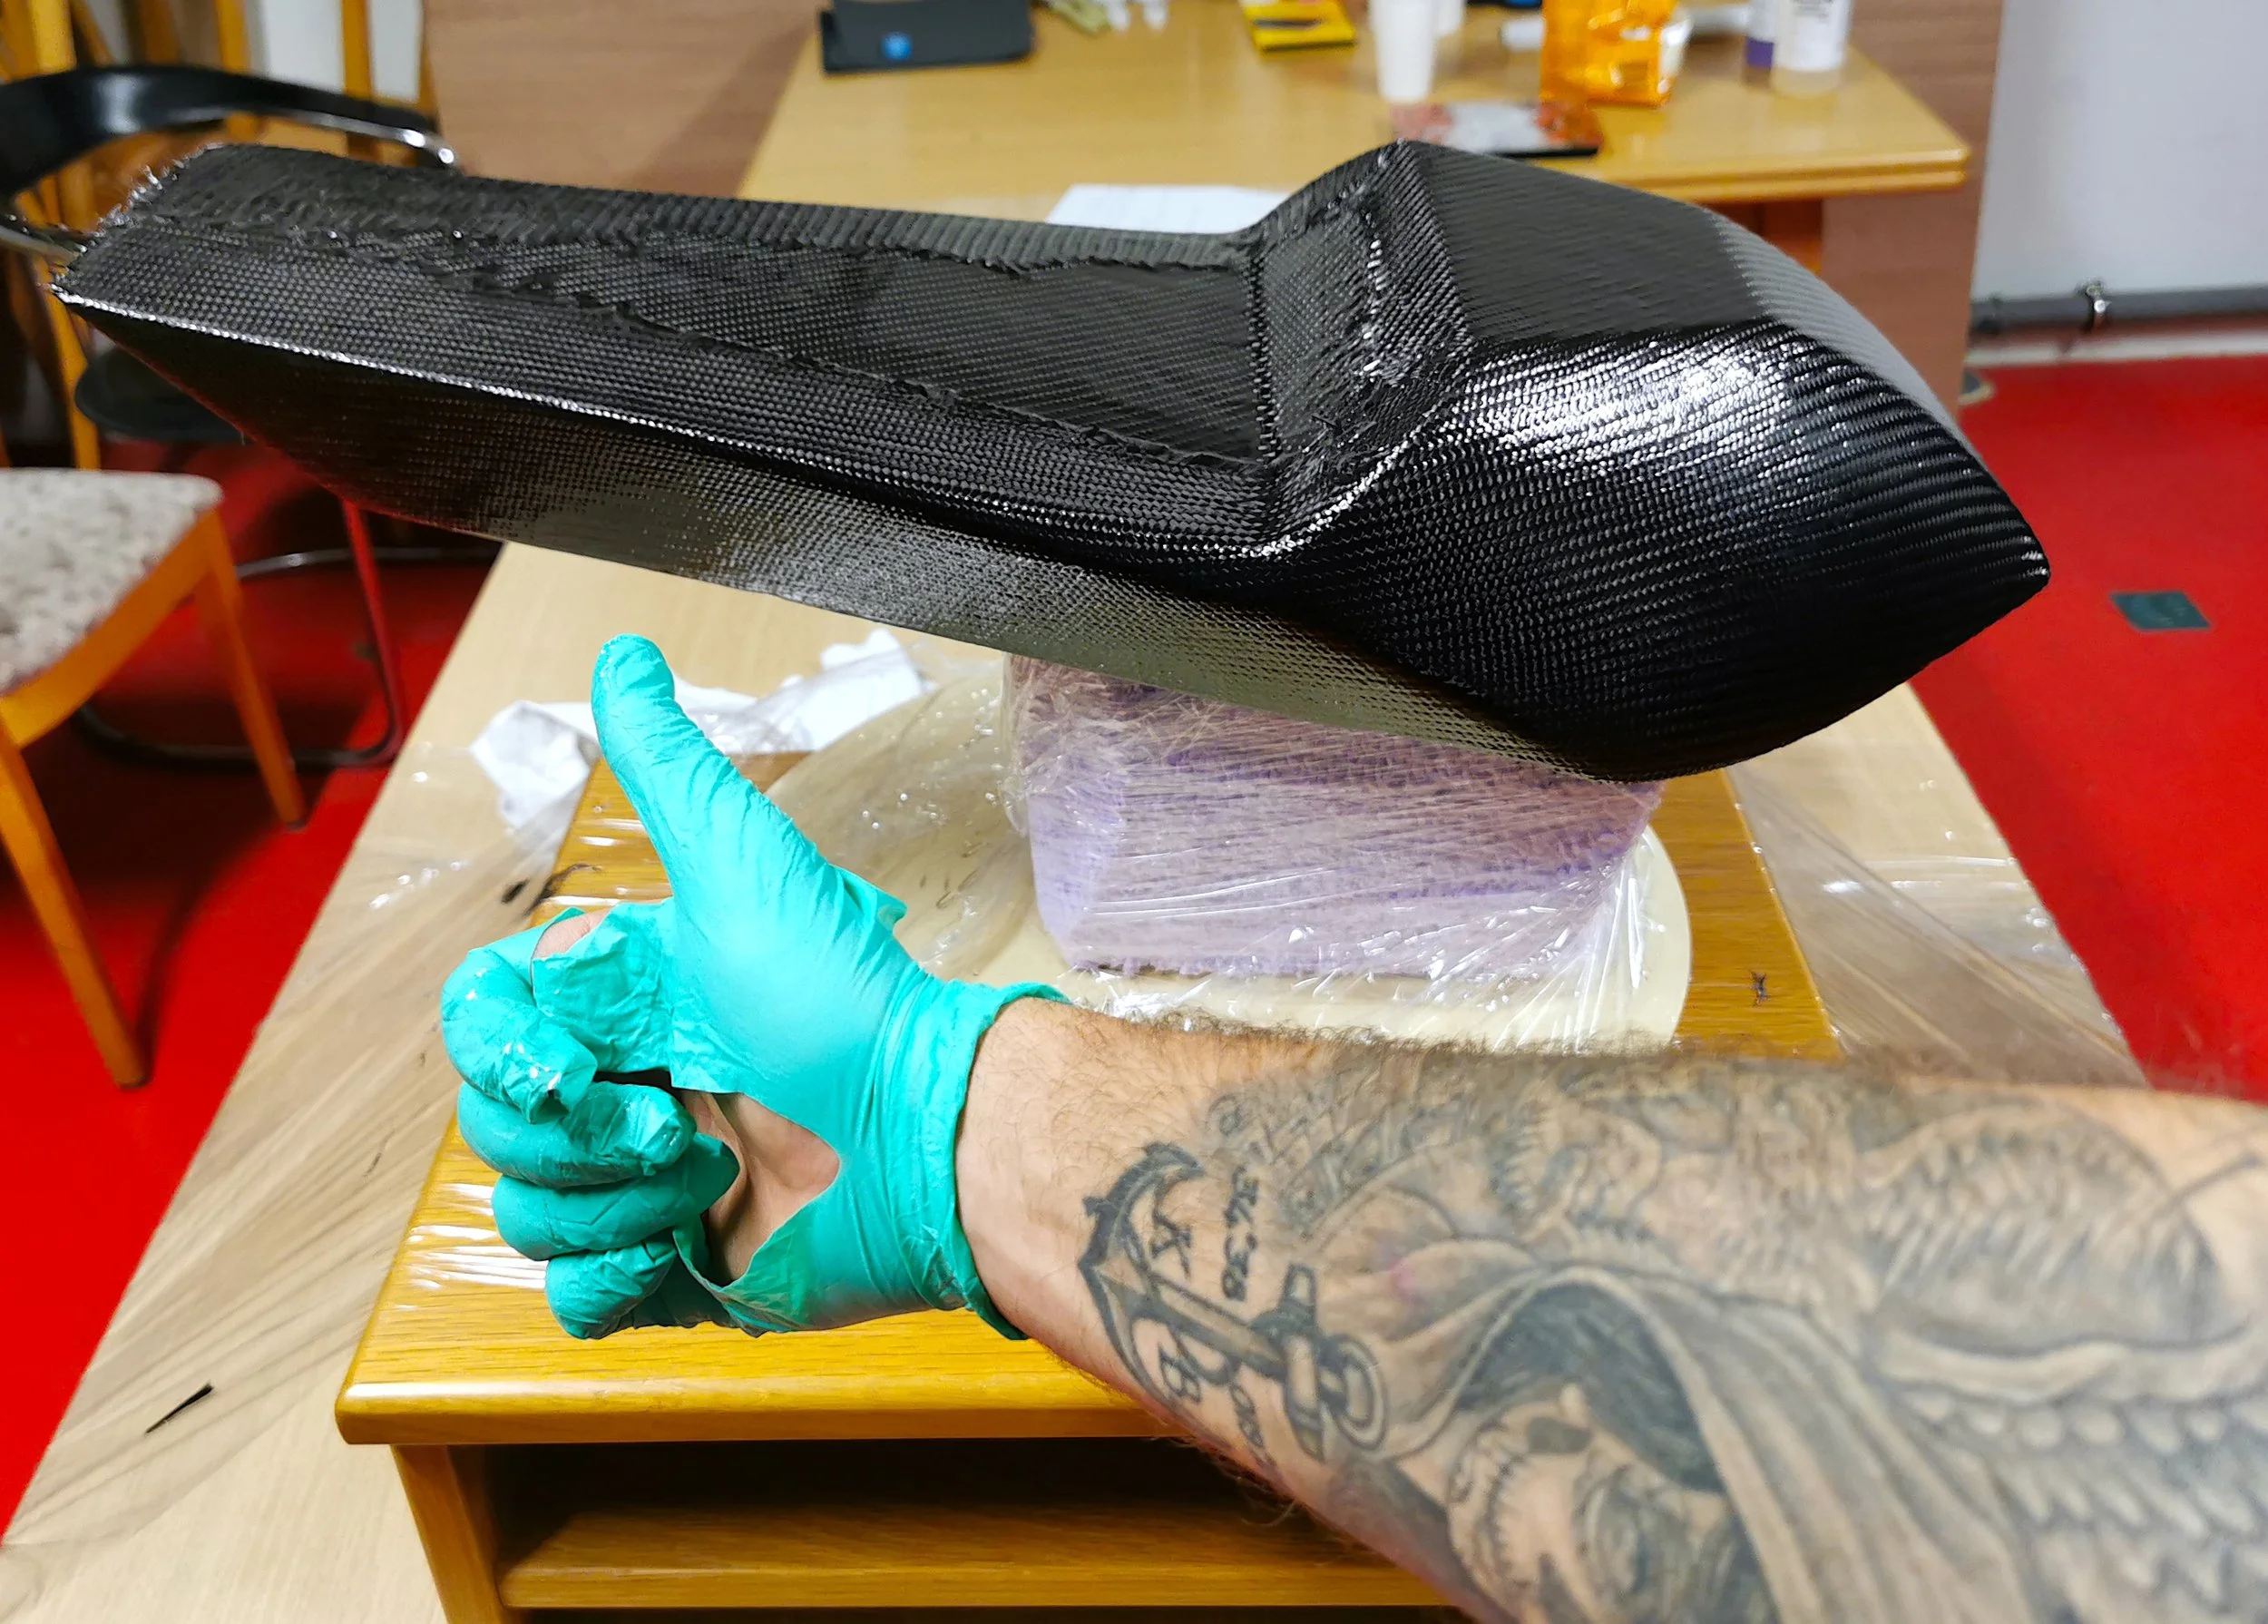
10. Last Step (when building a seat)
The object is successfully wrapped in carbon fiber. You are most likely finished at this point.
However, in the case of a seat, I do need something to sit on. So, I need to take one extra step:
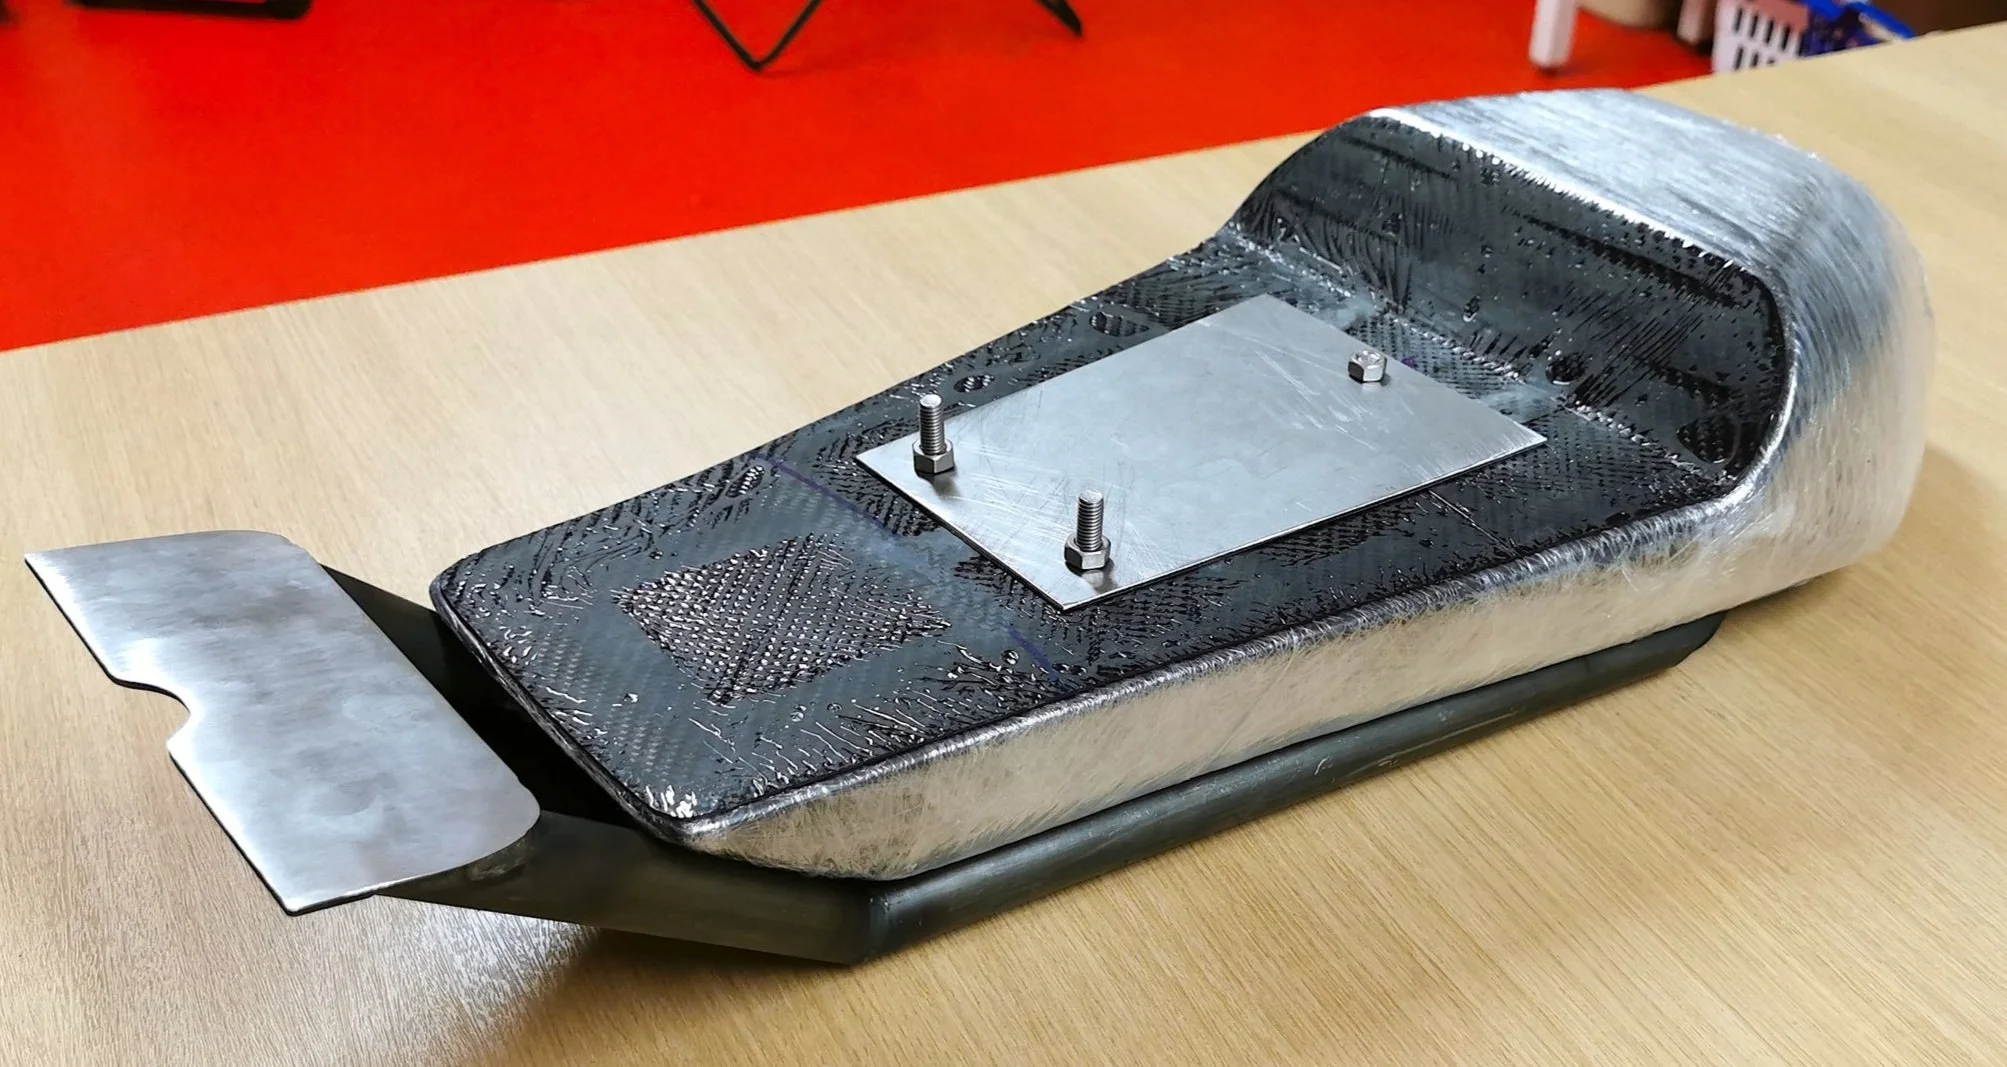
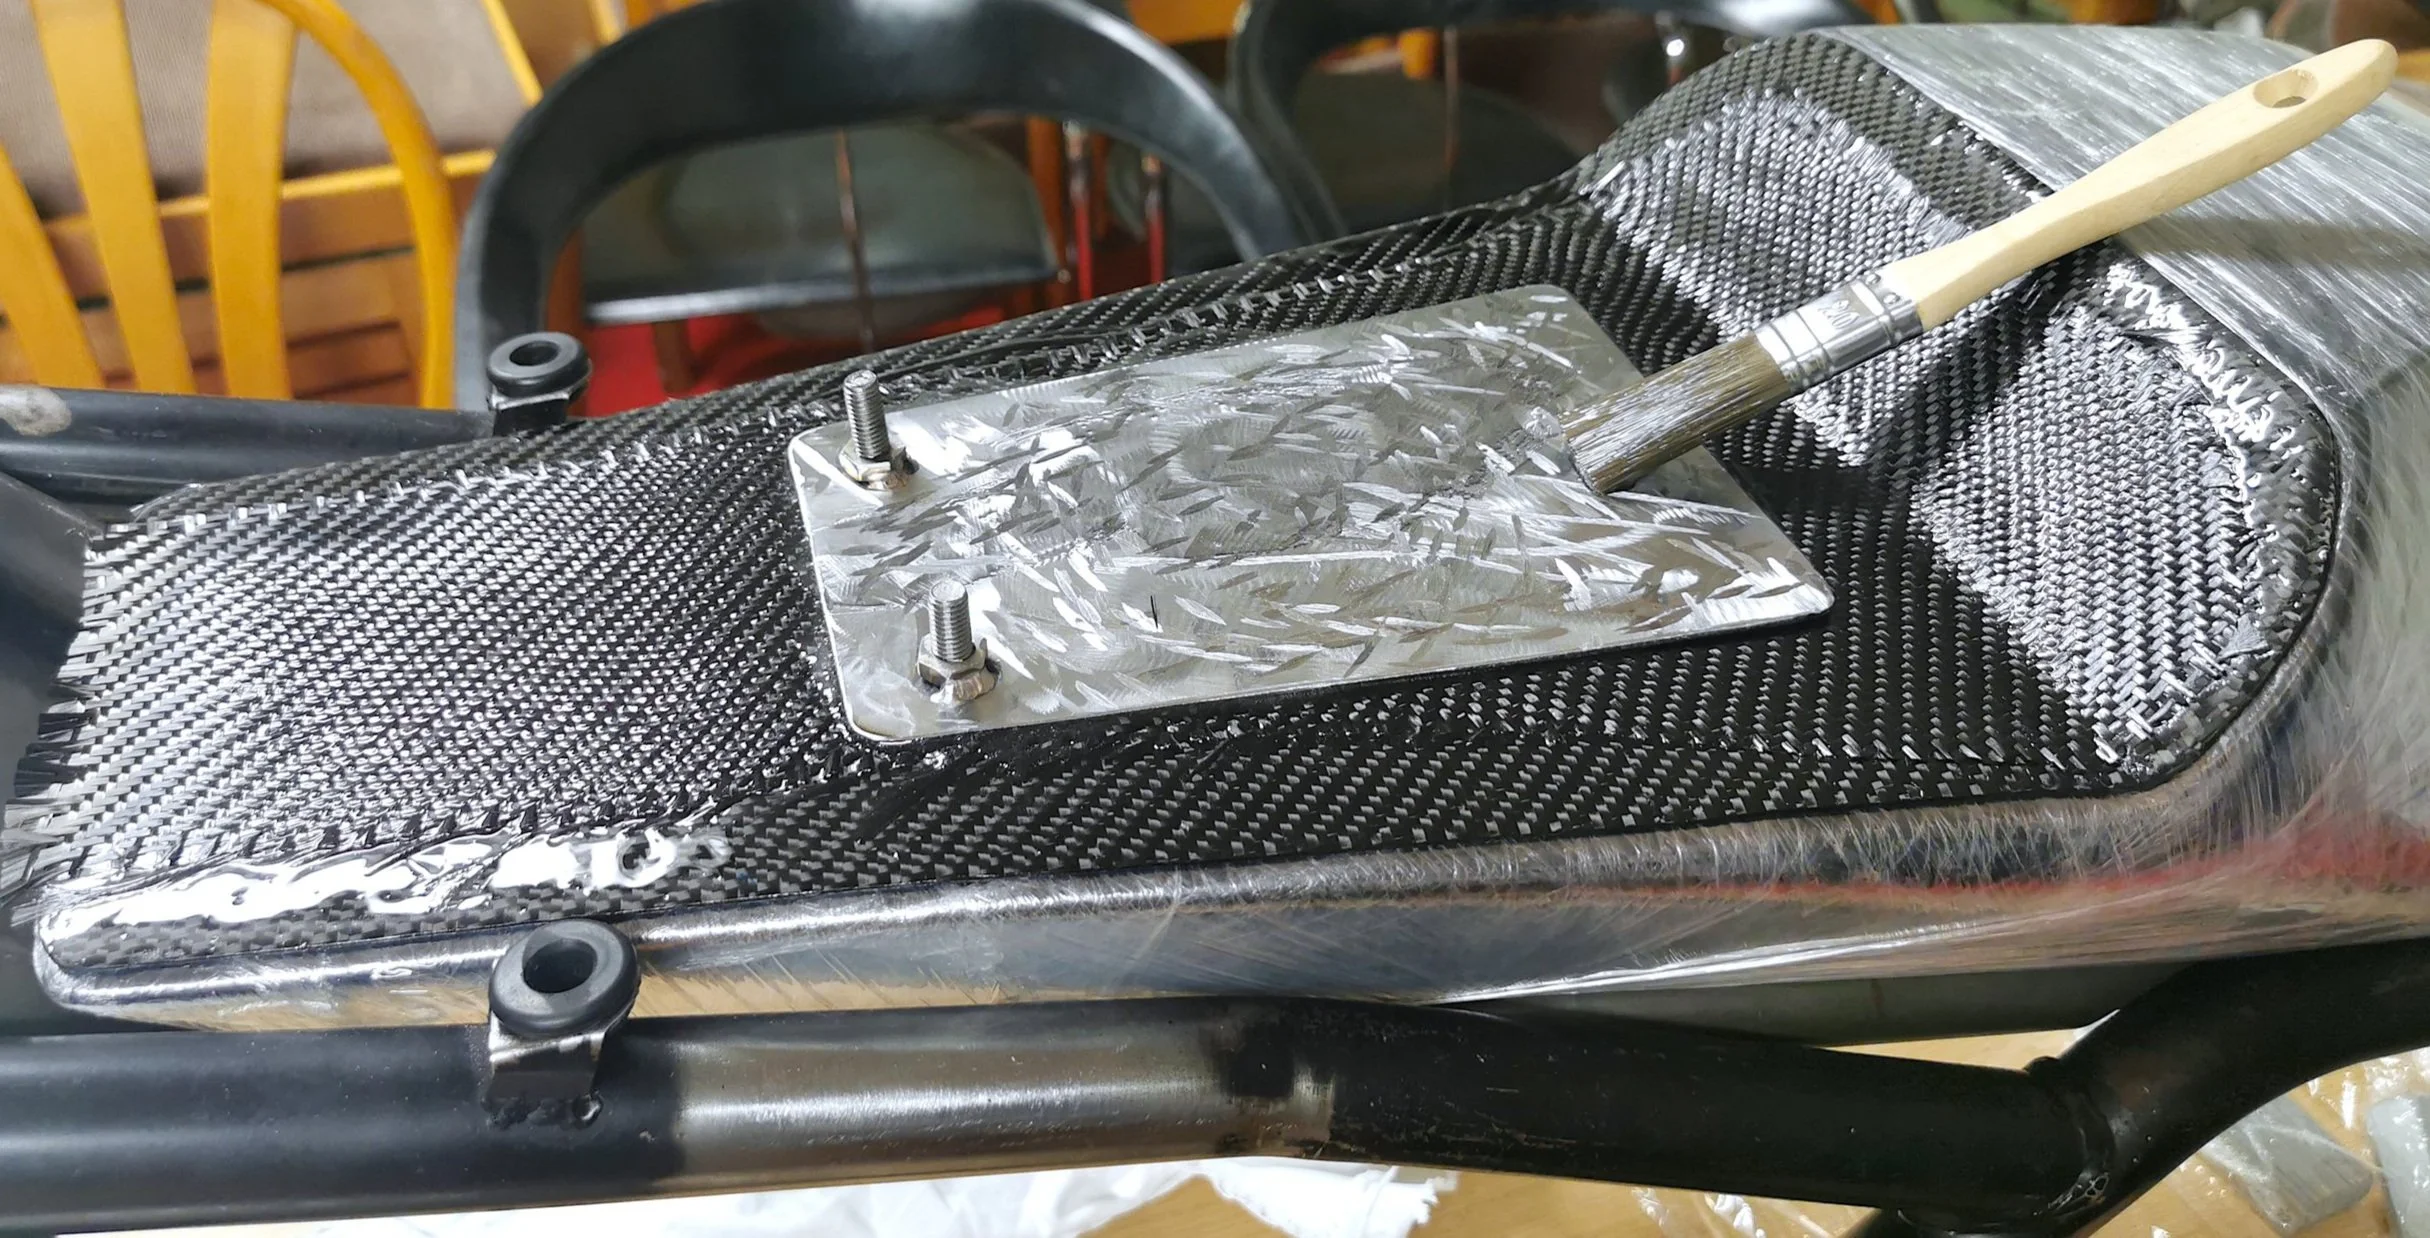
Creating a carbon seat plate:
I do so by wrapping the now finished carbon seat in household plastic foil and covering the seating area with epoxy and several layers of carbon fiber.
To ensure the seat won't fly off while driving, I embed a metal plate with 3 nuts and screws welded onto it into the carbon/epoxy layers.

11. Results (Breast Implant Cushion)
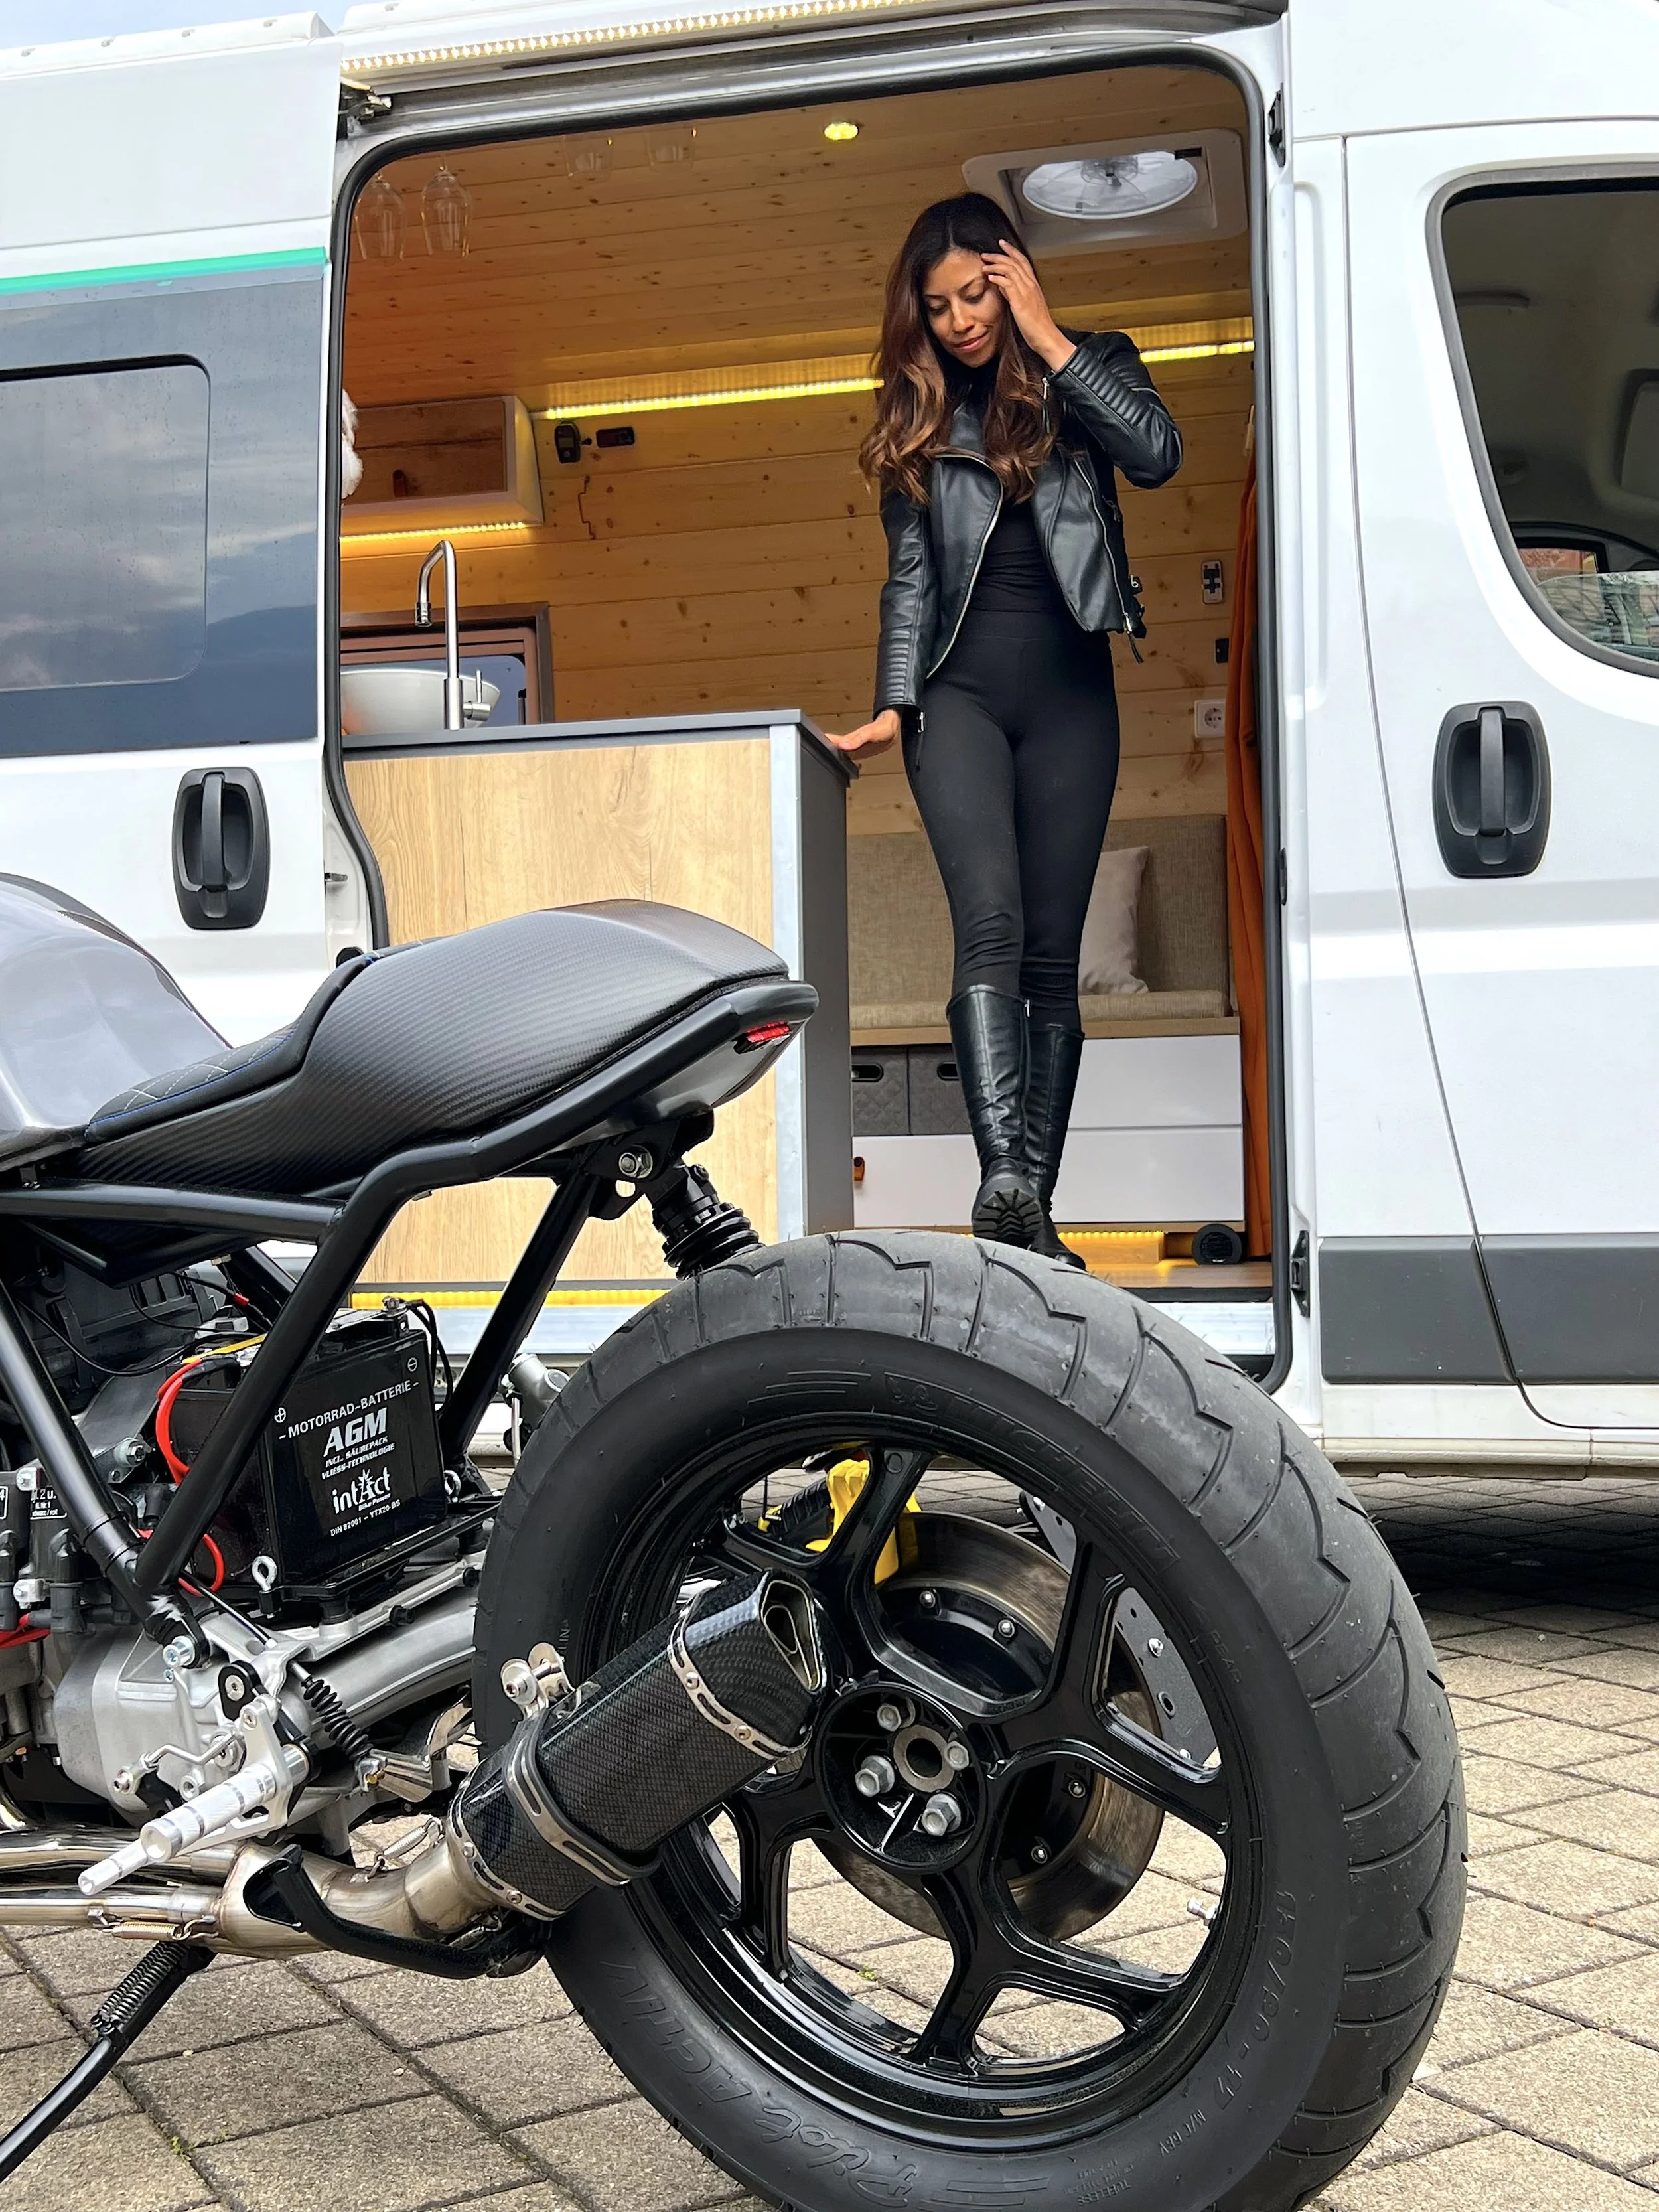
The carbon seat and the carbon seat plate are finished.
To complement the entire design, I wanted a seat cushion with a maximum thickness of 2cm. So, I drove to a nearby saddler in Weingarten (Sattlerei Missalek). She recommended a seat cushion made of breast implant material, explaining it offers great comfort with minimal thickness.
The idea of a breast implant cushion sounded very interesting, and I left the seat in her capable hands.
Now, the seat is complete and mounted, and the comfort is exceptional for its little material thickness.
Carbon skinning is a laborious job, but it's certainly worth the effort in the end. As a total amateur in shaping seats and working with carbon fiber, I found that working slowly and allowing enough time for the process, satisfactory results are indeed achievable.
You can find the entire building process on my YouTube Channel through the links below:
The camper in the background is a DIY Fiat Ducato conversion that I completed before starting on the BMW K100 cafe racer project. You can take a look at it by clicking here (link).
Thank you for having visited my page.
Lukas Kiemer
Bonus: From Customer to Featured Creator
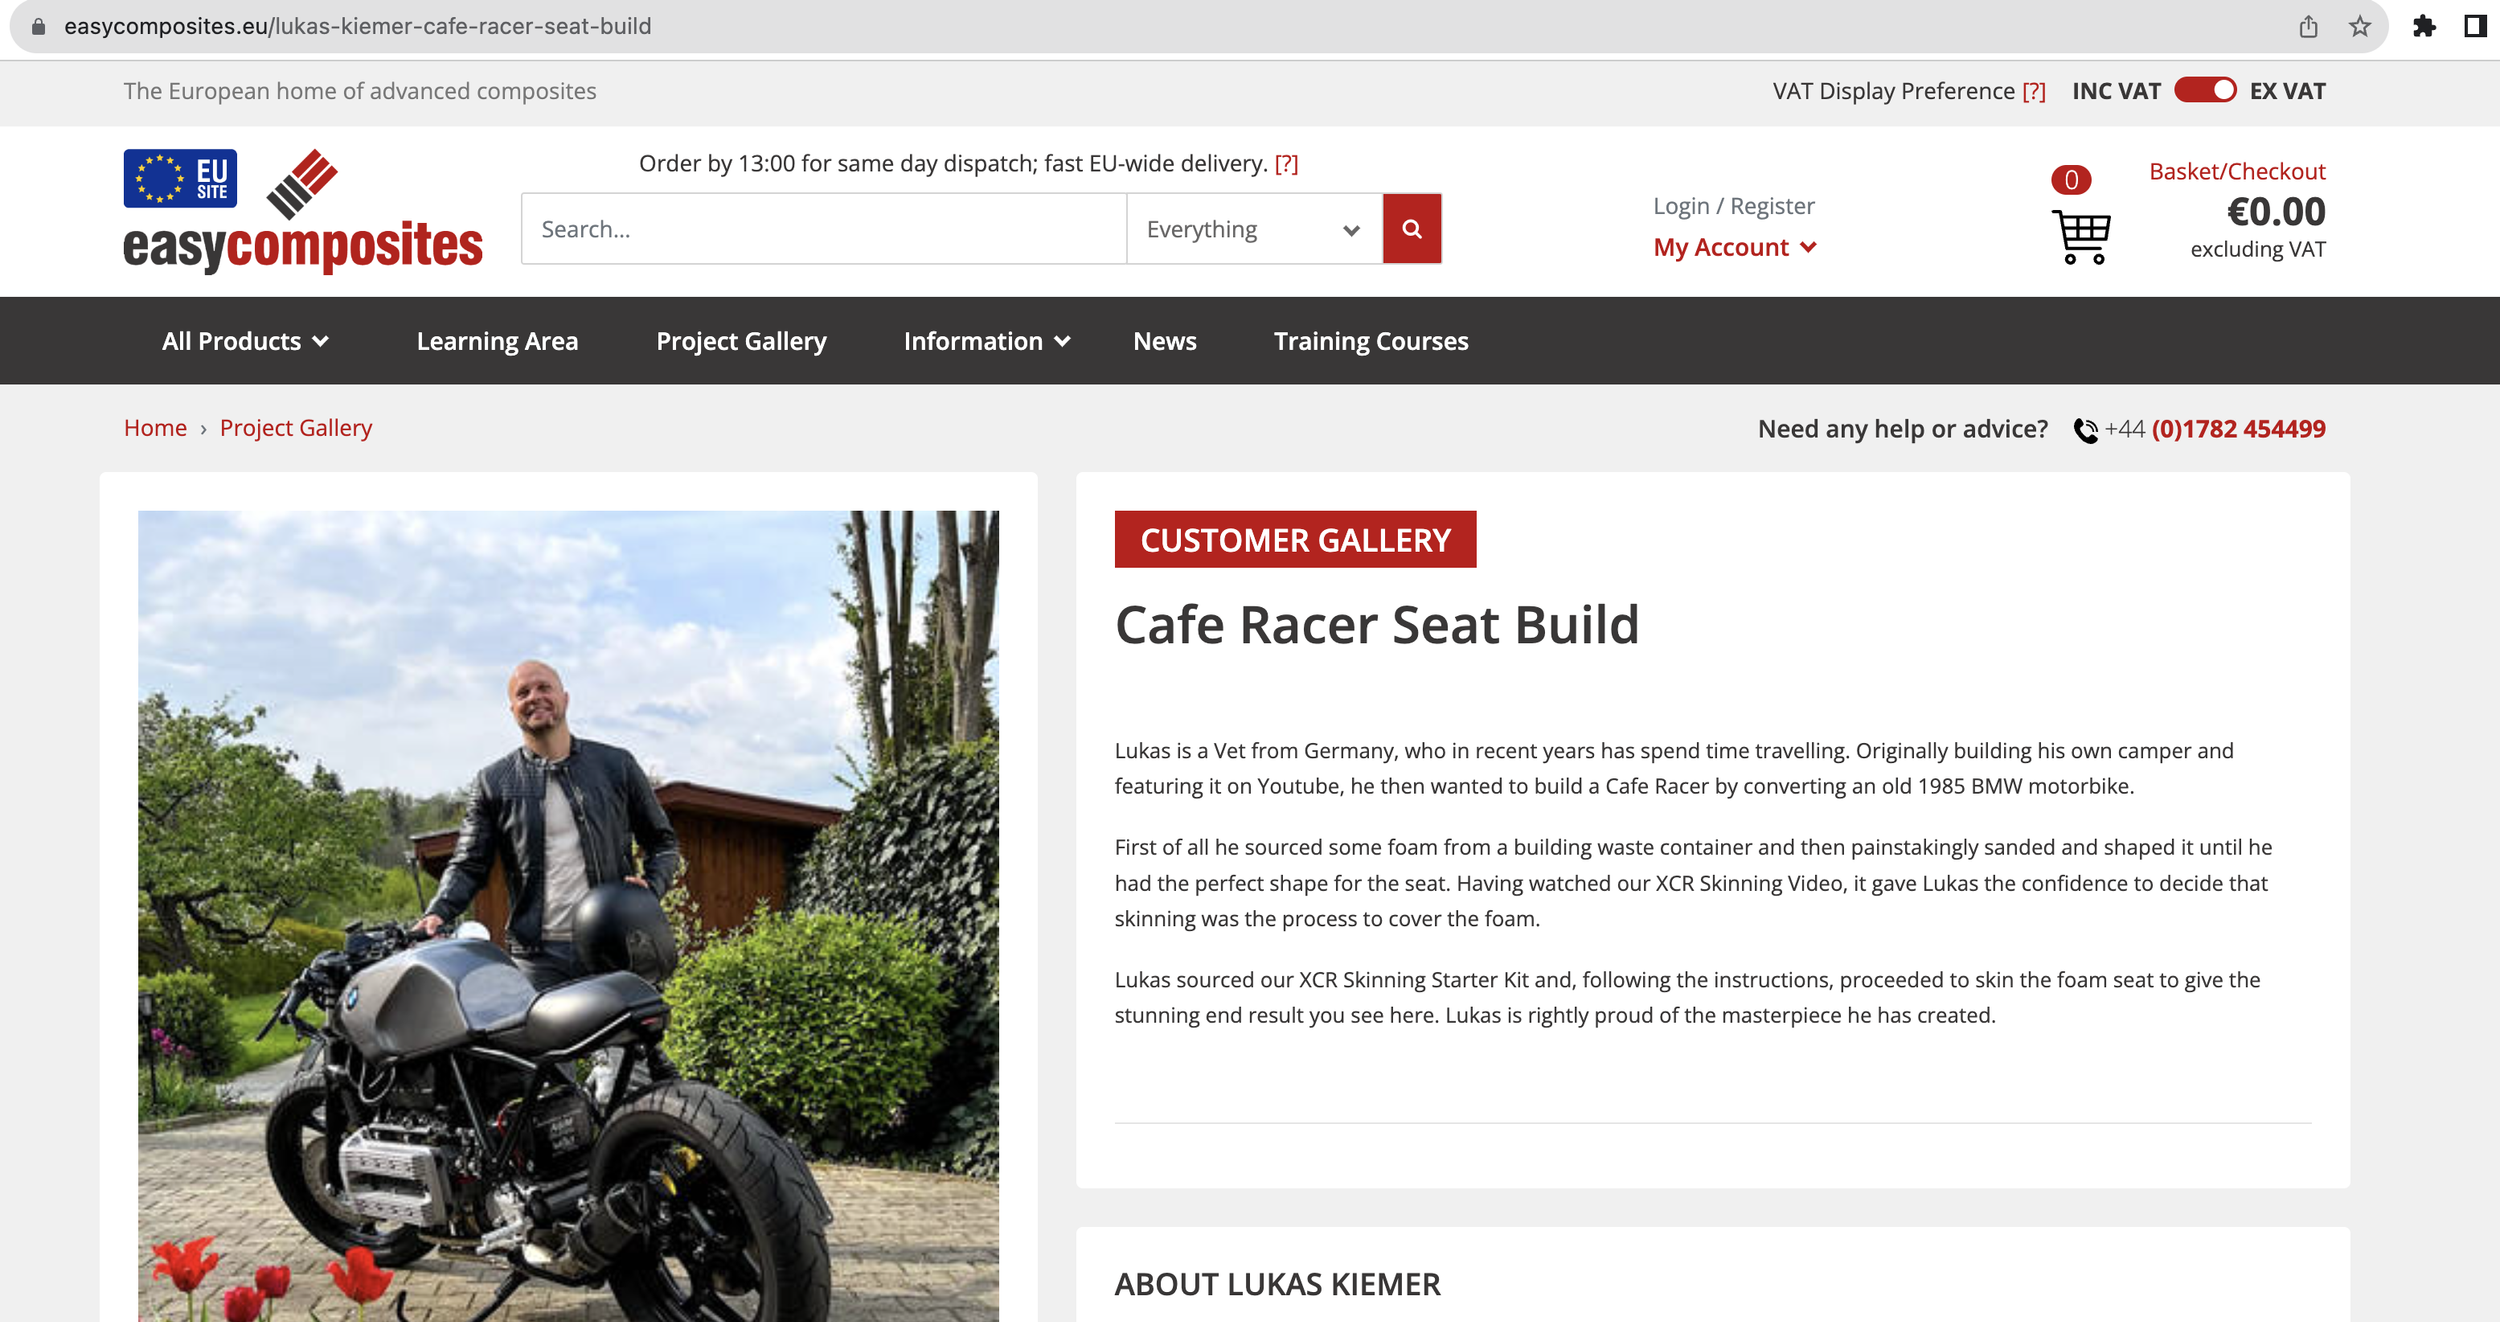
I want to express my gratitude to Easy Composites, the company from which I purchased carbon skinning materials. After completing my bike, they were kind enough to feature my project in their project gallery. This gesture means a lot to me, and I want to extend my thanks again to Easy Composites.
Click here (click) to view the project gallery at Easy Composites.
Note: Not a single product was ever sponsored or provided to me by Easy Composites. This article is solely based on my experience as a customer.