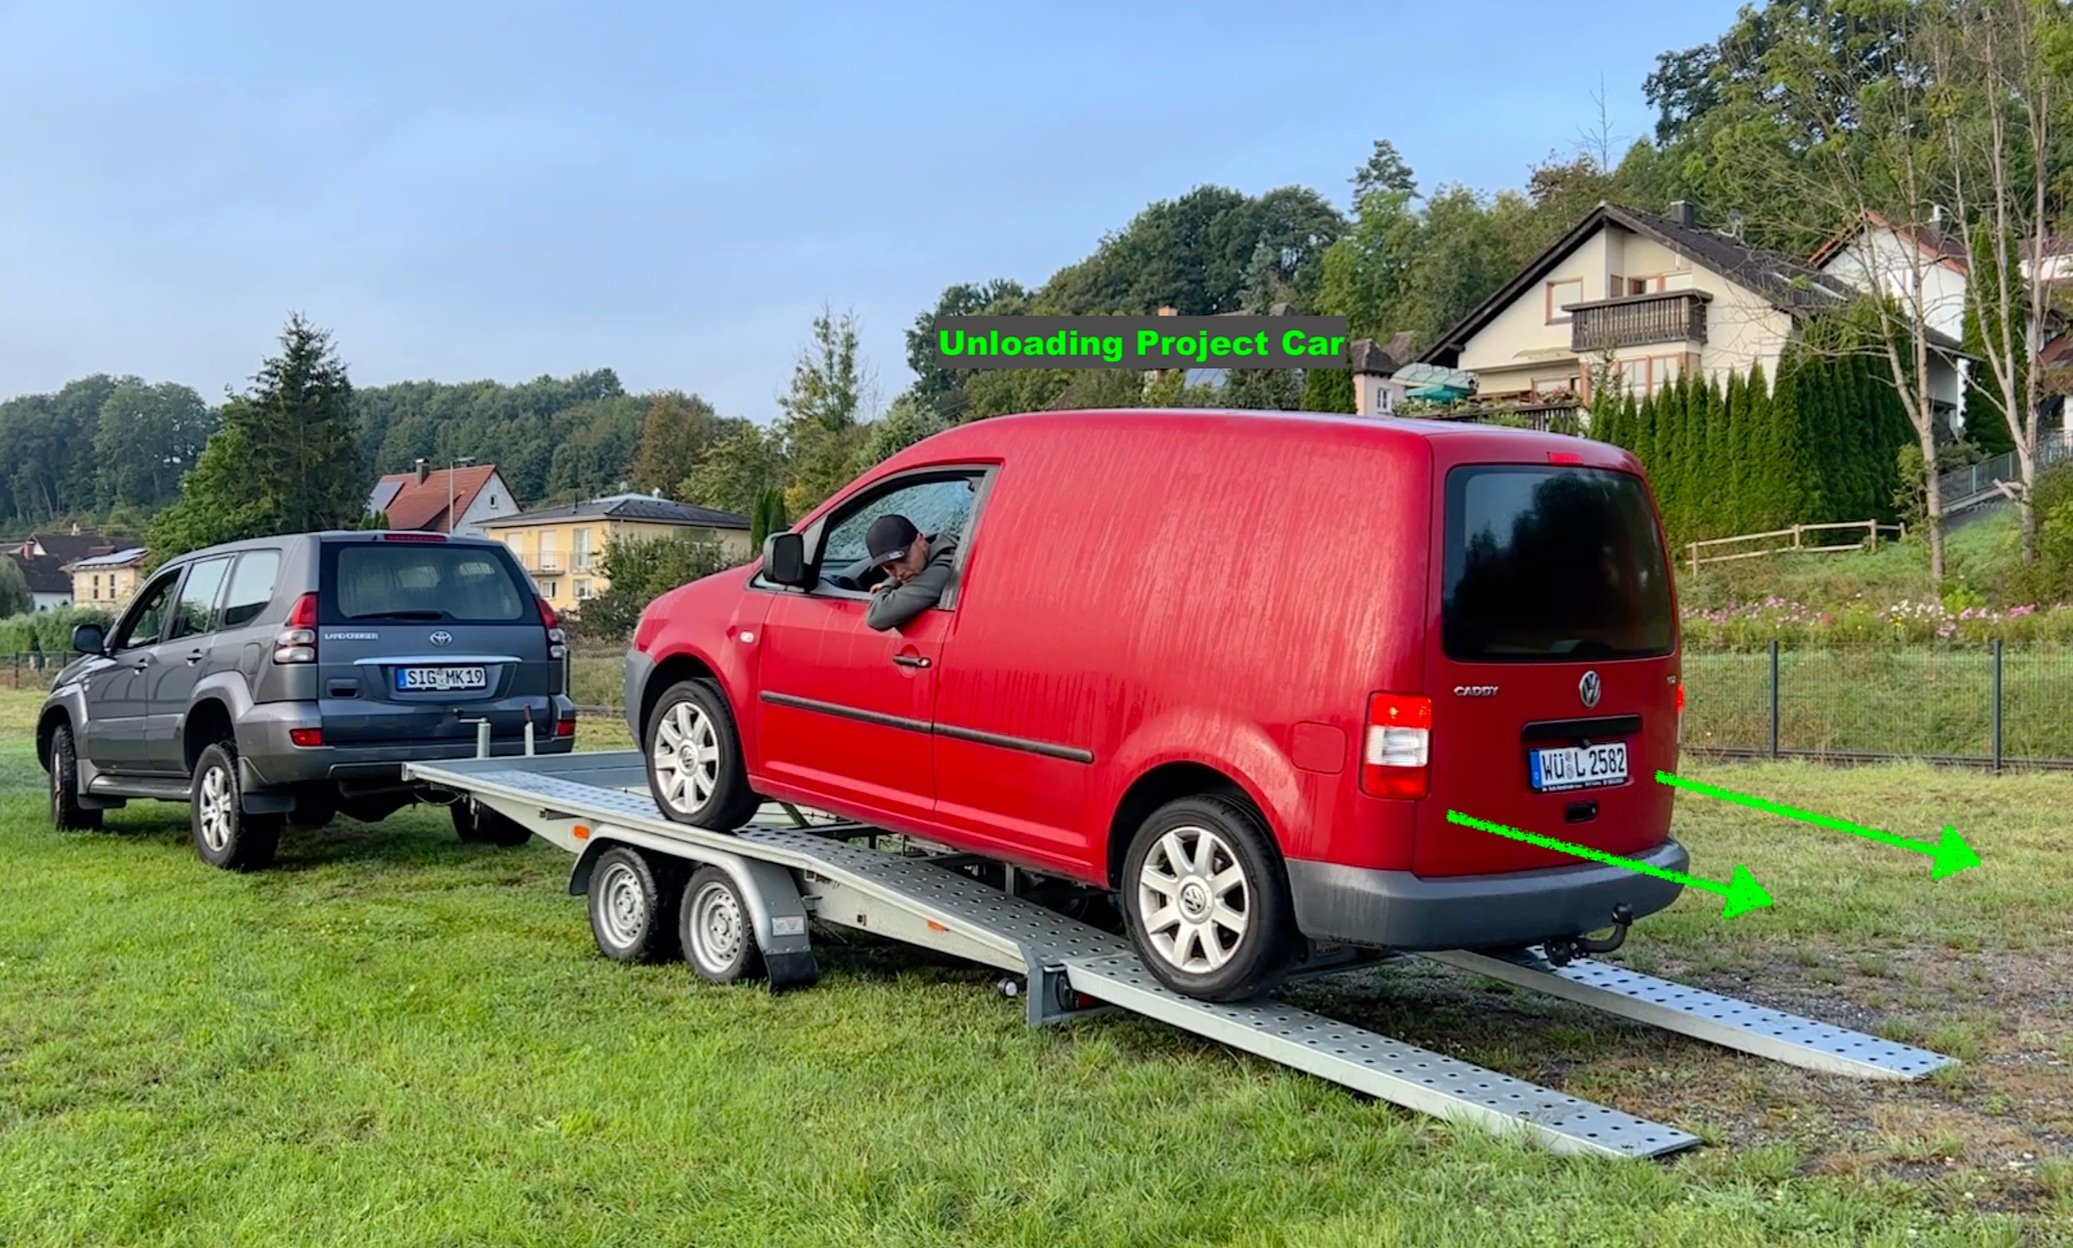
Van Conversion (VW Caddy 3)
About the project
Build Your Own Mini-Camper: A Comprehensive Guide
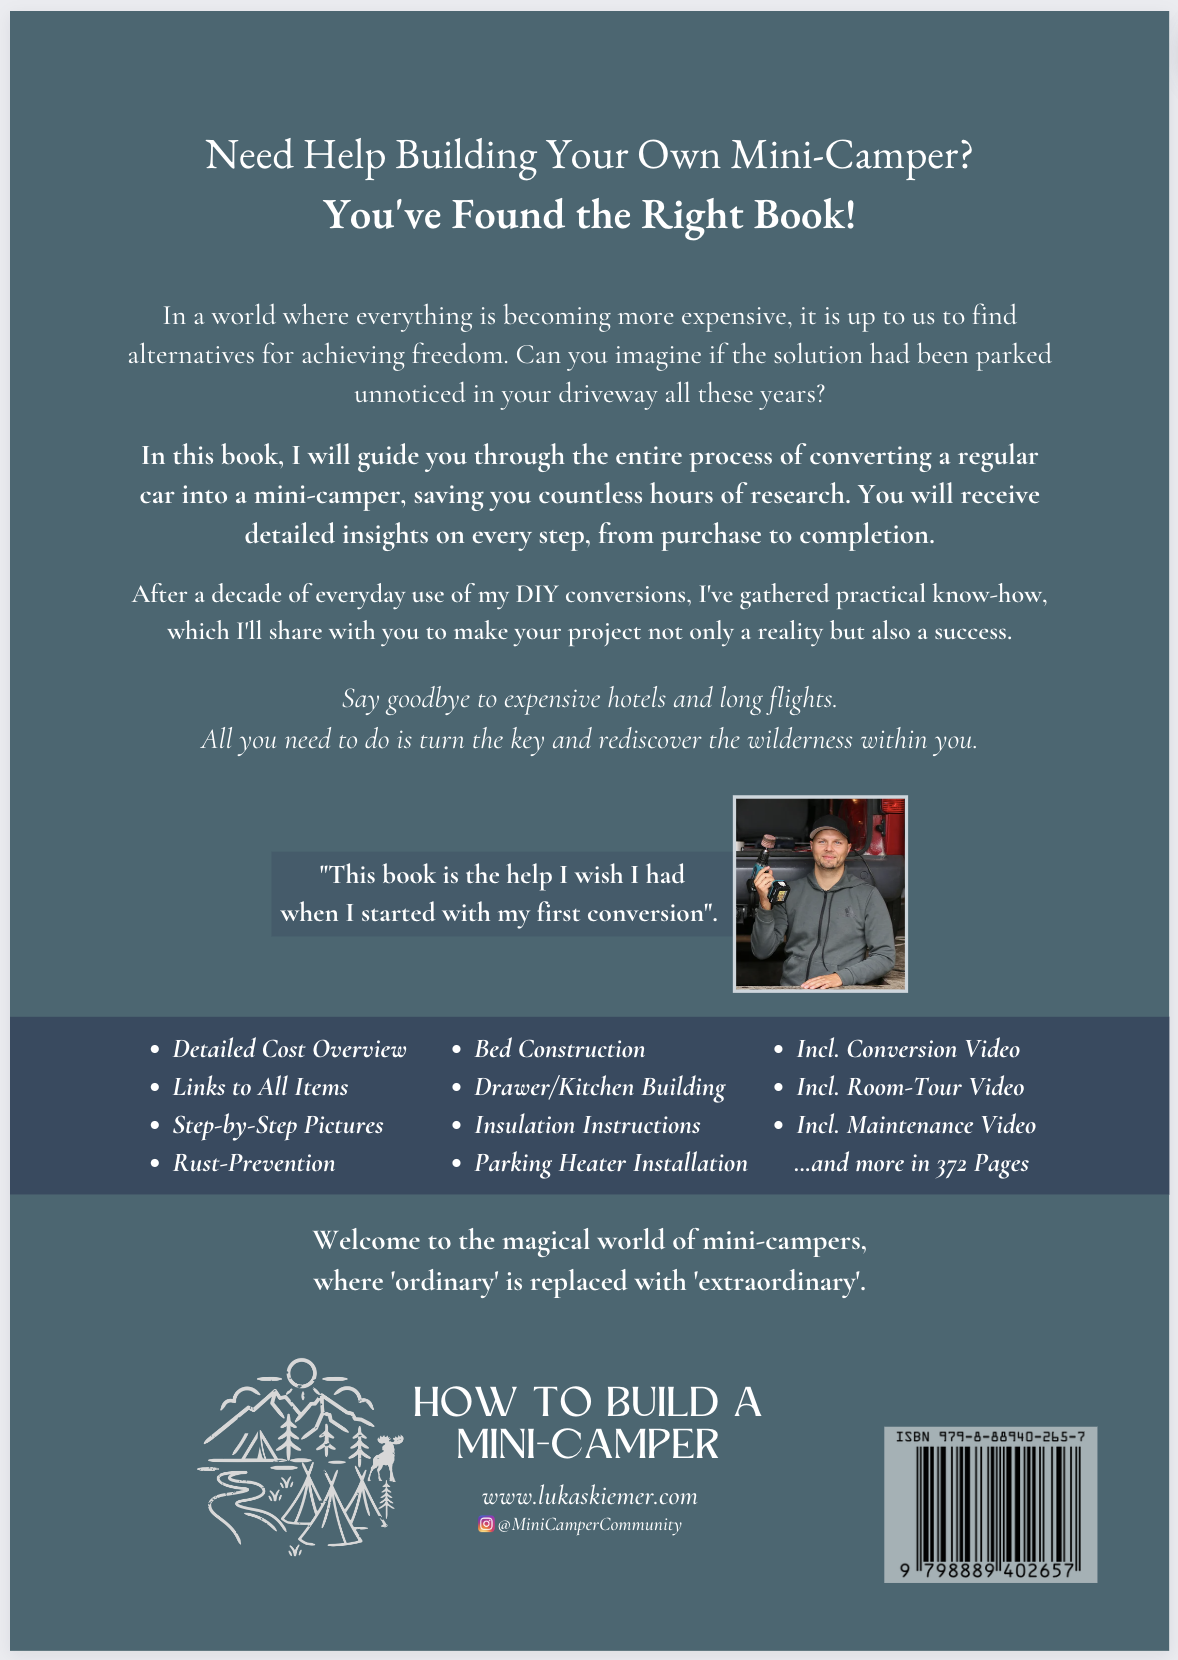
Before giving a short overview of the mini-camper conversion, I would like to offer you help in bringing your own conversion to life. I created an easy-to-follow step-by-step guide (click) making it possible for you to apply it to your own mini-camper project. The aim of my conversion book is to save you countless hours of research and to make your building experience so much easier.
The "How to Build a Mini-Camper" conversion guide.
Available here (click)
PS: Discover more mini-camper building ideas on the '@MiniCamperCommunity' Instagram page (click). Hopefully, we get to see your progress there too!
I wish you all the best with your own conversion and truly hope that this page, along with the book, will be of great help.
Happy Building
Lukas Kiemer
About the VW Caddy
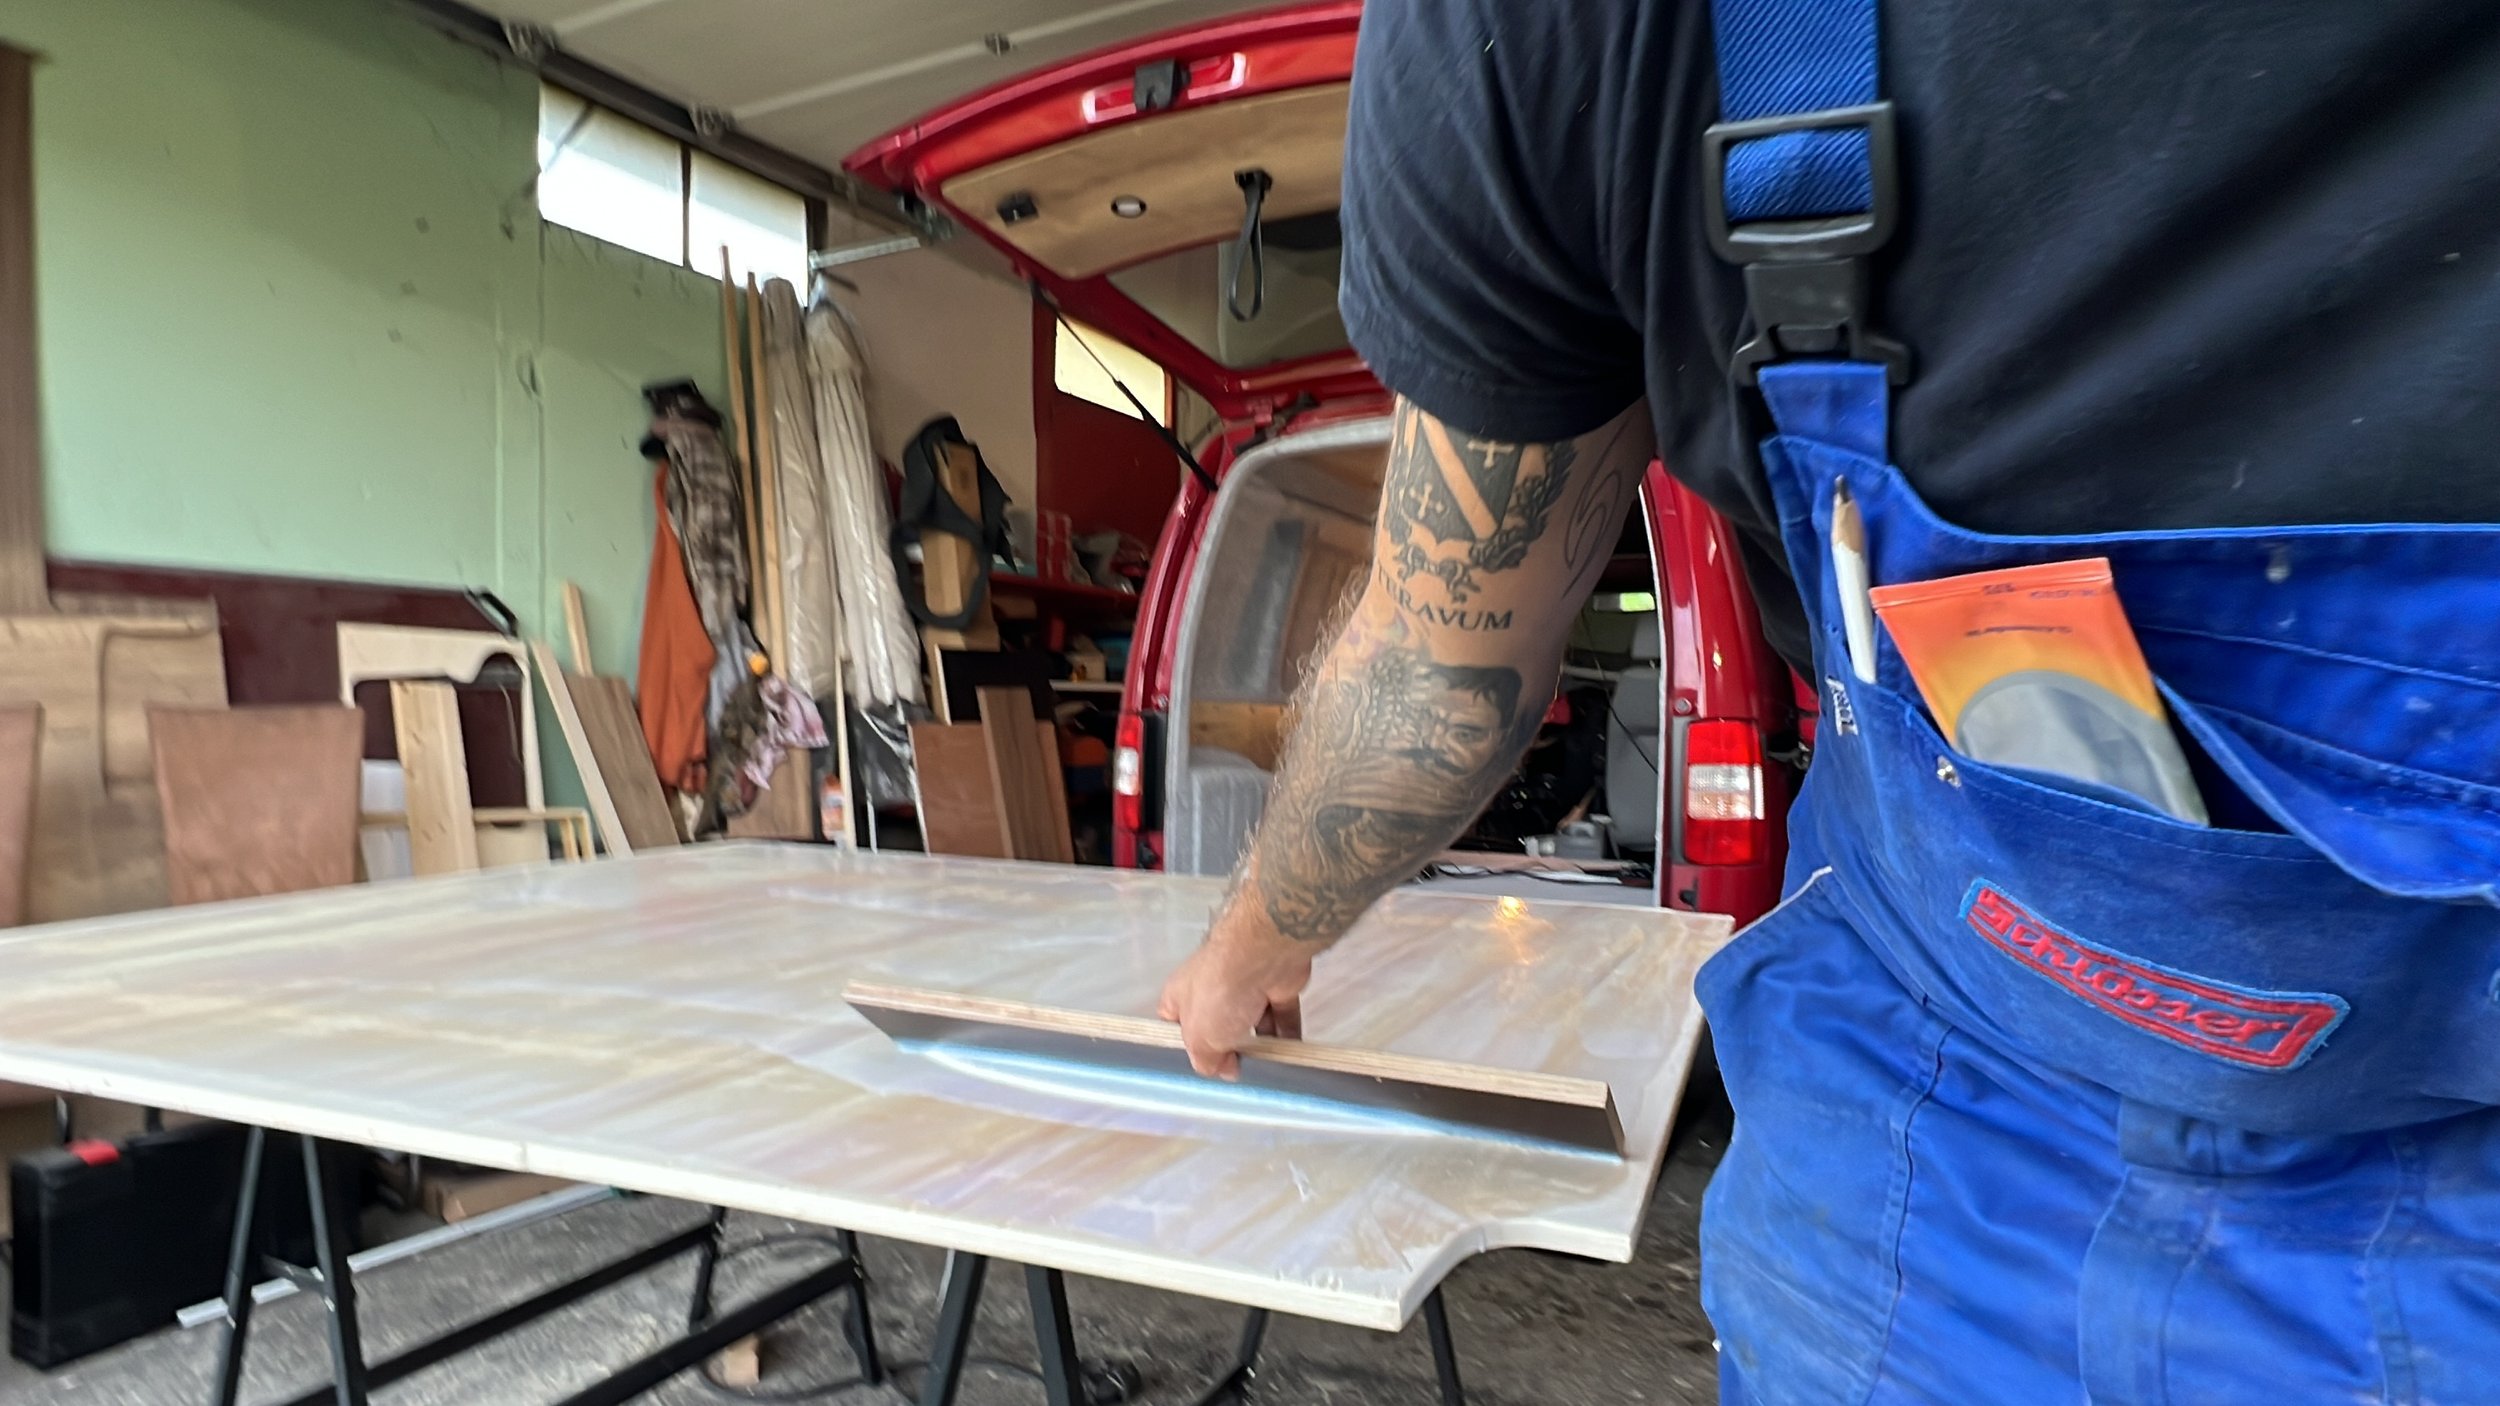
(The items used in this build you can find by clicking here)
Why the VW Caddy might be the right camper for most of us right now:
Cheap to buy
The VW Caddy 3 (also known as type 2k) was produced from 2003-2015. You will be able to find a VW Caddy 3 in good condition between 2000-12000€ any day of the week!
Rising fuel prices
The VW Caddy 3 uses only between 4.7l-6l of fuel per 100km. Compensating the rising fuel prices compared to bigger vans/campers.
Rising environmental concerns
You can only buy the Caddy 3 second-hand. Toyota brought out a study which stated that around 28% of a cars lifetime Co2 emissions are solely from its production (link), therefore buying a car secondhand is a good start. On top the fuel consumption is pretty low, ranging from 4.7l-6l.
Expenses rising in a non proportional relationship to one's income
For most of us life is getting more expensive in general but this doesn't mean we have to give up on the dream of owning a camper and making memories for a lifetime. A VW Caddy 3 might be just the right fit for most of us right now!
The affordability of the car, the low fuel consumption and the fairly cheap and easily source-able spare parts make this car a very attractive camper base. With a smart camper conversion the car can be used as a daily commuter and a fully-equipped camper at the same time.
My Recommendation:
The VW Caddy 3 might not give you the same comfort and luxury as a big camper van but it gives you from everything a little bit. And if you are willing to compensate you might be surprised about this wolf in sheep's clothing. For guidance on finding the right second-hand car, check out the chapters “Choosing the Ideal Base Vehicle” and “Buying a Second-Hand Car: Tips for a Successful Purchase” in the conversion book (click).
2. First Thoughts On A Mini Camper
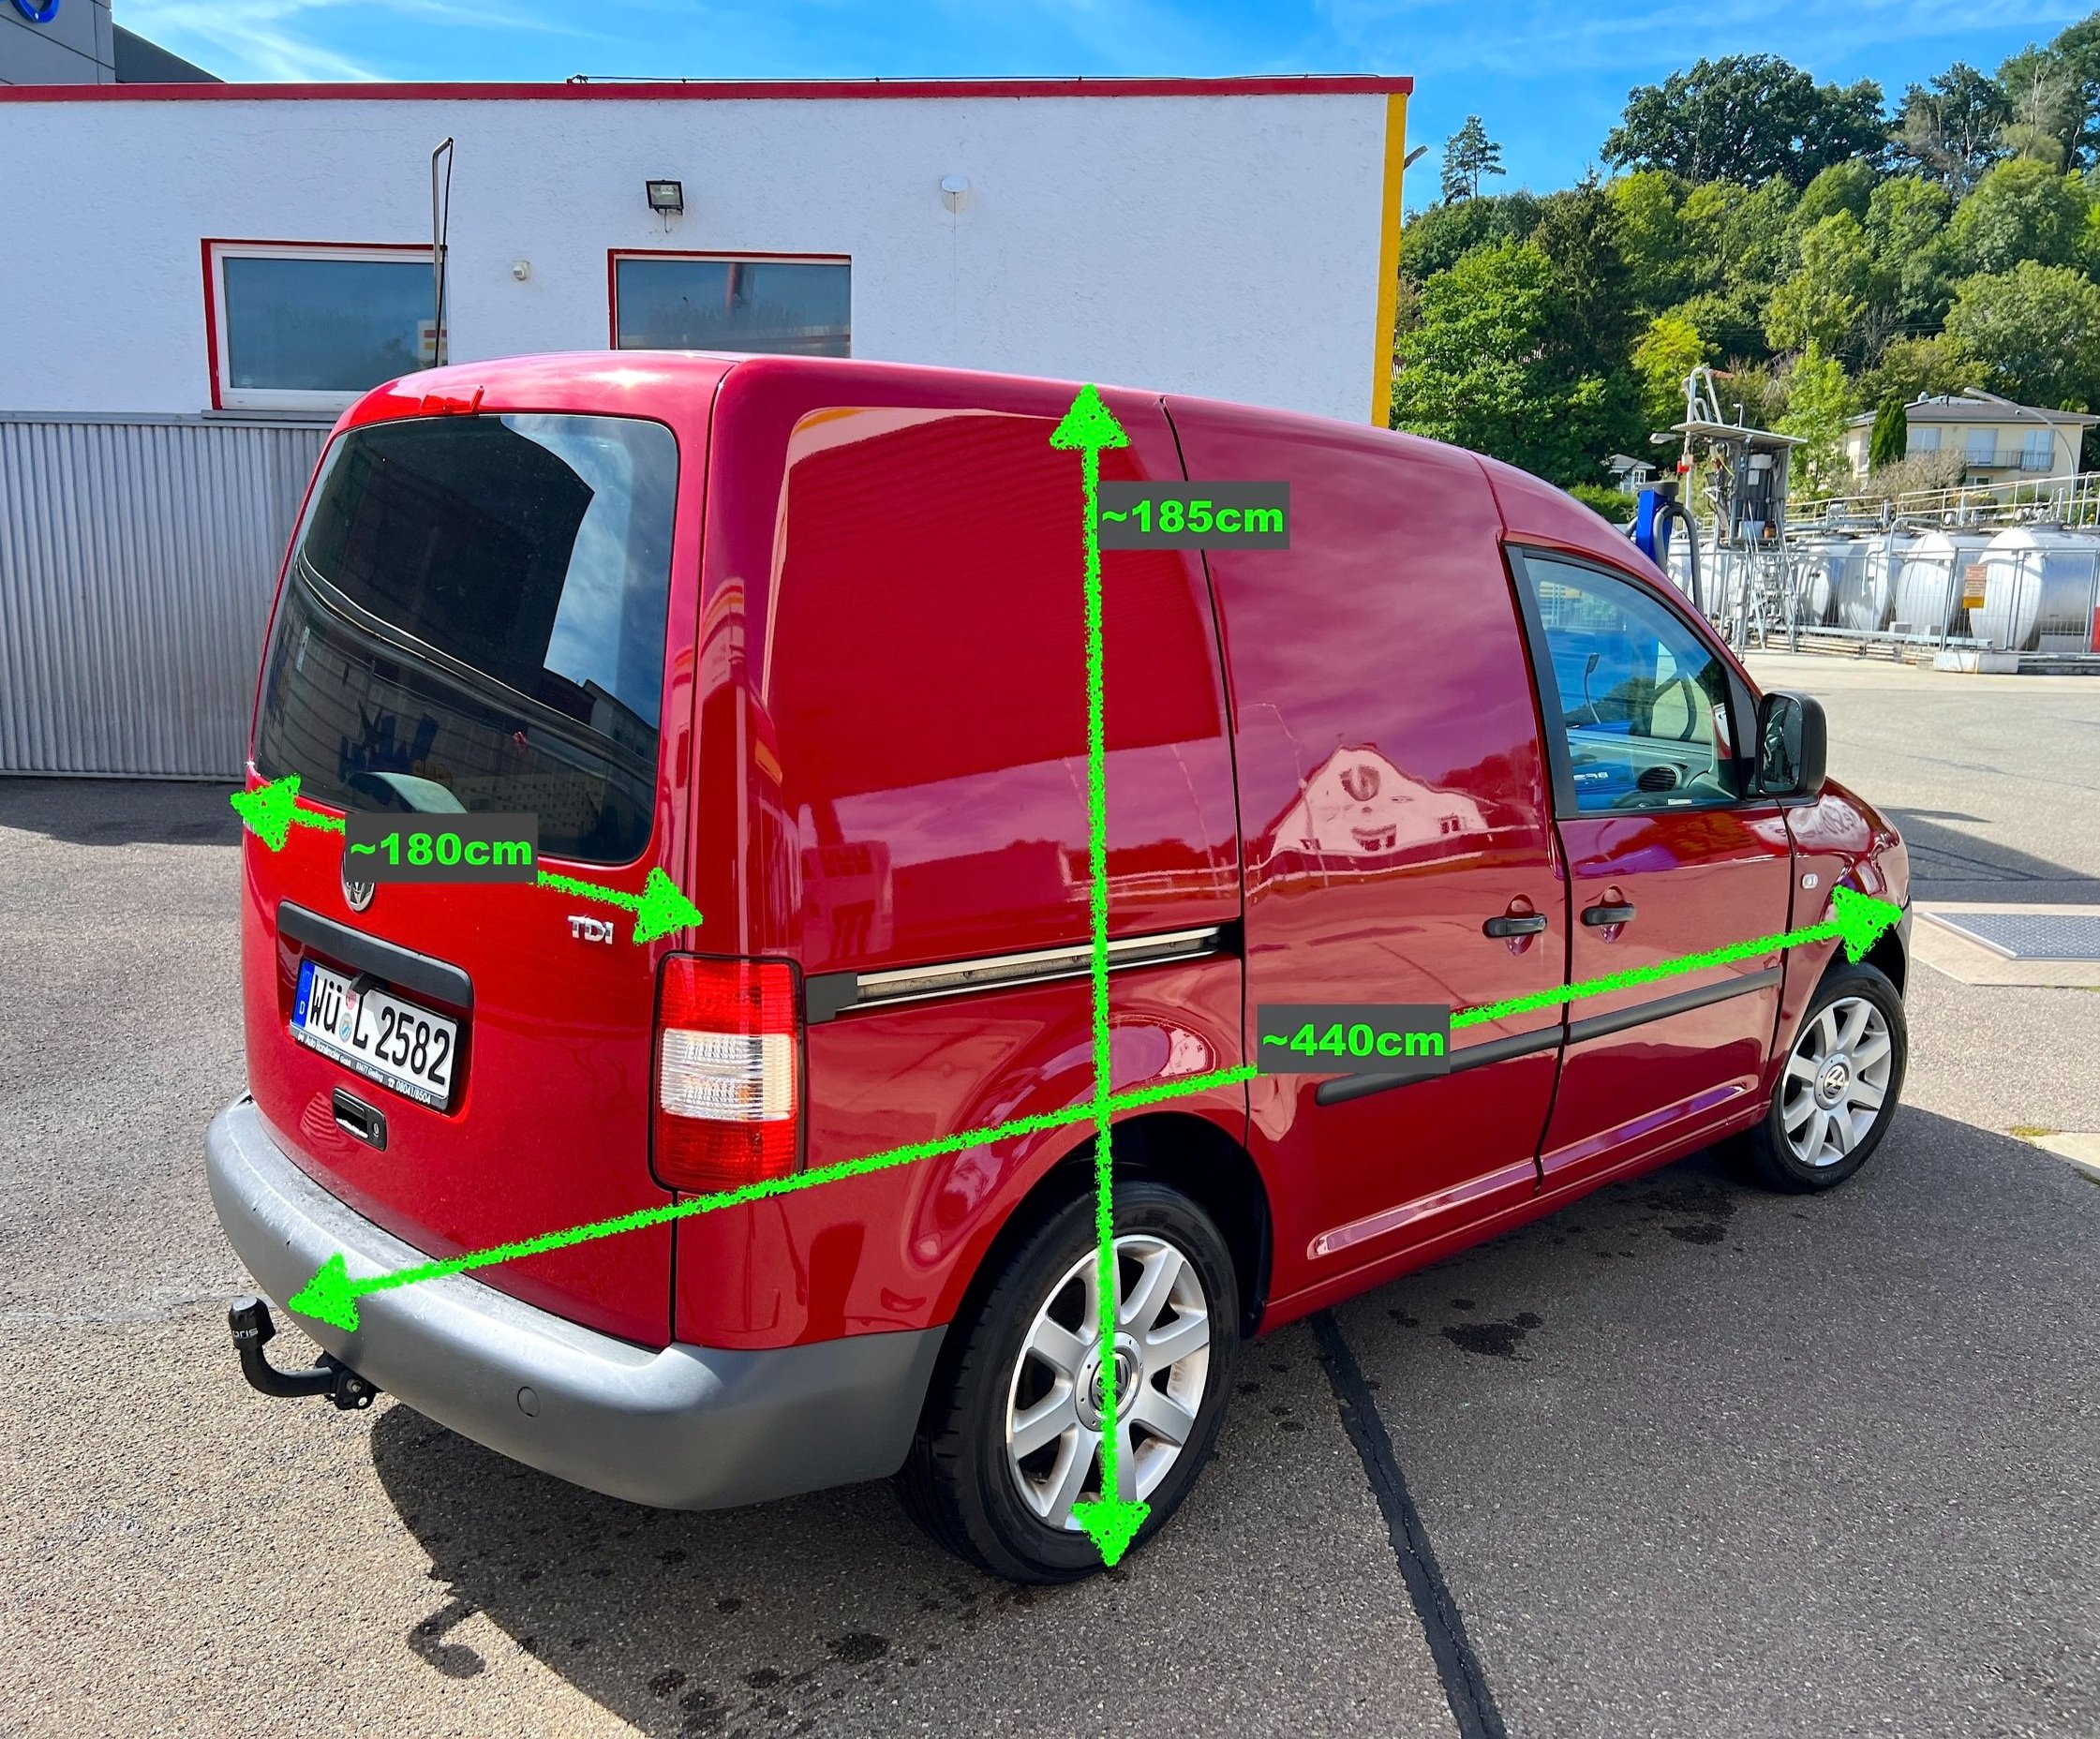
This VW Caddy (L1/H1) has the following loading dimensions:
Length (Exterior/Interior): ∼4,4m/∼1,9m
Width (Exterior/Interior): ∼1,8m/∼1,5m
Height (Exterior/Interior): ∼1,85m/∼1,3m
This seems uncomfortably small, right? I hope you're not claustrophobic, meaning scared of small spaces. But jokes aside, don’t let the compact size discourage you.
You might remember the stories of our grandparents: Camping was done with a group of friends, some old bicycles, a backpack full of goods, and a packed tent around the bike rack. This is the moment where we should remember what camping originally stood for:
Making unforgettable memories with loved ones
Living and connecting with the environment
Certain activities, such as cooking, brushing teeth, and going to the toilet, required some effort
From the viewpoint of previous generations, this 105 horsepower red mini-camper, complete with a 2kW heater, a bed, lithium-powered electrics, a shower, a portable toilet, LED lighting, and more, would be considered the epitome of luxurious travel. Moreover, it comfortably accommodates two people.
You can find numerous helpful tips and instructions for making the most of small spaces in the conversion guide (click).
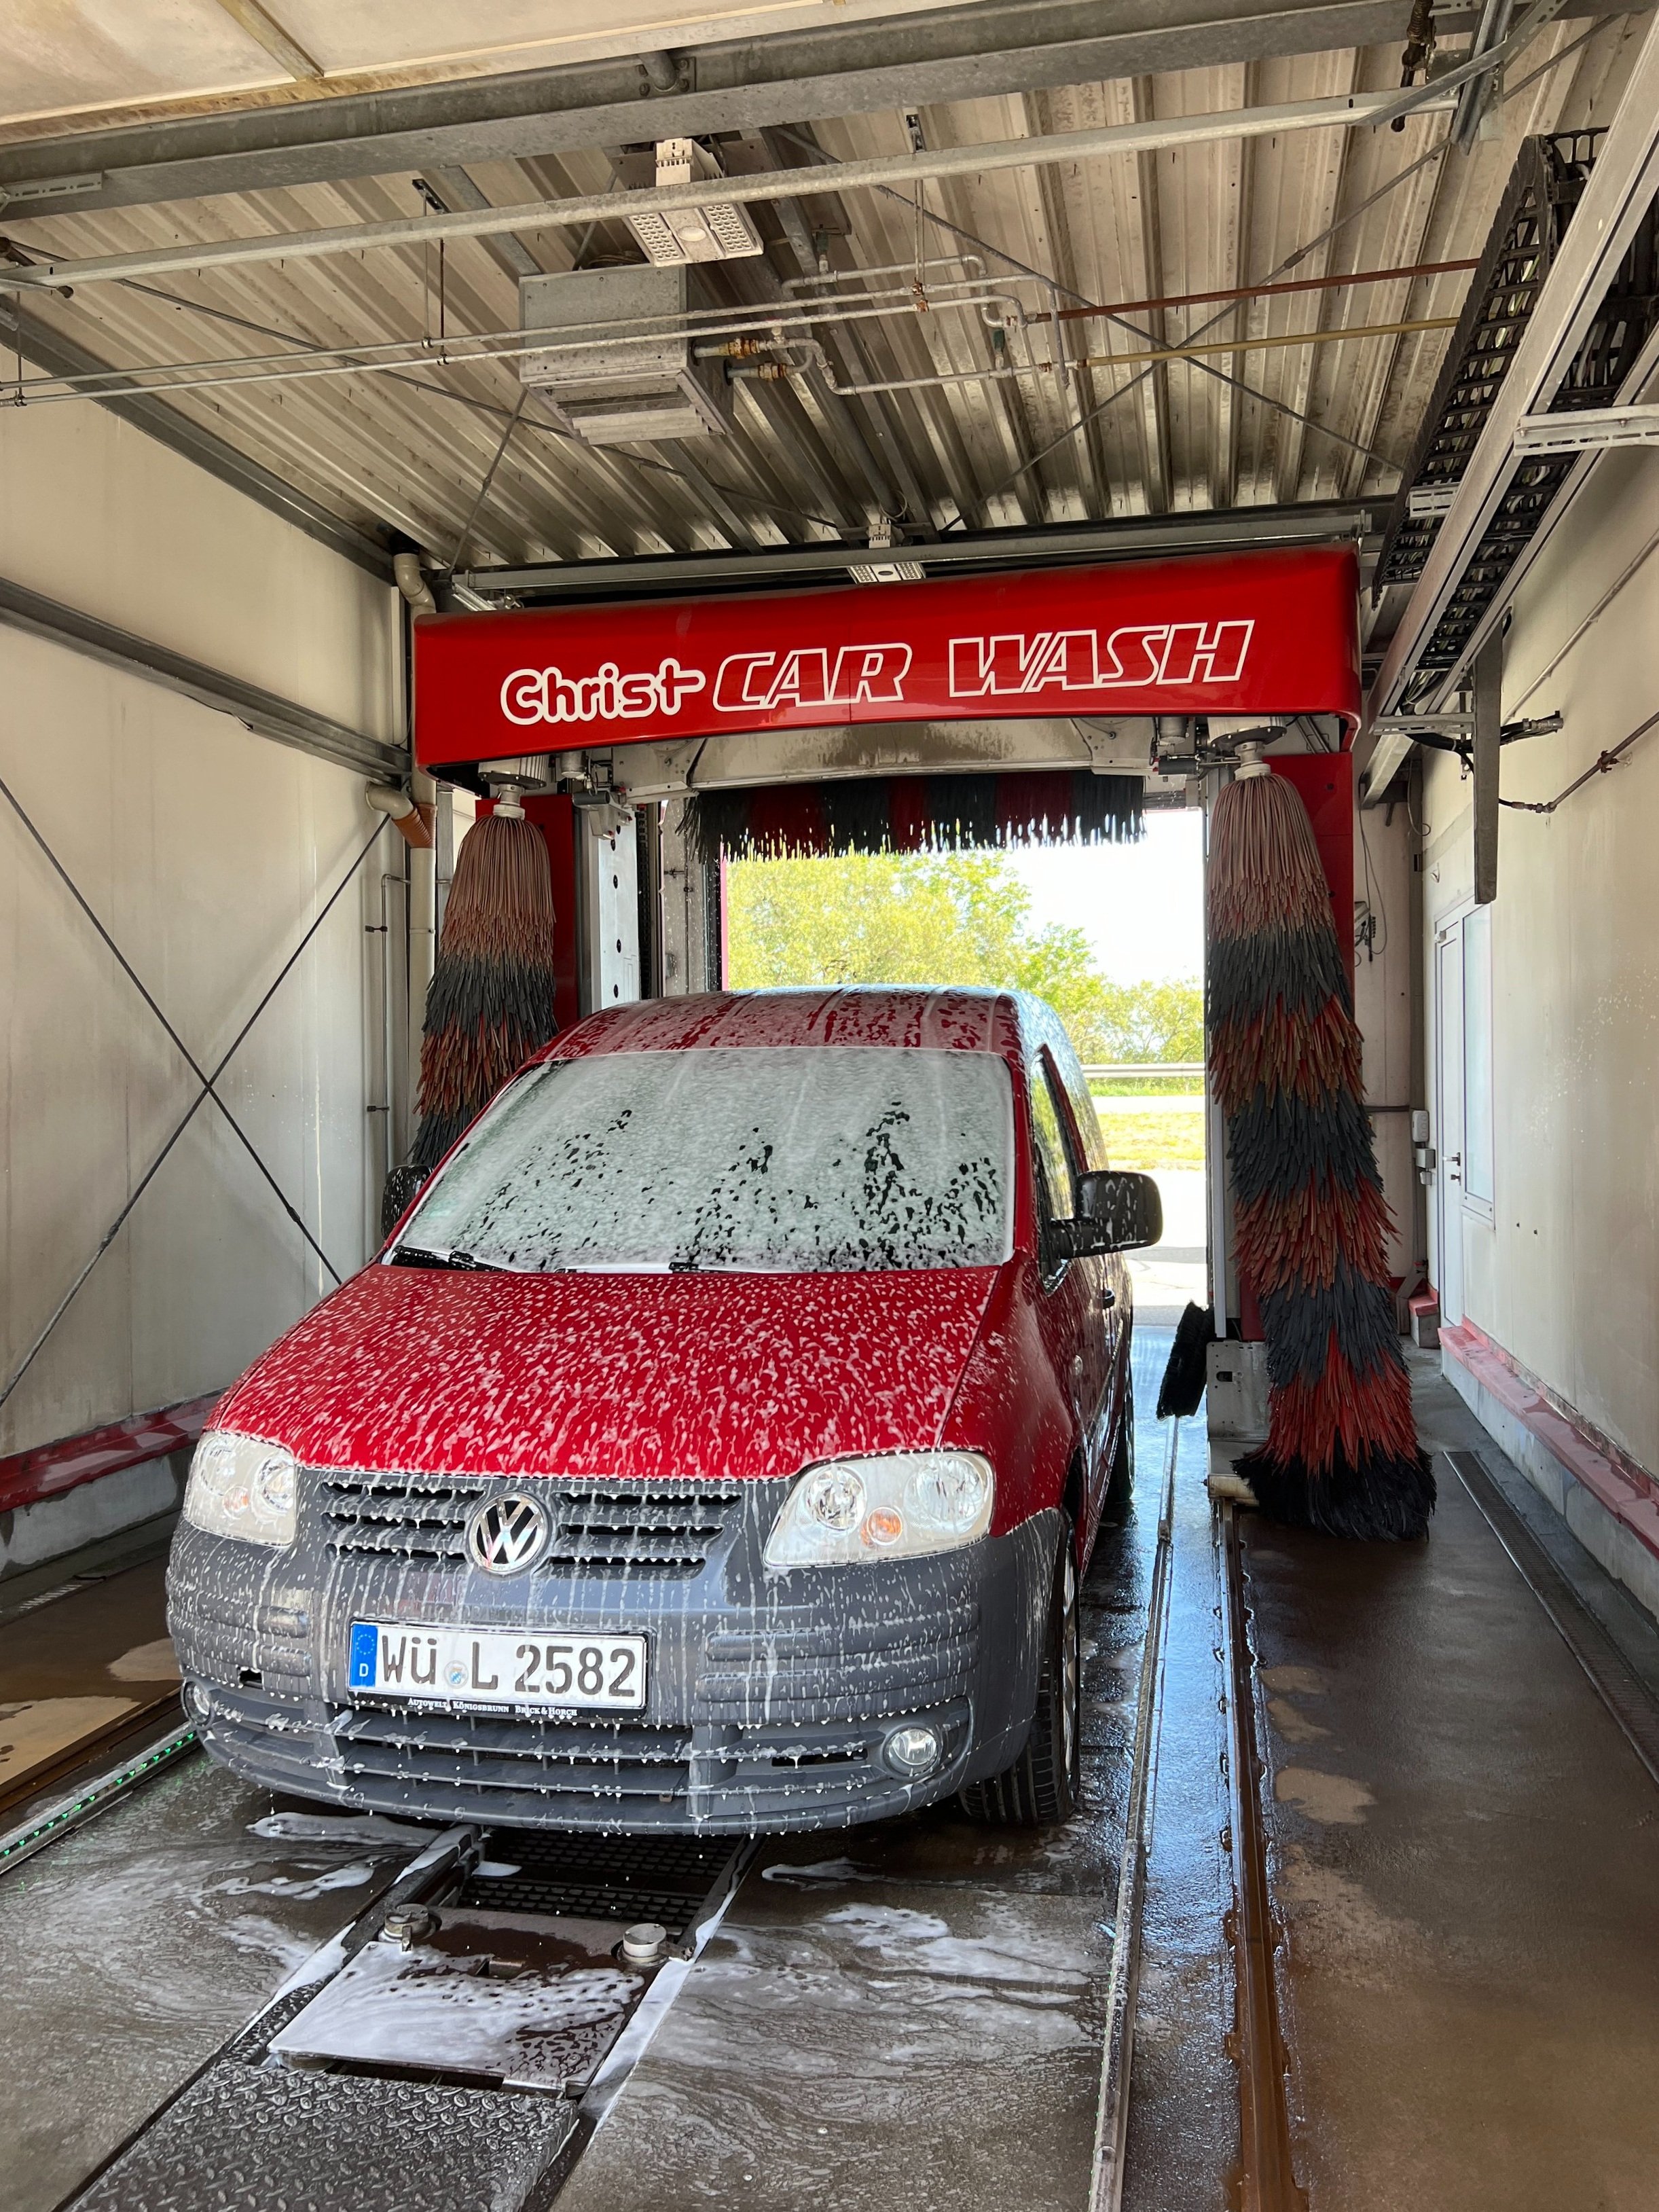
3a. Wash & Rust-Prevention
A wash can't be that important, right?
It couldn't be further from the truth. Now is the best time for a thorough wash before the conversion begins, and that is for three significant reasons:
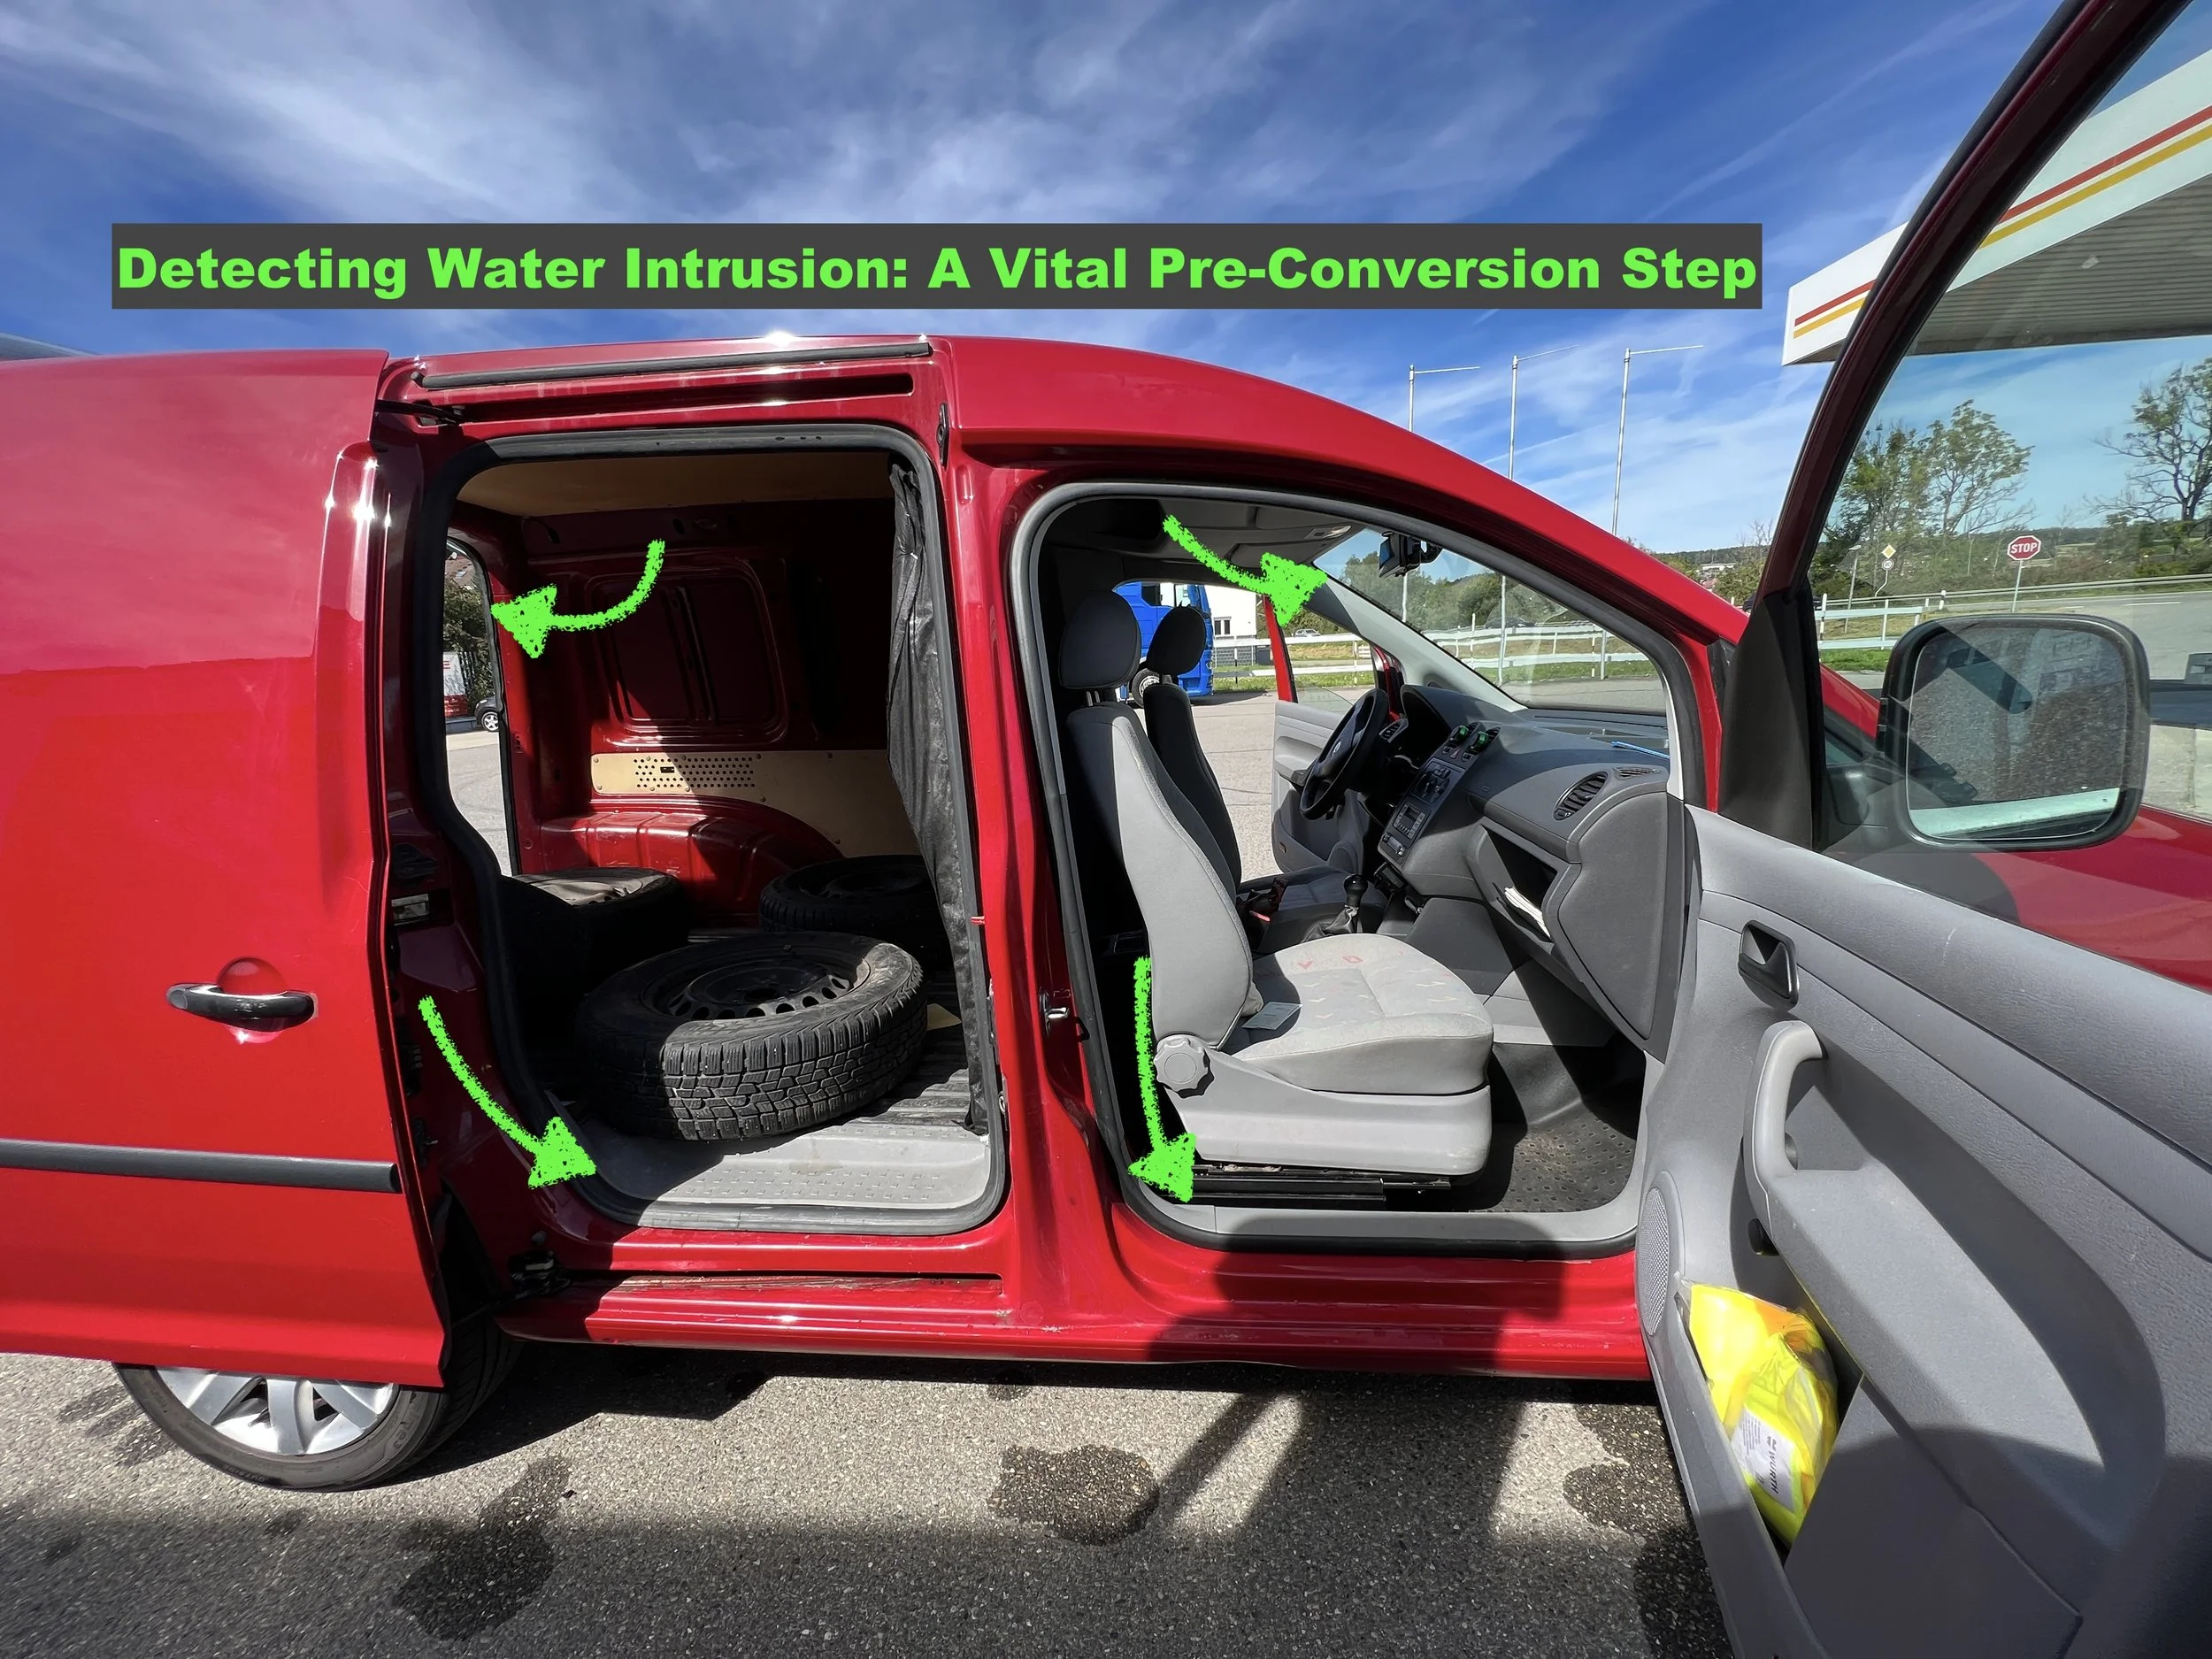
Spot leaks: Now, before any camper furniture is installed inside the car, it is still very easy to fix or repair certain leaks if necessary.
Reveal hidden rust spots and scratches: After the wash, it will be much easier to find and address overlooked scratches that can become costly issues in the long run. Again, if you need to replace an entire piece of body metal, having an empty vehicle will allow the body repair shop to repair it much quicker, leaving you with more in your conversion budget.
Clearing the underbody and cavities from years of accumulated grime, dirt, and salt using the handheld water pressure pistol. Don't forget to remove some of the rubber plugs from the underbody and also blow through the cavities. This allows for proper cavity sealing once everything is dry (see next step).
My Recommendation:
A very thorough wash before the conversion starts is an essential part of ensuring the longevity of your project. Don't skip this step; combining such a wash with the upcoming rust prevention treatment is truly a wise investment for the long-term value of your vehicle. More in depth in the conversion book (click).
3b. Wash & Rust-Prevention Continuation…
There's one thing I always recommend when buying a vehicle, whether it's just a regular car or a future camper:
An Anticorrosion treatment.
Investing around half a day in anticorrosion treatment can make a significant difference in preventing future rust-related repairs. However, many people choose not to do it. For this reason, I have included straightforward rust-preventive instructions in the “How to Build a Mini-Camper” conversion guide (click).
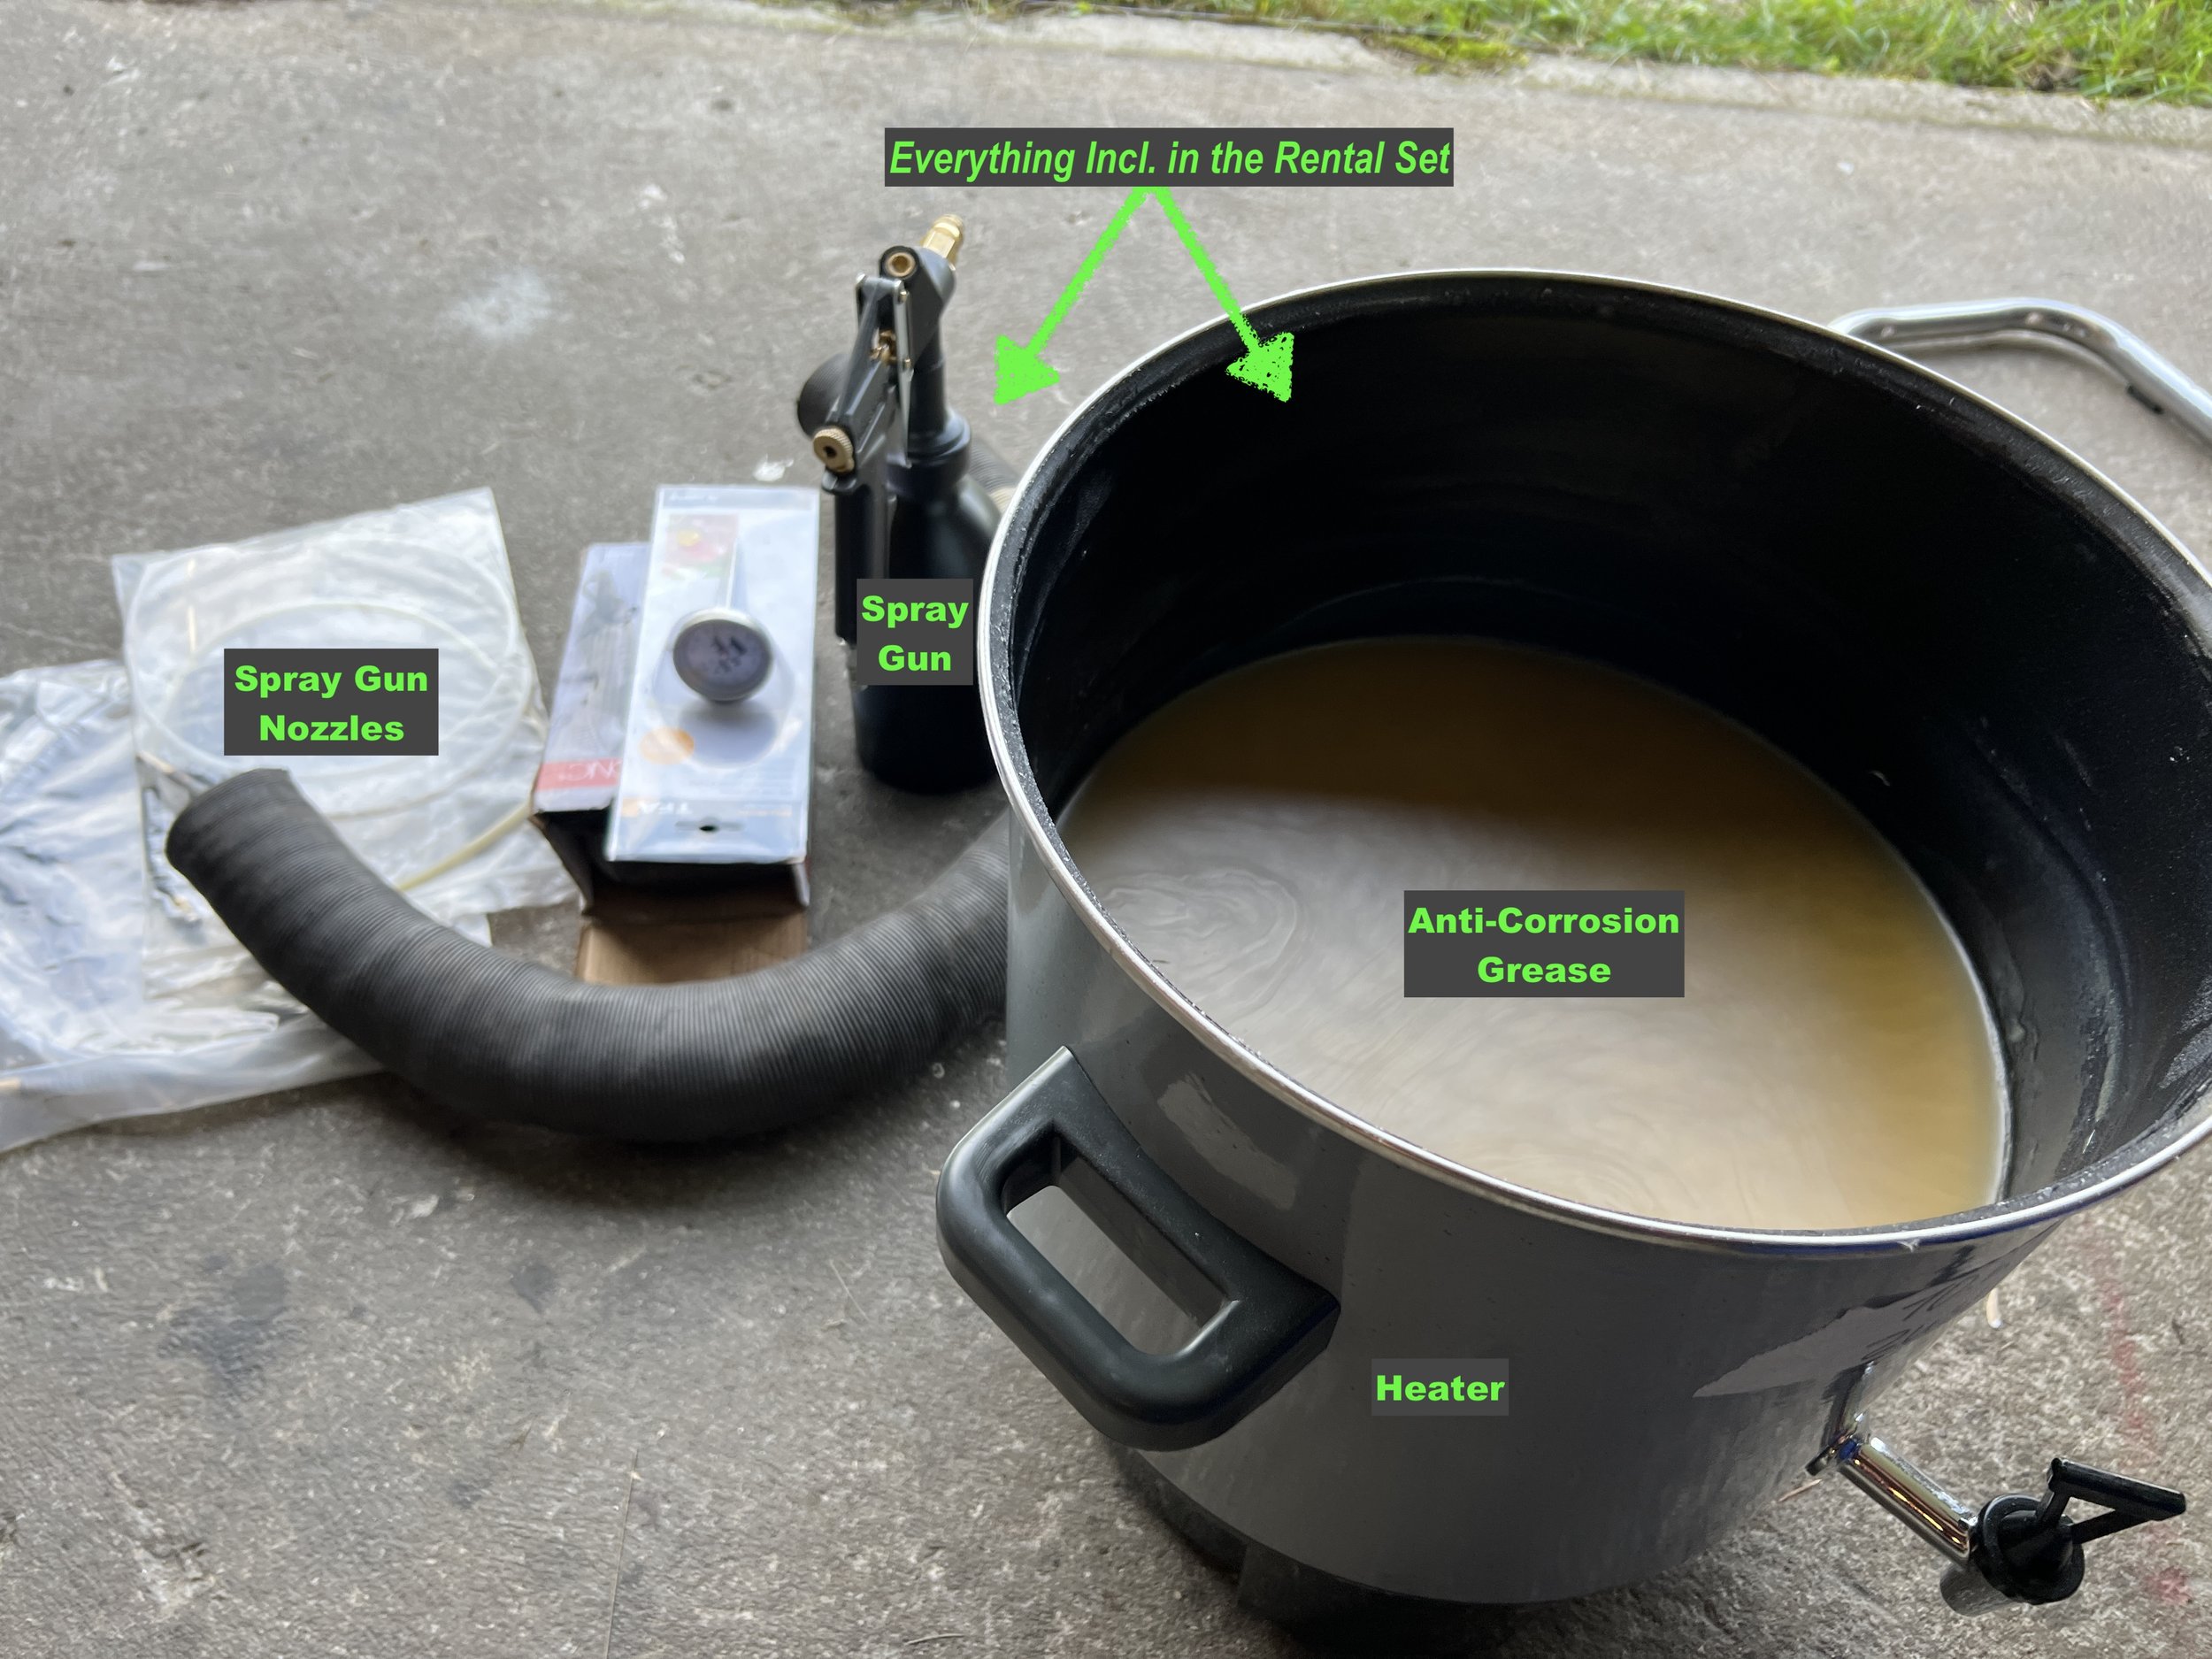
One of the best solutions for underbody and cavity rust prevention is a grease named after its inventor, “Mike Sanders”. I use it for every camper conversion, and having seen firsthand how it holds up even after 10 years, I have real-life testing confidence and experience in its long-term durability. The inventor himself worked in various fields, from aircrafts to ships and car body repairs, and rust was always a major concern. So, he dedicated his life to providing a better solution.
You can find the link to the product I used by clicking here.
The secret lies in the grease's melting point, which is higher than anything else I know of on the market. This property allows it to stay put and not run off like water during hot summer days. Additionally, if there are any scratches underneath the car body, the grease slowly creeps into the scratches, sealing them from oxidation (rust) once again.
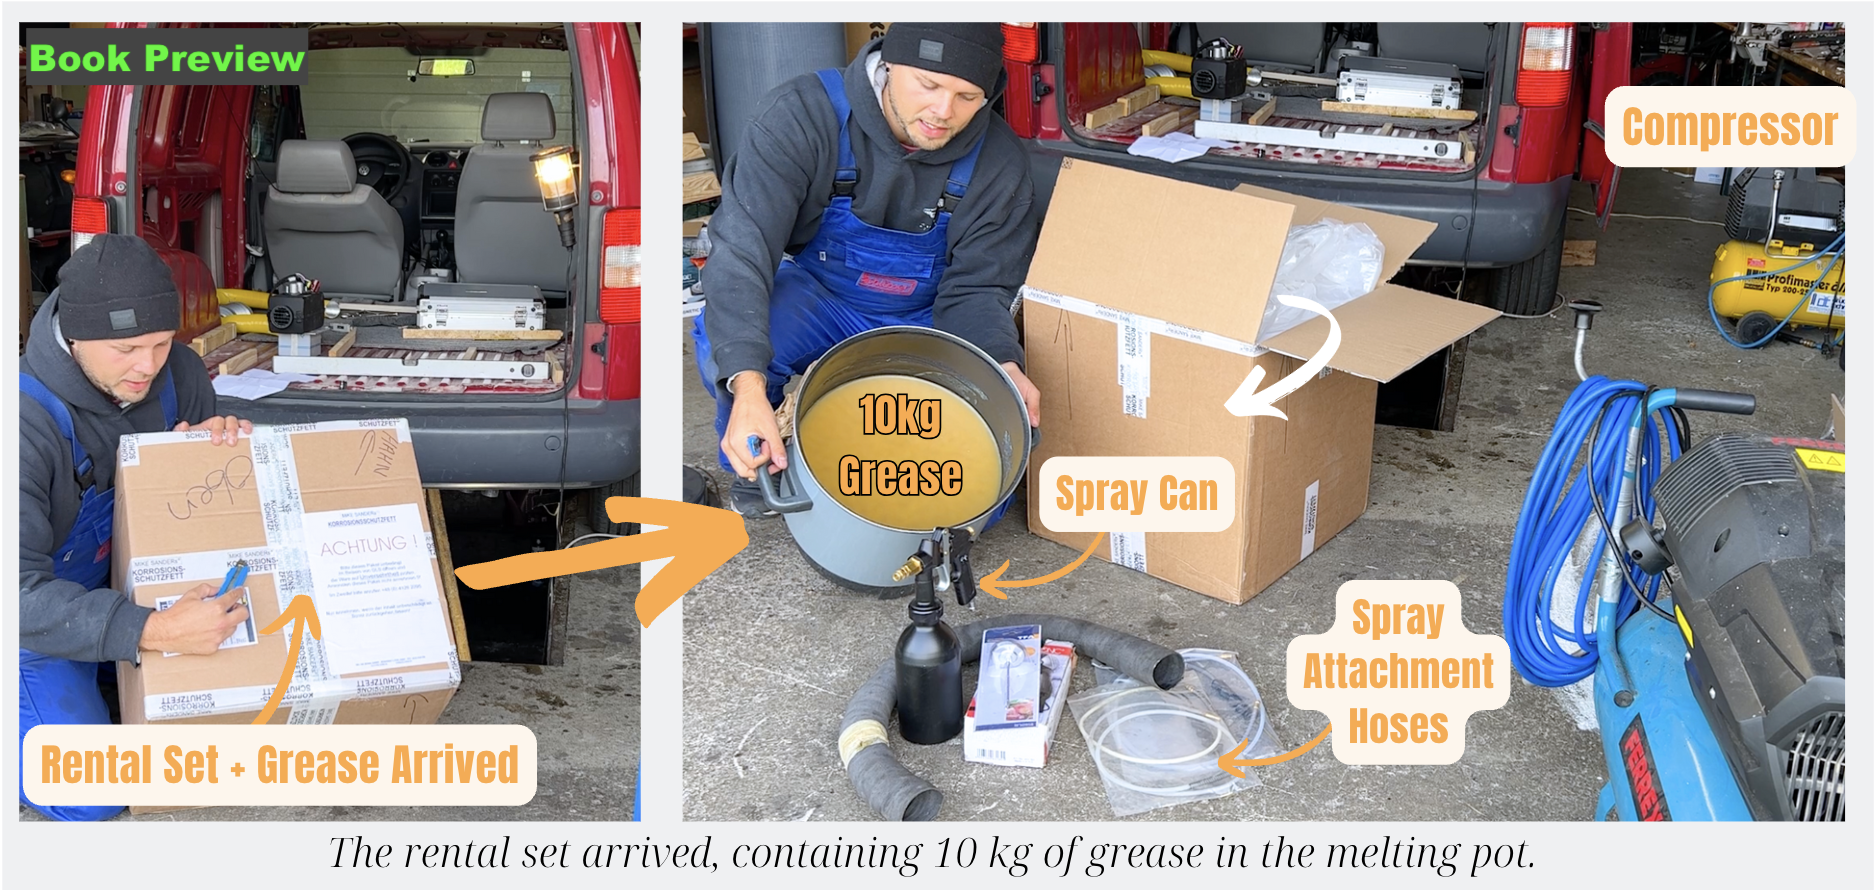
Application: Heat the grease to 100-120°C and apply it through a spray system. If you do not have a spray system, you can contact Mike-Sanders.de and ask for a rental set. Alternatively, you can simply brush the heated grease on with paint brushes if you are looking for a quick solution. Therefore, you only need a compressor if you choose to spray it. If you opt to brush it on, simply use a hot water bath to liquify the grease in its metal can, and start brushing.
I used the same anticorrosion grease for my Fiat Ducato camper conversion (you can see it by clicking here) and VW T4 camper (click). Even after almost a decade the grease is still providing corrosion resistance. I have made also the effort to talk to a CEO of auto body technician shop who confirmed me the effectiveness of this product.
My Recommendation:
Why invest a significant part of your hard-earned money and time into a DIY camper project, only to leave it unprotected and exposed to the biggest car-killer, rust? Do yourself a favor: take half a day to apply a proper underbody and cavity sealing. These are the areas that need protection the most. You will find that your vehicle maintains its value and youth for much longer, which in turn increases its resale value, compensating for the relatively small cost of the grease. Find a detailed step-by-step rust prevention guide in my conversion book (click here).
4. Engine Maintenance
Smart choice buying a used car for your camper conversion! —> Did you know that a car loses the most value in its first year of being used (around 20%) and in its first 5 years, it depreciates by around 40% (click)?
But do you really know if the engine was properly cared for? Let's make sure by doing a quick maintenance of the car engine before the camper conversion. This includes changing the:
Engine Oil
Engine Oil filter
Fuel filter
Air filter
Coolant (Antifreeze)
Windscreen washer fluid
Glow plugs (if it's a diesel engine)
Spark plugs (if it's a petrol engine)
Since such maintenance should be done regularly on any car, I recommend doing this maintenance yourself. If it's your first time, ask someone close to you who has done basic car maintenance before. Not only will you learn an important life skill, but you can also significantly reduce future expenses on your car!
A side note about the coolant: It's crucial that your coolant doesn't freeze during very cold winter days. When that happens, water expands and can damage or even crack the engine, leading to high repair costs! So, simply get an antifreeze tester (available at most auto parts stores), open the coolant reservoir, and dip it inside to see if there's enough antifreeze in the system. Then check if the coolant is clean (no particles floating or a dirty appearance). If you're unsure, it's best to flush the liquid and replace it with new fluid or visit a car shop and let them assess the condition of your coolant. This step is essential not just for freezing protection but also for preventing corrosion in the cooling system.
My Recommendation:
To assist you further, apart from the book chapter “Inspection & General Maintenance”, I've created a maintenance video for you (click). In this video, I demonstrate how to change the engine oil, filter, and glow plugs with ease. You can use this video guide for your next engine maintenance and save a lot for your next mini-camper adventure. I hope you find this helpful.
5. Disassembly of Interior
To kick off your mini camper conversion on the right note, removing the interior panels is advisable for two main reasons:
To inspect the condition behind the panels and apply rust preventative treatment (more details in the book).
To utilize the original panels as templates for cutting professionally-looking camper panels (an in-depth guide is also provided in the book).
Important Note: Preserve the original trim panels that you have removed from the walls, roof, trunk, and driver’s cabin, as they will serve as perfect templates for your upcoming camper interior.
Creating Professional Camper Panels:
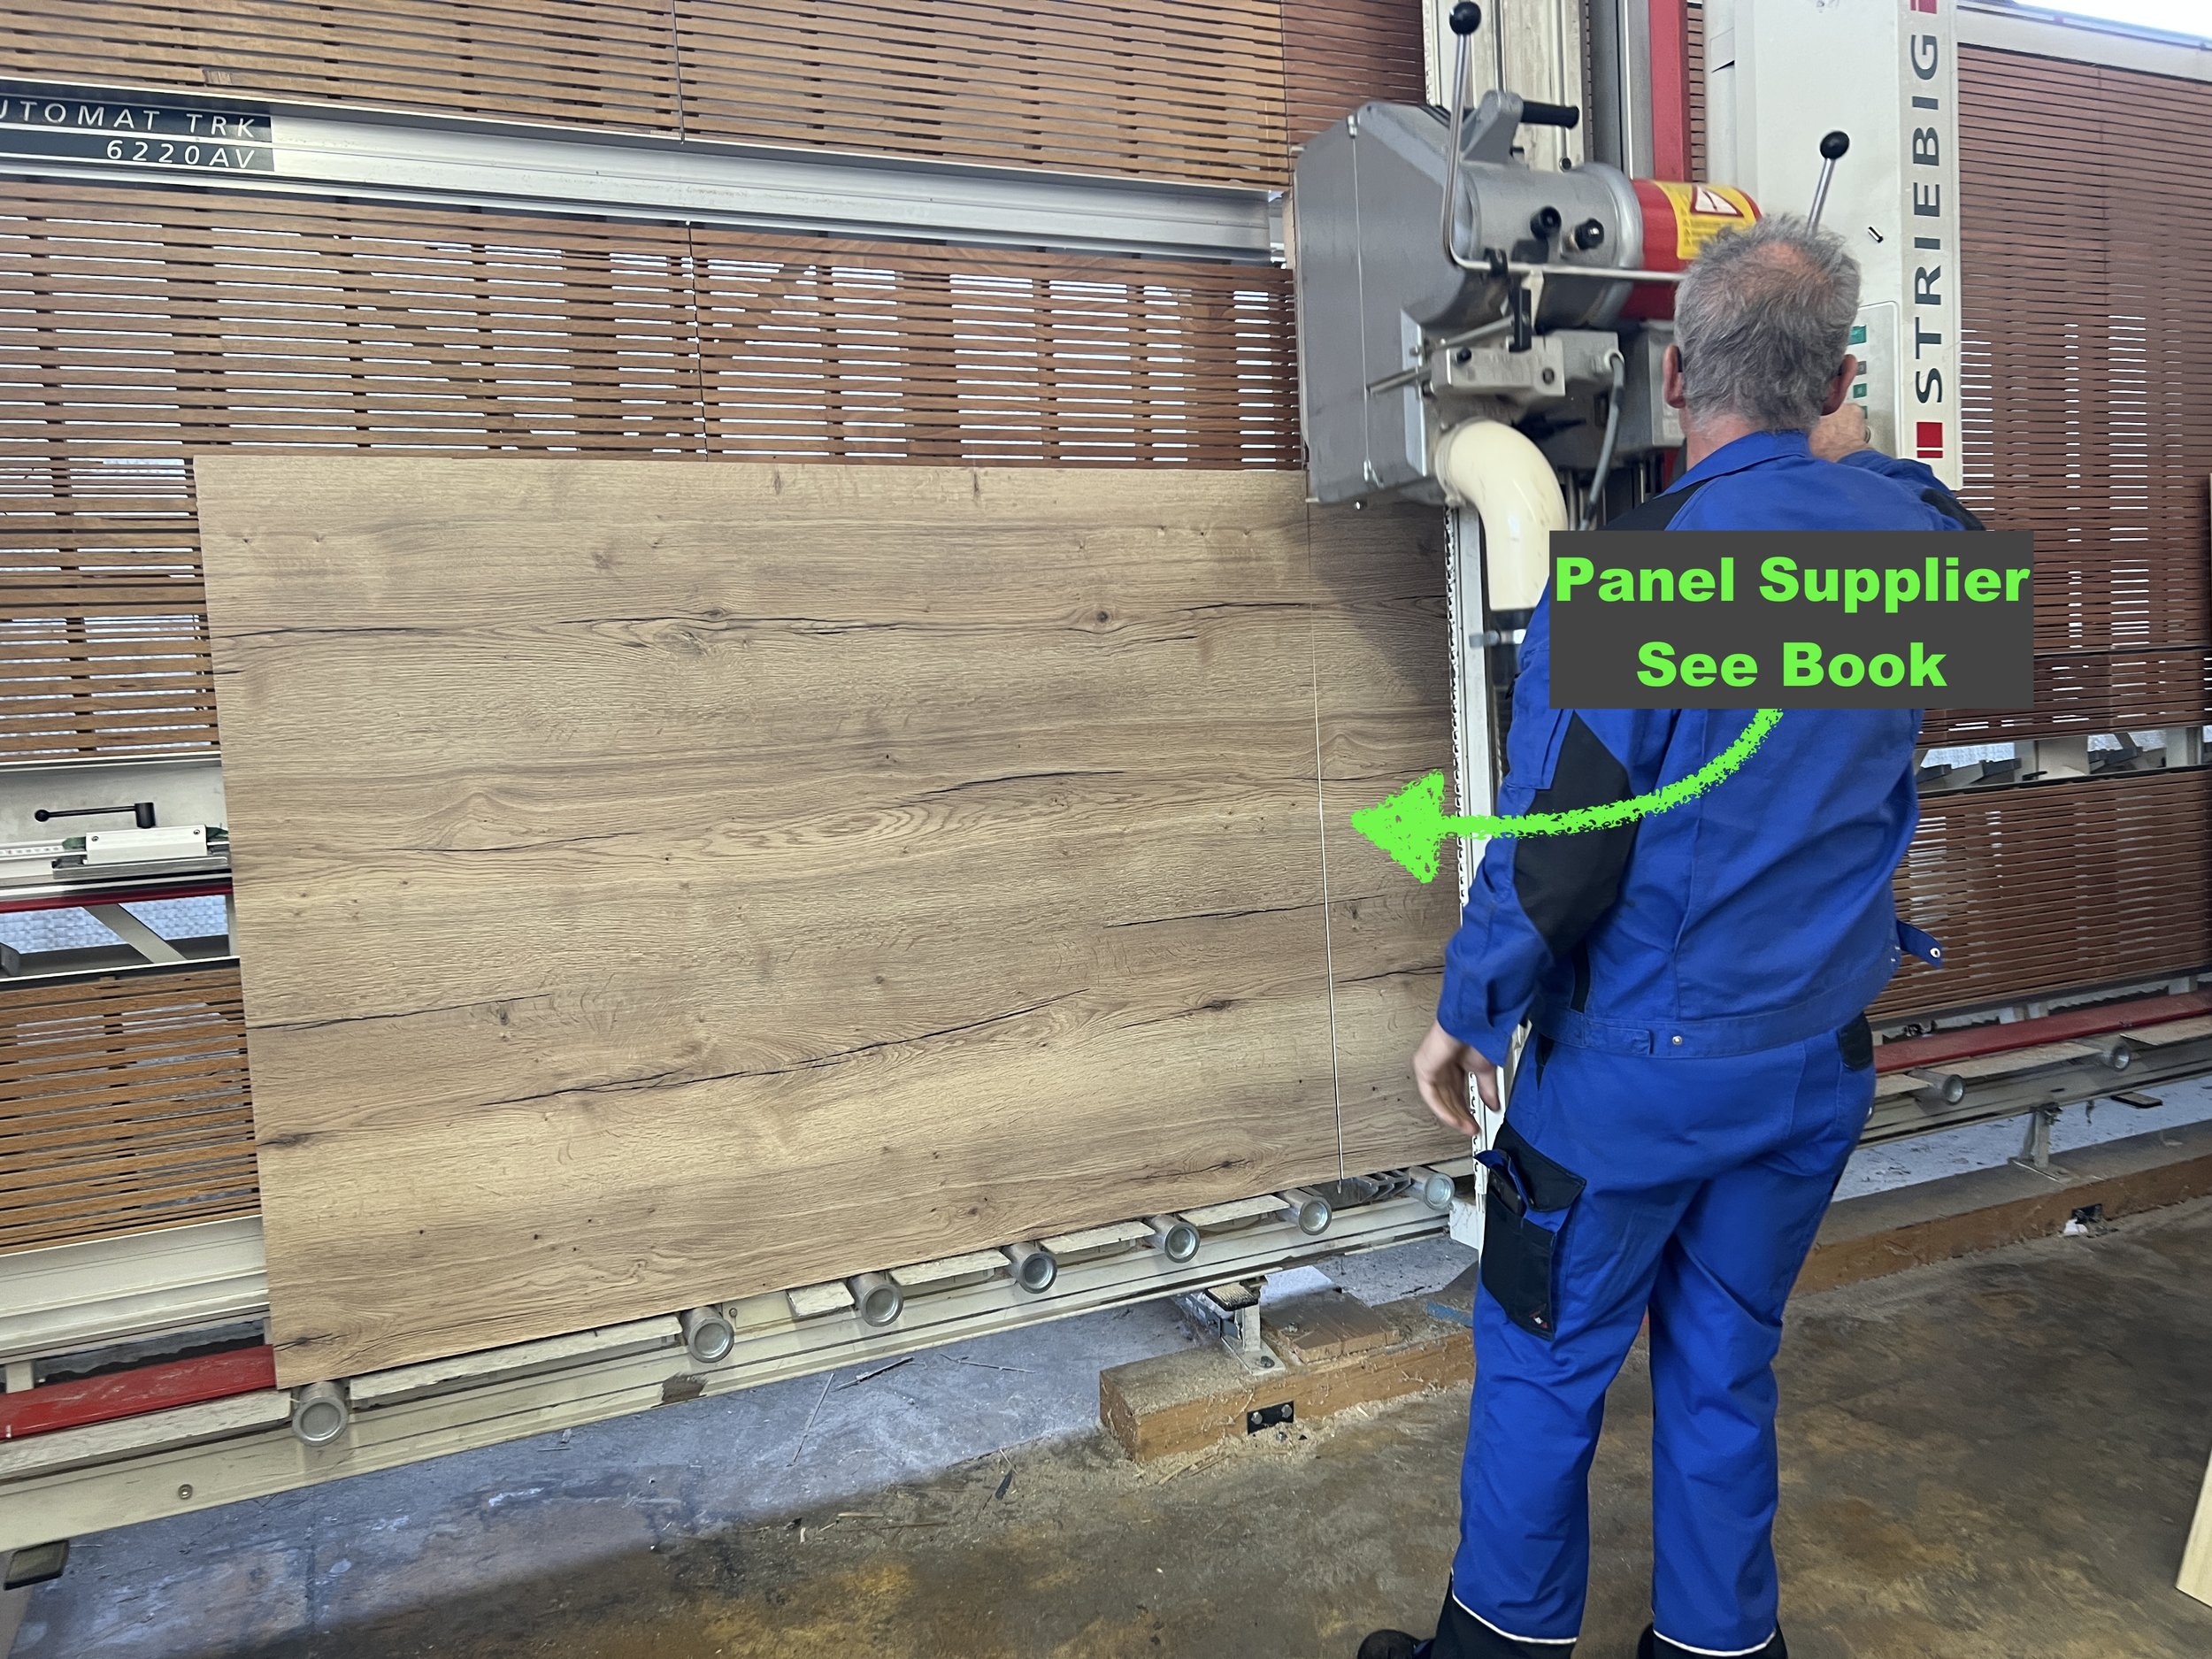
Given that your camper’s interior will face high humidity and temperature fluctuations, it is not recommended to use just any material to cut your camper panels. I have identified a supplier that provides very lightweight panels, which are highly suitable for building camper interiors. The wood surface has a printed finish, eliminating the need for surface treatments. Additionally, due to its construction, it effortlessly withstands the extreme conditions inside your camper. You can find more information about the supplier and the camper panel guide in the book: “A Step-by-Step Guide to Professional-Looking Interior Panels”.
My Recommendation:
Repurpose the original trim panels as templates to create a professional-looking camper interior. Ensure you take pictures or videos during the disassembly process – this guarantees you remember the original assembly and which screws were used. Sometimes, it can take weeks before certain parts need reassembling, and you'll be grateful for having documented the disassembly! Also, choose a panel material that encompasses all the necessary qualities: lightweight, resistance to humidity and temperature fluctuations, and a resistance to mold growth, ensuring a long life for your camper interior!
6. Planning the Conversion
We have significantly less space than in standard-sized camper vehicles. However, this limited space is not a problem for us mini-camper builders; it simply means we have to plan and build as efficiently as possible and potentially even surpass some of the larger campers in capabilities!
Whatever vehicle you choose for your mini camper, you will realize how challenging it is to find a straight line to build upon. Constructing the interior of a camper is unlike any other project I have experienced – one can never rely entirely on sketches. Therefore, be prepared to adjust the parts you are constructing.
For detailed interior and furniture building instructions, you can refer to my “How to Build a Mini-Camper” conversion guide (click).
Larger Vans: One of the most popular base vehicles for a larger DIY campervan conversion is the Fiat Ducato. You can view my previous Fiat Ducato DIY camper conversion by clicking here (click).
My Recommendation:
Create a detailed sketch of the interior. Try to anticipate as many variables as possible and remain open to making adjustments during the construction phase. To ensure nothing is overlooked, it's best to quickly review the chapters of the mini-camper building guidebook (click). Remember, building a mini-camper is like assembling a large puzzle; if one piece is forgotten, it might be difficult to fit it into the already built interior.
7. Installing a Parking Heater
The idea behind a mini camper is ultimate freedom encapsulated in the shell of an inconspicuous car.
However, the car is placed in an open environment, and we do require a certain range of temperatures to feel comfortable. Combined with the uncertainty of which latitudes future travels will take us, we need to ensure the ability to regulate the temperature inside the mini camper in both directions:
For Cold Areas: A strong and safe heater is necessary (click).
For Warm Areas: Good insulation is necessary (click).
In this project, I will optimize the mini-camper for both cold and warm climates. Now, let's focus on how to combat cold areas first!
I chose a diesel-fueled car as one of the most efficient and safe parking heaters are diesel-fueled. This way, we can create a connection from the diesel tank of the car to the relatively small-sized parking heater. An adapter plate can be quite helpful for the installation (click).
My Recommendation:
The value of your car will increase after installing a parking heater, likely similar to the purchase price of the heater itself. If you install the parking heater yourself, it is probable that the value of your car will not only compensate for the heater's cost but may even exceed it. If you feel overwhelmed by the prospect of installing a parking heater yourself, don't worry, as I have included a detailed installation guide in my mini-camper conversion book (click). After reading it, you might be surprised by how relatively straightforward such an installation can be.
8. Floor Base Construction
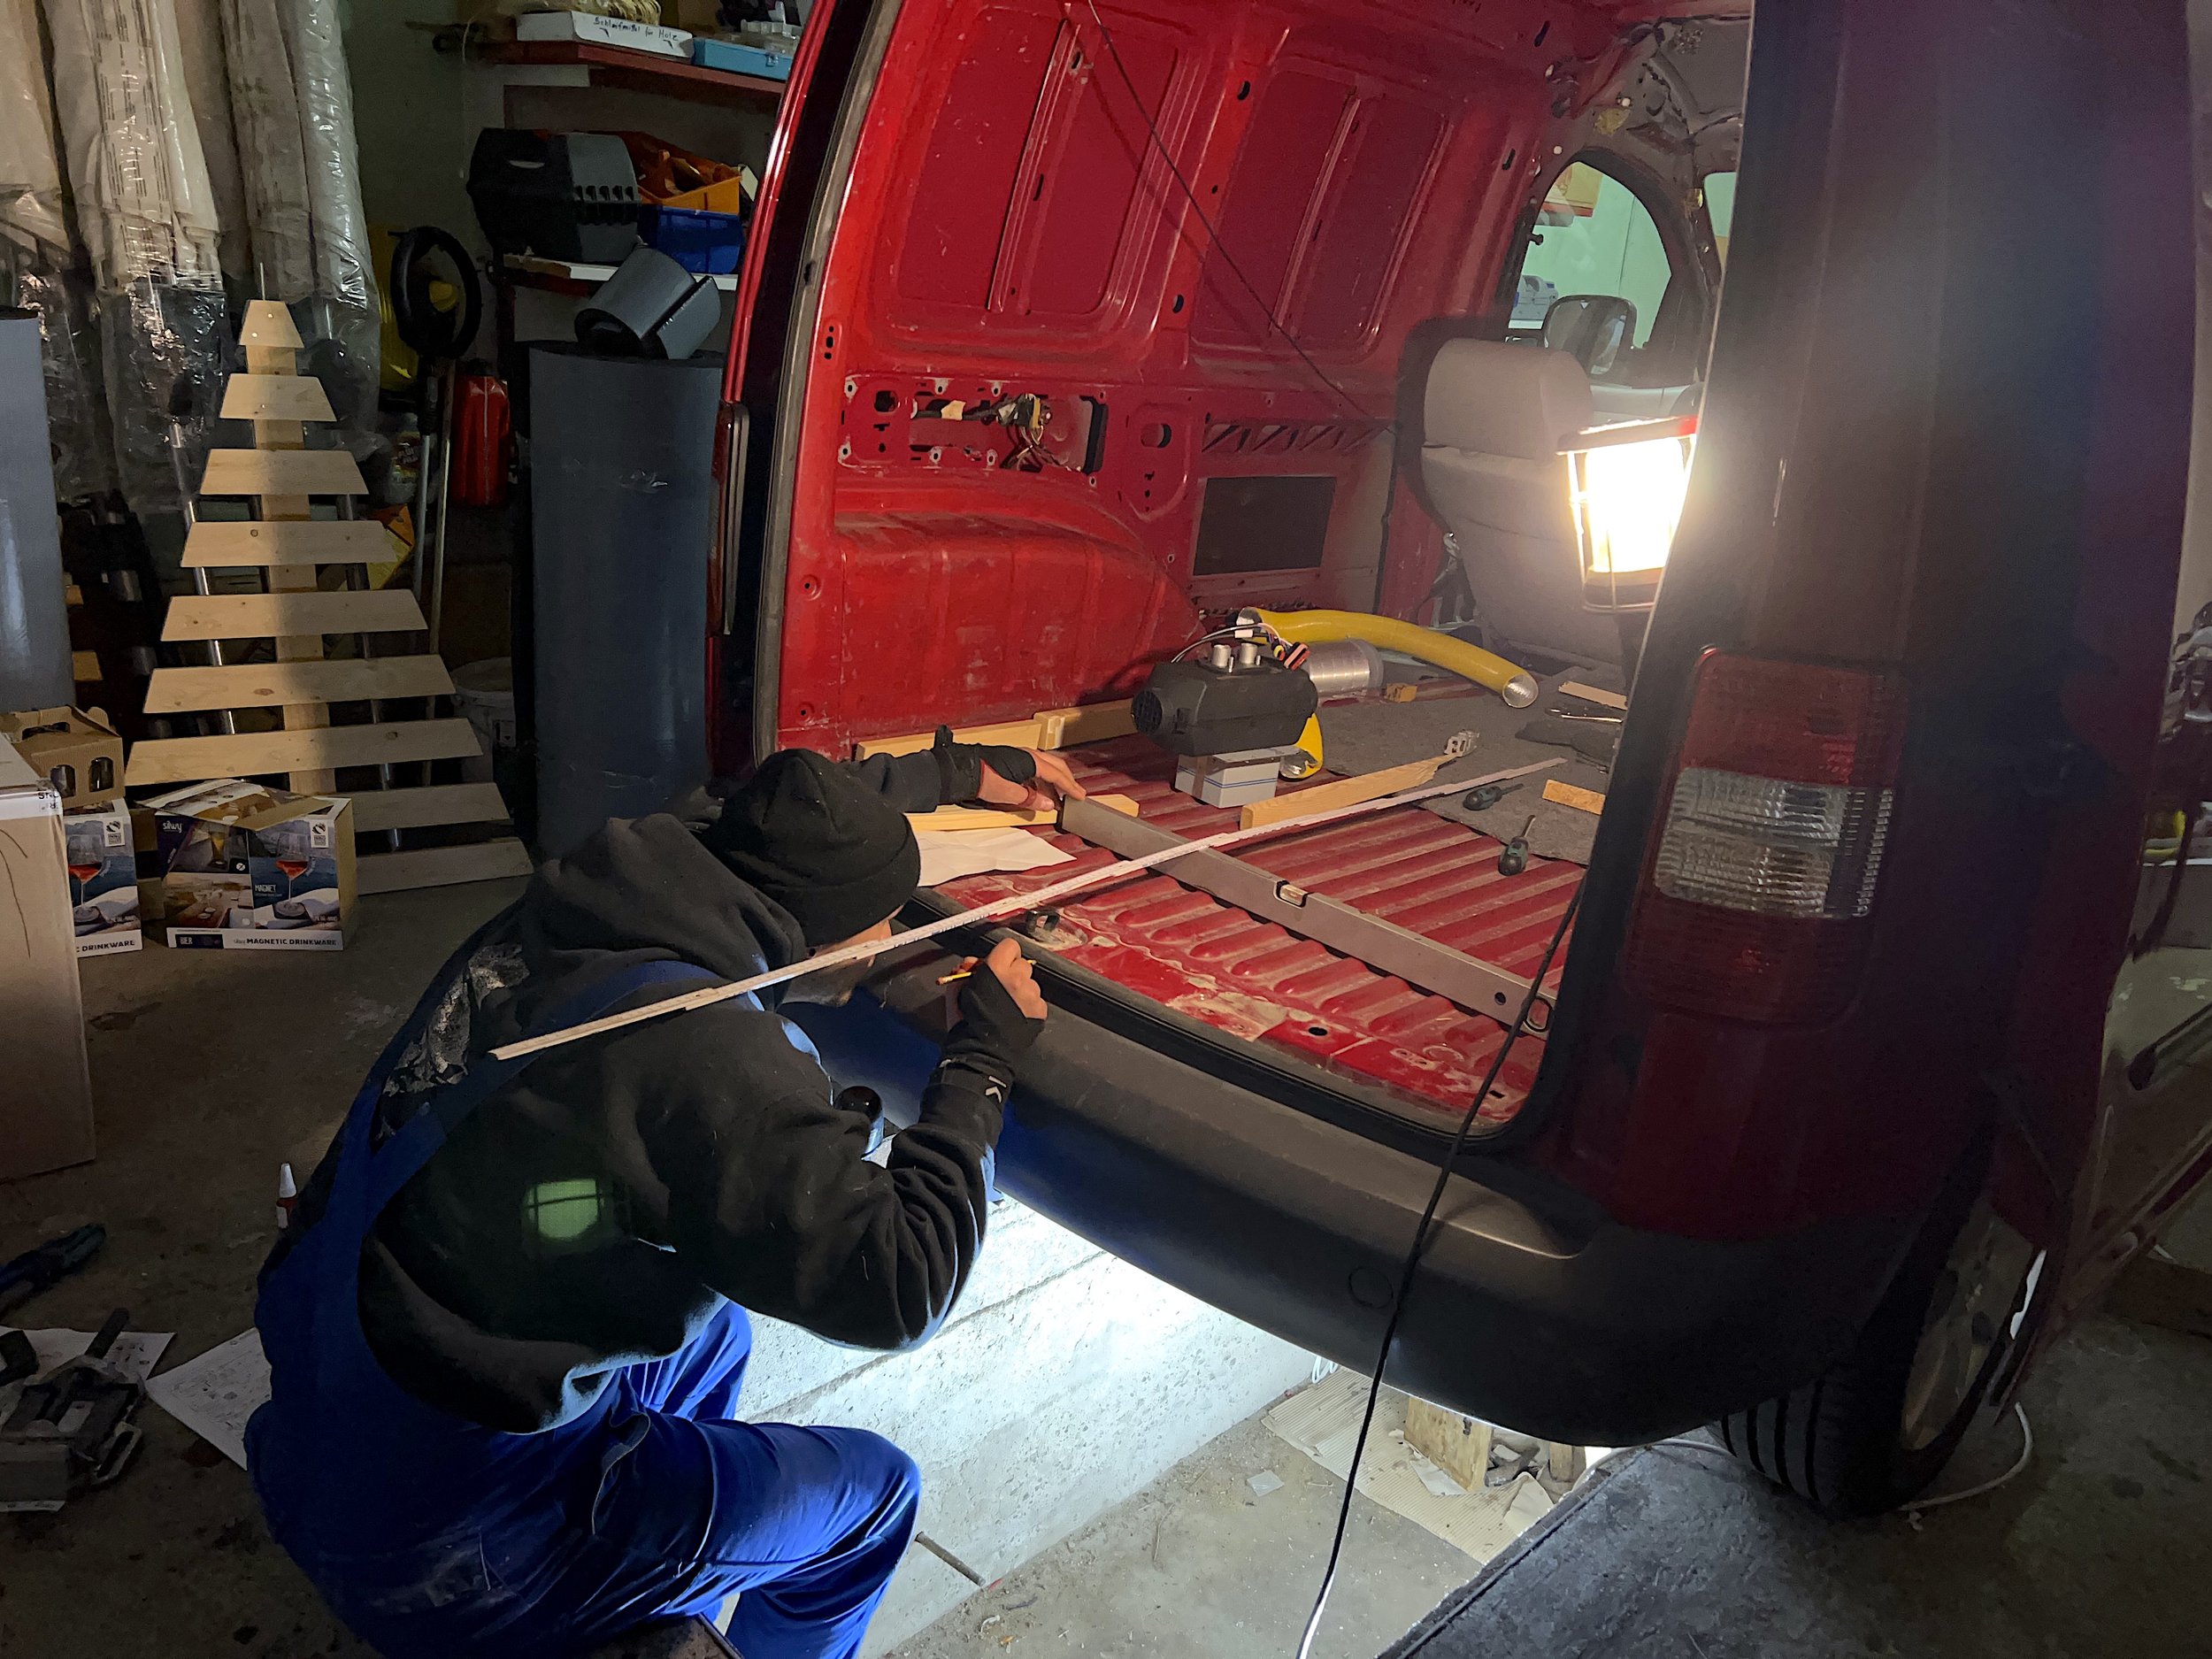
Creating a solid and strong base for the floorplate is essential. Much of your furniture will be directly attached to the floorplate later on, so it is crucial to ensure it is securely fixed to the body chassis.
Treat any rust spots if present.
Degrease the entire floor with brake cleaner (click).
Cut wooden slats to your desired thickness.
Glue the wooden slats with special car construction adhesive to the floor (click).
Paint the wooden slats to make them water-resistant (click).
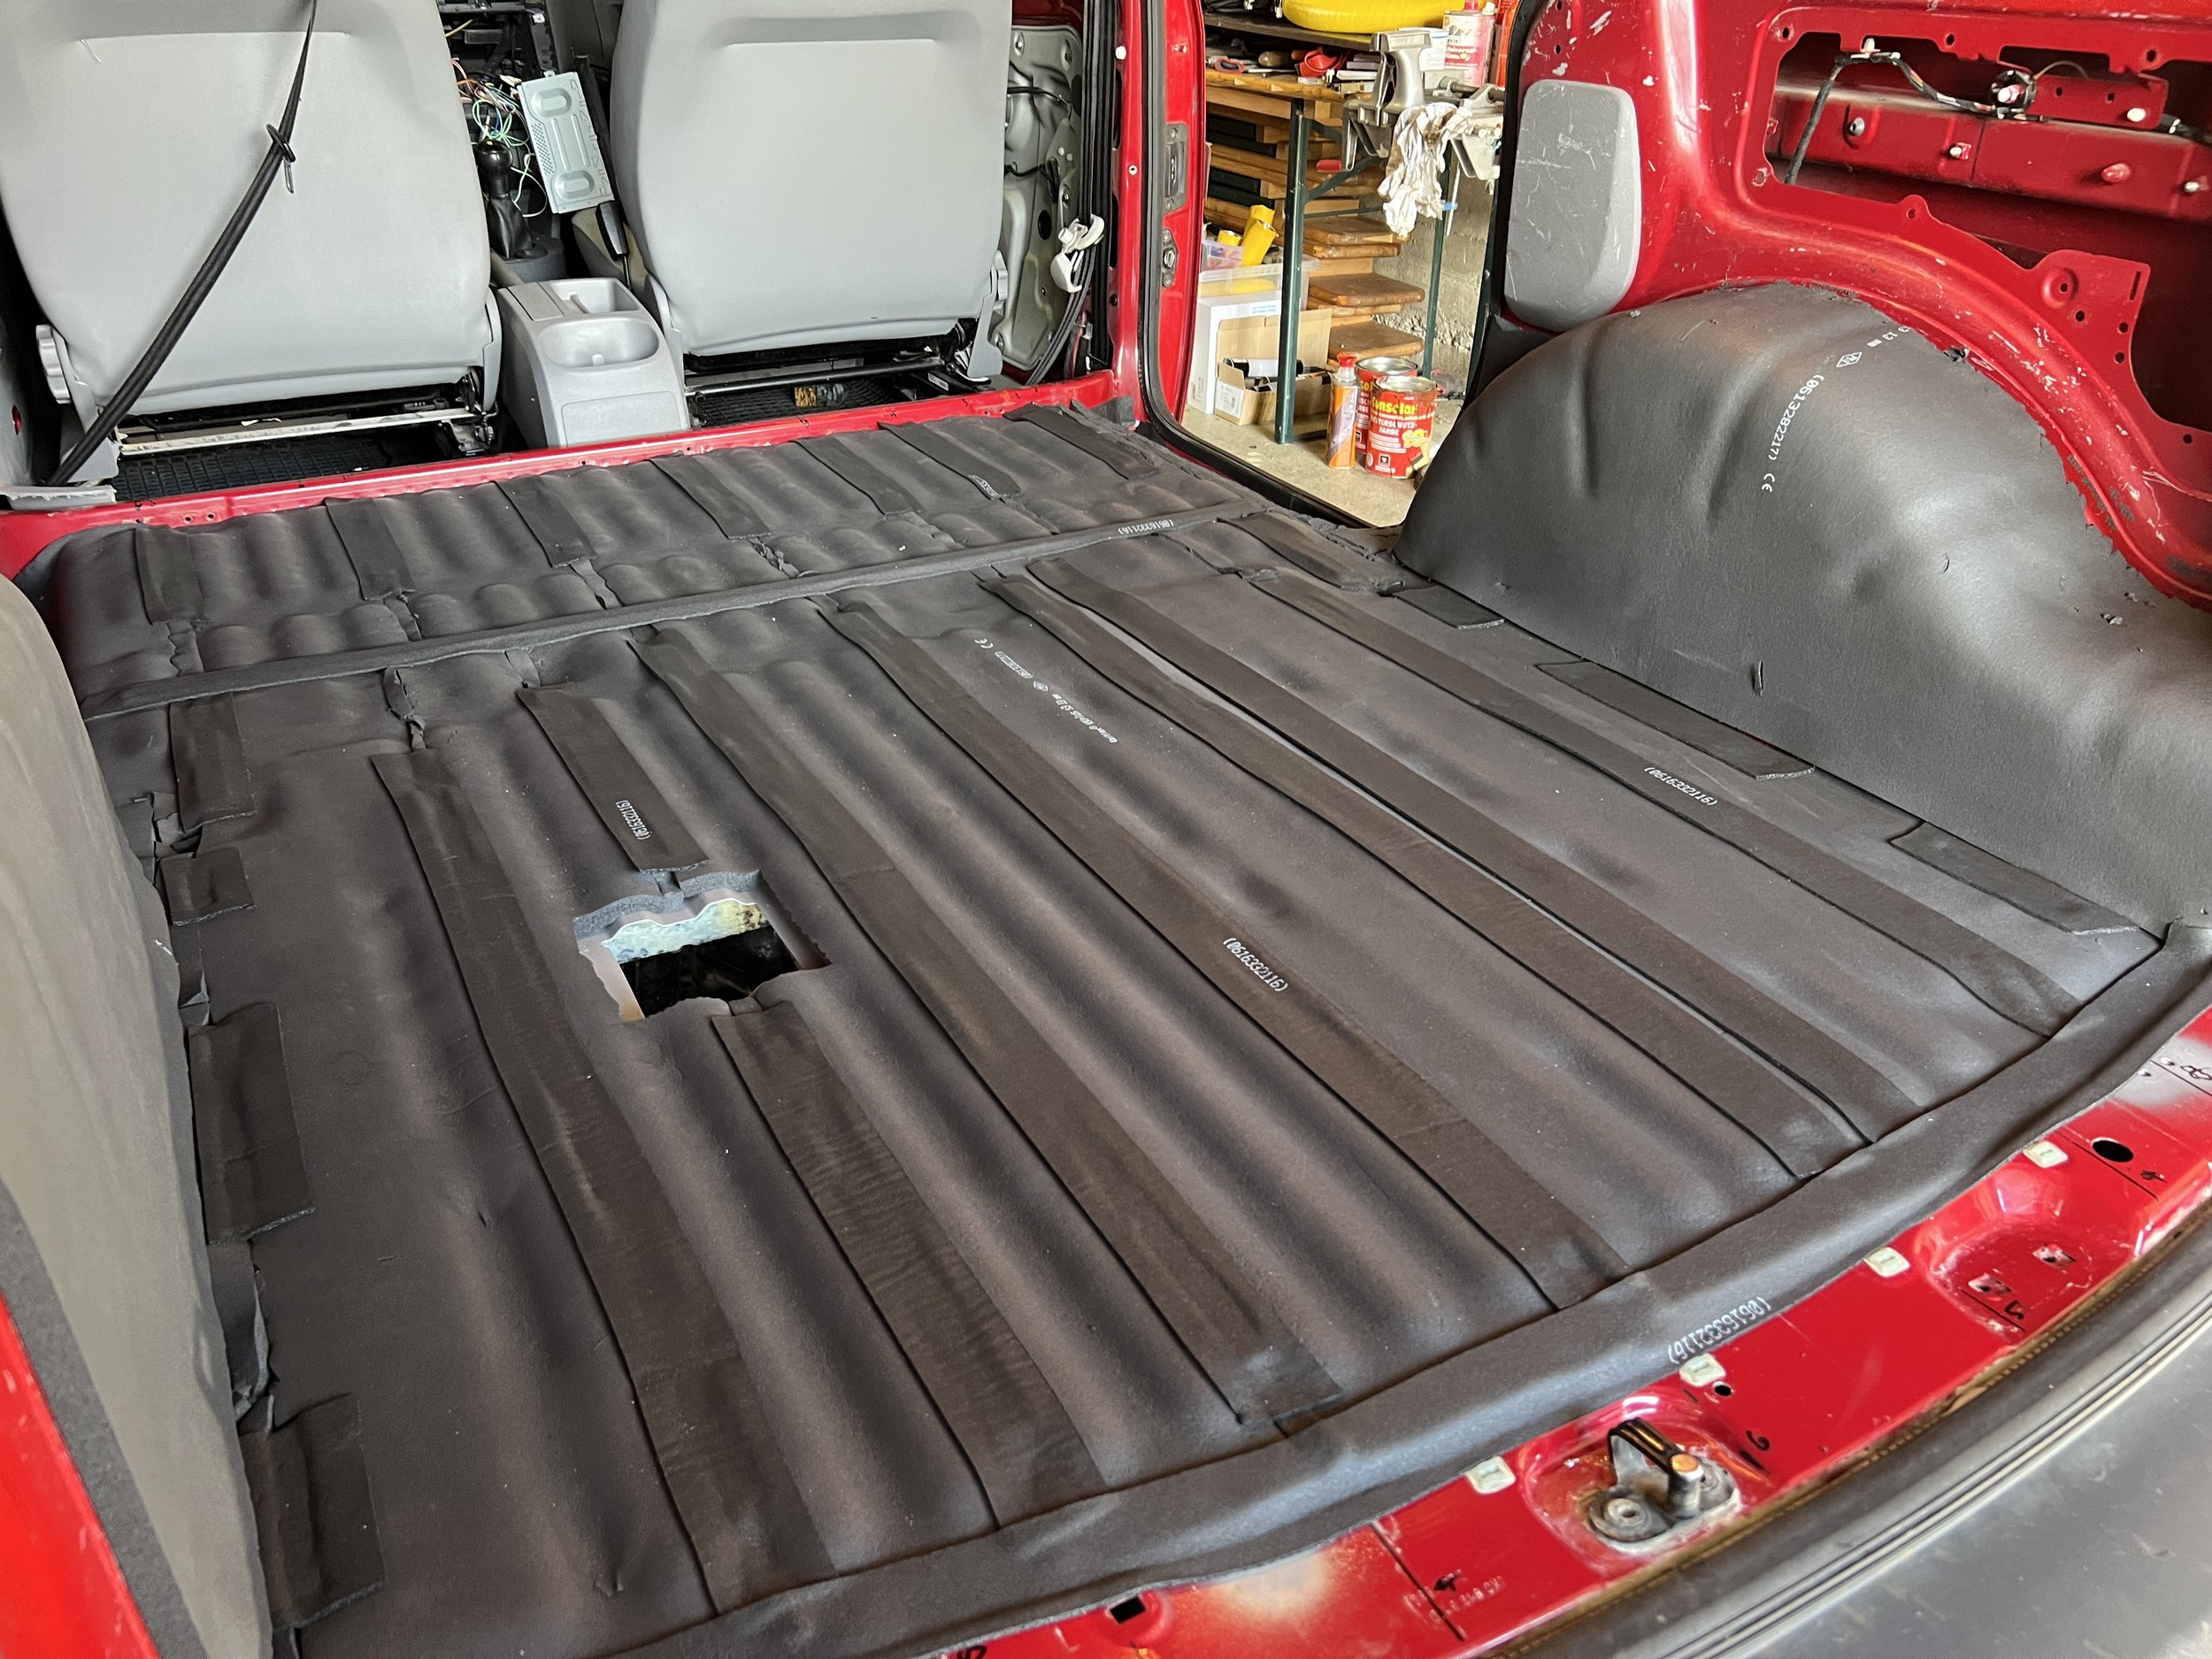
Apply insulation to create a vapor barrier (click).
You can find a detailed step-by-step guide on the floor base construction in my conversion book (click).
My Recommendation:
There are several reasons why gluing some components of your camper interior is a superior choice to using screws. One reason is to avoid thermal bridges, which can occur when screws conduct the cold from the body chassis into the warm interior. This can lead to condensation and, eventually, mold growth. You can find more tips on how to prevent mold growth in the mini-camper conversion book (click).
9. The Right Insulation
Insulating your camper project is essential, in my opinion.
Place an ice-cold bottle outside on a hot summer day, and you'll notice the outside of the bottle becoming wet. This effect is known as condensation, and it occurs when two different ambient temperatures are separated by a thin barrier, much like a window in your home. You won't notice condensation (foggy windows) in the summer when the outside and inside temperatures are similar; but in the winter, when the exterior temperature is far below the interior’s, water condenses where warm, humid air meets a cold surface.
Remember that the human body loses about 1 small cup of water through respiration and perspiration every night, adding more humidity to the indoor air. In your spacious home, this won't pose much of a problem as the room is likely well-insulated, and the windows are substantially thicker, perhaps even double or triple-glazed. Generally, the thicker the walls/windows/insulation, the slower the heat transfer between different temperature zones, resulting in less or no water formation (condensation) on the walls/windows.
However, we're dealing with a vehicle that has a body metal barely 3mm thick and very thin windows. This means condensation will definitely occur, and to a great extent! Water and high humidity are detrimental to your interior, potentially causing mold and material damage.
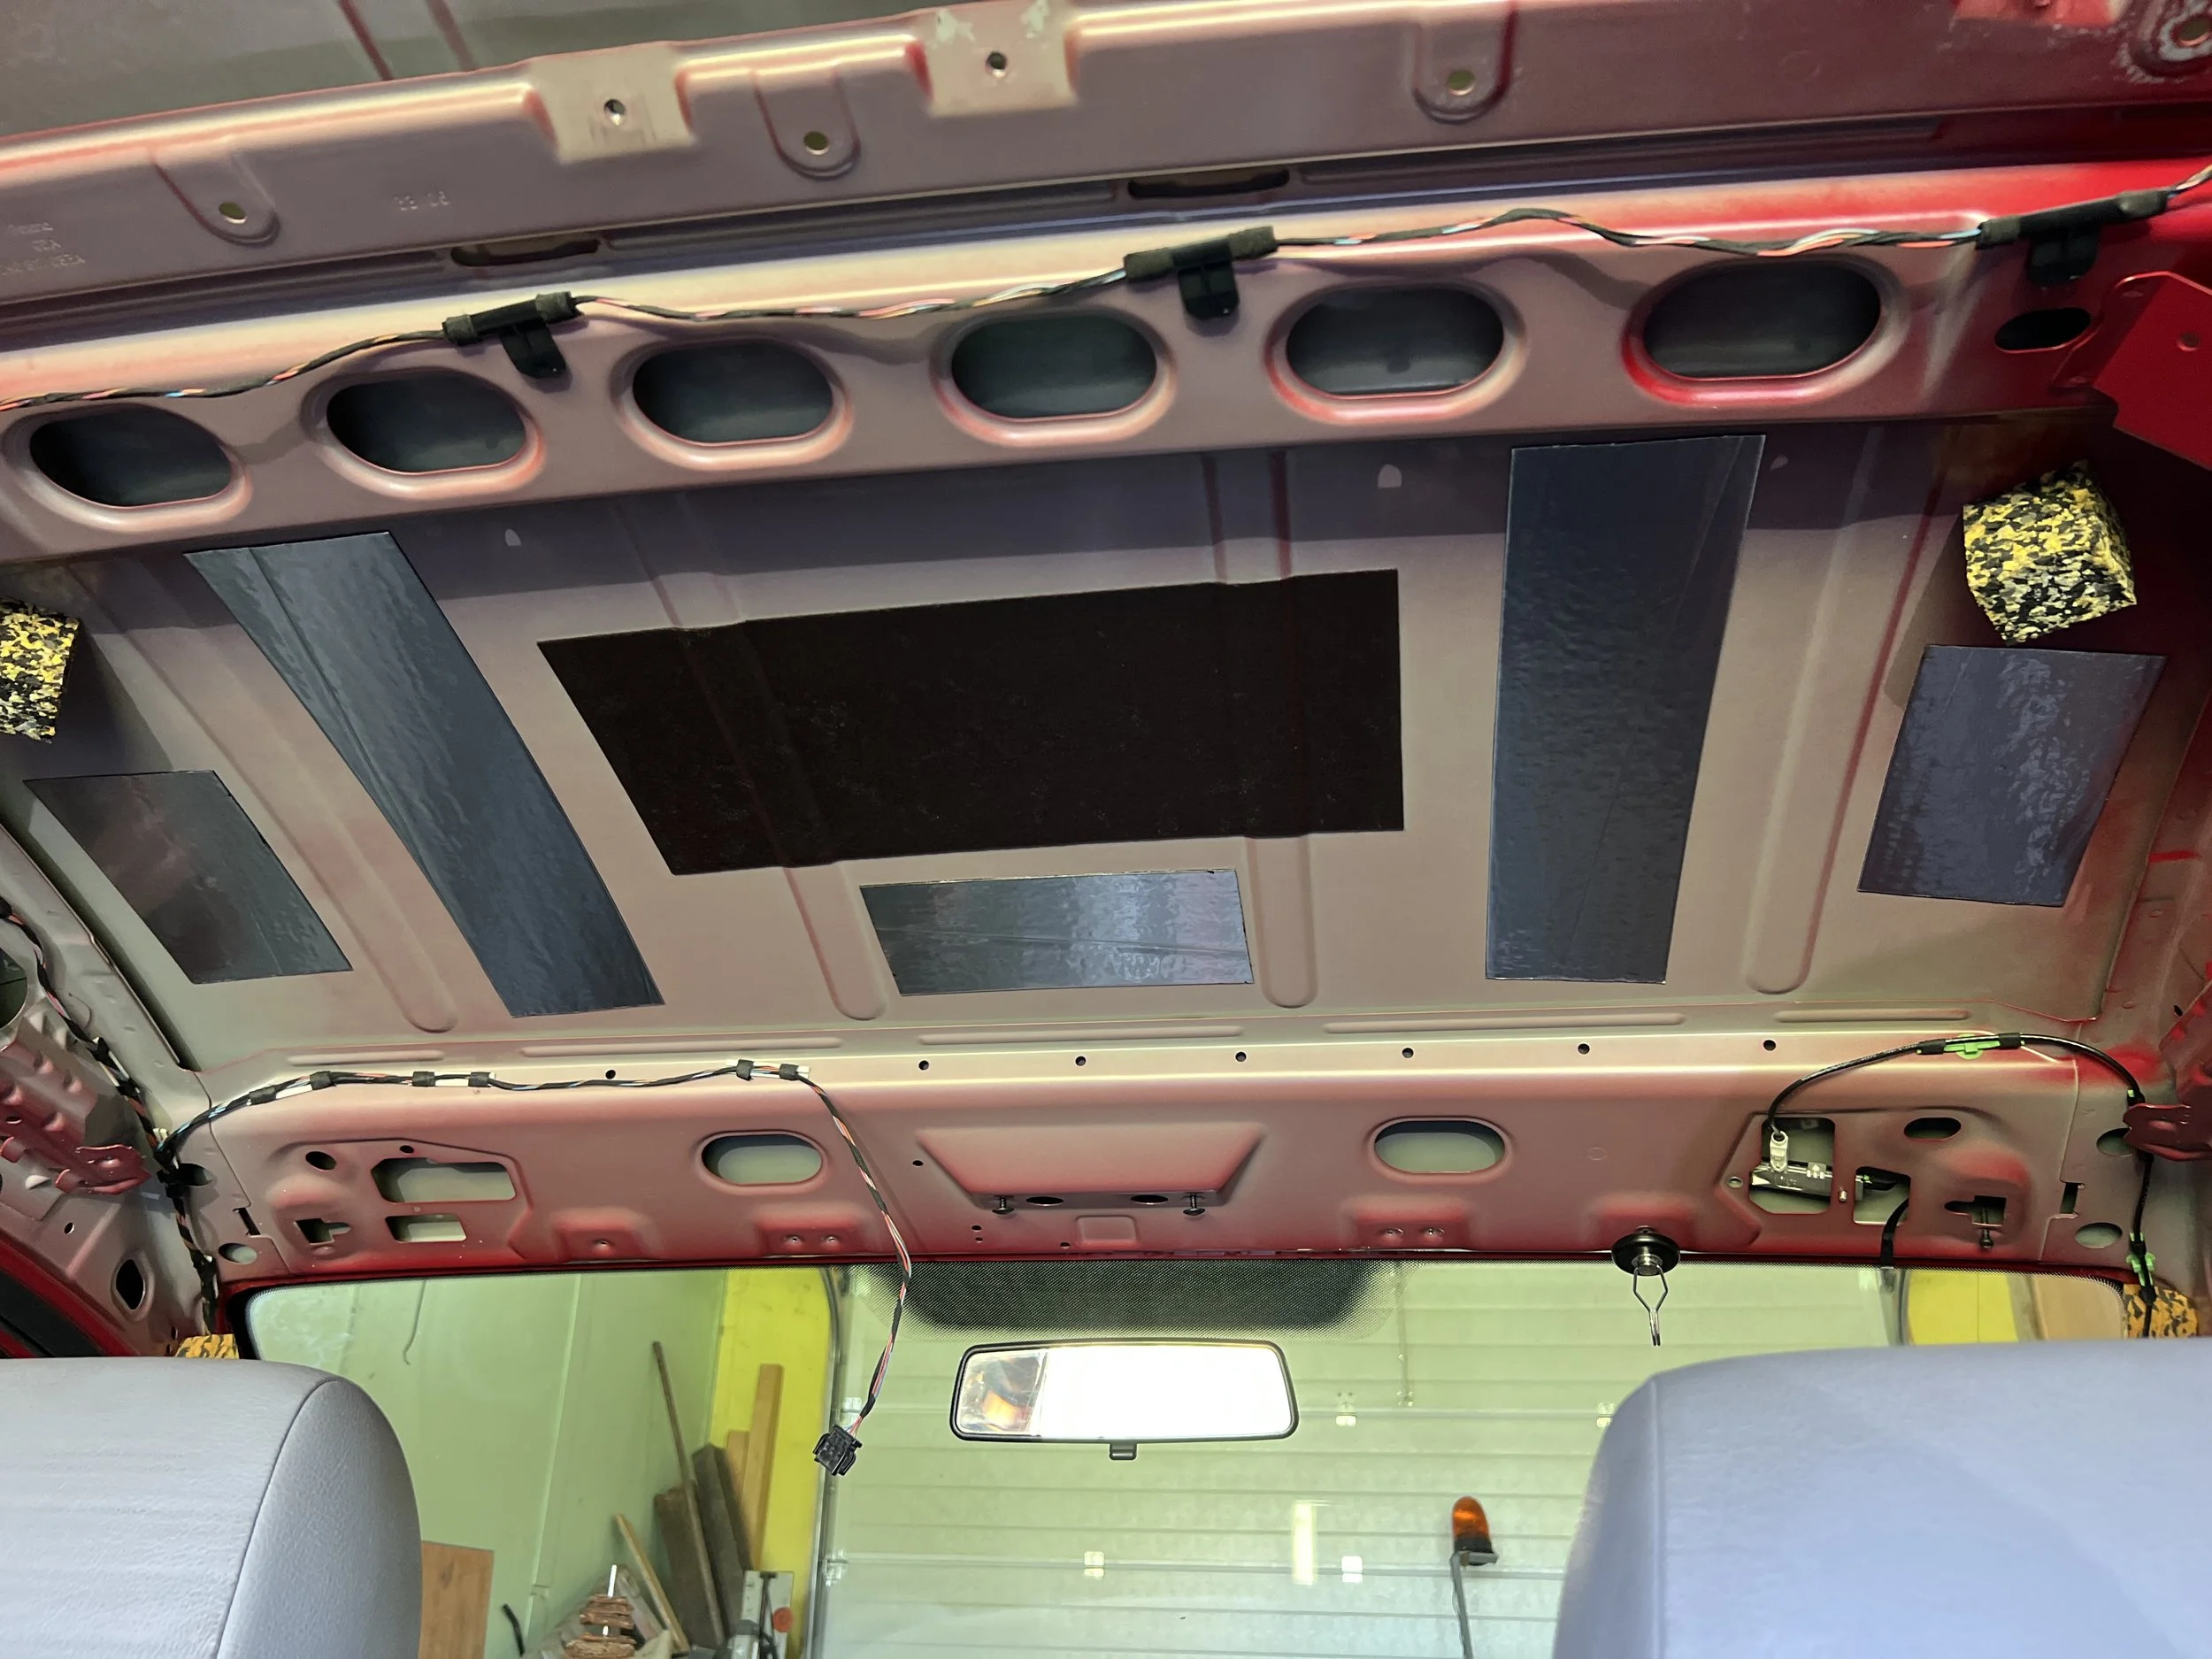
The Solution: Use a premium insulation material that serves as a vapor diffusion barrier and reduces thermal conductivity, such as Kaimann Technical Insulation (click).
My Recommendation:
Proper insulation is crucial, but not all insulation is appropriate for a camper interior. In my conversion book (click), I provide in-depth information on how to apply insulation, with all steps clearly illustrated with pictures to facilitate easy replication.
10. Alu Butyl for Noise Reduction?
There is quite a discussion around the topic of "noise reduction”.
Alu butyl is composed of a sticky bitumen layer that is known to greatly absorb vibrations of the car body… A big reason why Alu butyl is used in premium car sound systems.
We want to spend countless unforgettable hours in our mini camper, therefore anything that makes the experience more comfortable is worth considering. It's undeniable that Alu Butyl will give your car interior a more pleasant auditory ambiance. However, the difference after having applied Alu Butyl won't leave you with a "WOAH" effect, but rather a "this is nice" effect.
Mass is required to absorb shock waves/vibrations, so the Alu Butyl will surprise you with its hefty weight. The Alu Butyl tape (click) I am holding in the picture on the side weighs as much as a medium-sized stone, making it not the ideal component for a camper build because every vehicle has a limited loading capacity. Moreover, every kg/pound added will have a minimal incremental effect on fuel consumption.
So is it Really Needed? My Recommendation:
In my conversion book, you'll discover a noise-dampening experiment I conducted, comparing Alu butyl, self-adhesive insulation, and their combination. The definitive winner is unveiled within the book (click). The insights on Alu Butyl might lead you to question its necessity, possibly saving you not only the expense of the material but also the additional weight it adds.
11. Floor Plate
The floor plate should be carefully selected. The environment inside a camper can be quite extreme, from sub-zero temperatures in winter to glaring heat in the summer sun, potentially reaching 70 degrees Fahrenheit or more. Additionally, storing wet clothes, water spills, or sleeping inside the vehicle will create high humidities, potentially for prolonged periods. Therefore, you want your floor plate to be:
Strong
Flexible
Not too heavy
Water-resistant
Humidity-resistant
High Mold Resistance
Thick enough to serve as a foundation for screws
The ideal solution is waterproof plywood. It is commonly used for trailer surfaces due to its high resistance to water and mold, offering a significant advantage: it saves you considerable time as there's no need for surface treatment. Simply cut it to your desired shape and apply some paint to the cuts to protect the damaged surfaces. In my conversion book (click), you'll find a step-by-step installation guide for your mini-camper floor plate.
My Recommendation:
Waterproof plywood is the ideal material for a floor plate (see picture attached). The optimal thickness, from my experience, is detailed in my conversion book in the chapter "The Floor Plate: Essential Characteristics of a Mini Camper Floor Plate" (click).
12. Roof Construction
Every hole made in the car body can potentially become a breeding ground for rust. Also, metal screws that directly contact the car body and protrude into the interior can act as thermal bridges. This means water condensation may occur due to the temperature difference between the warm, humid interior and the cold screw, which transfers the car body’s temperature through the insulation. Over time, this condensation around the screw could cause mold. In short:
Prioritize gluing over screwing where possible.
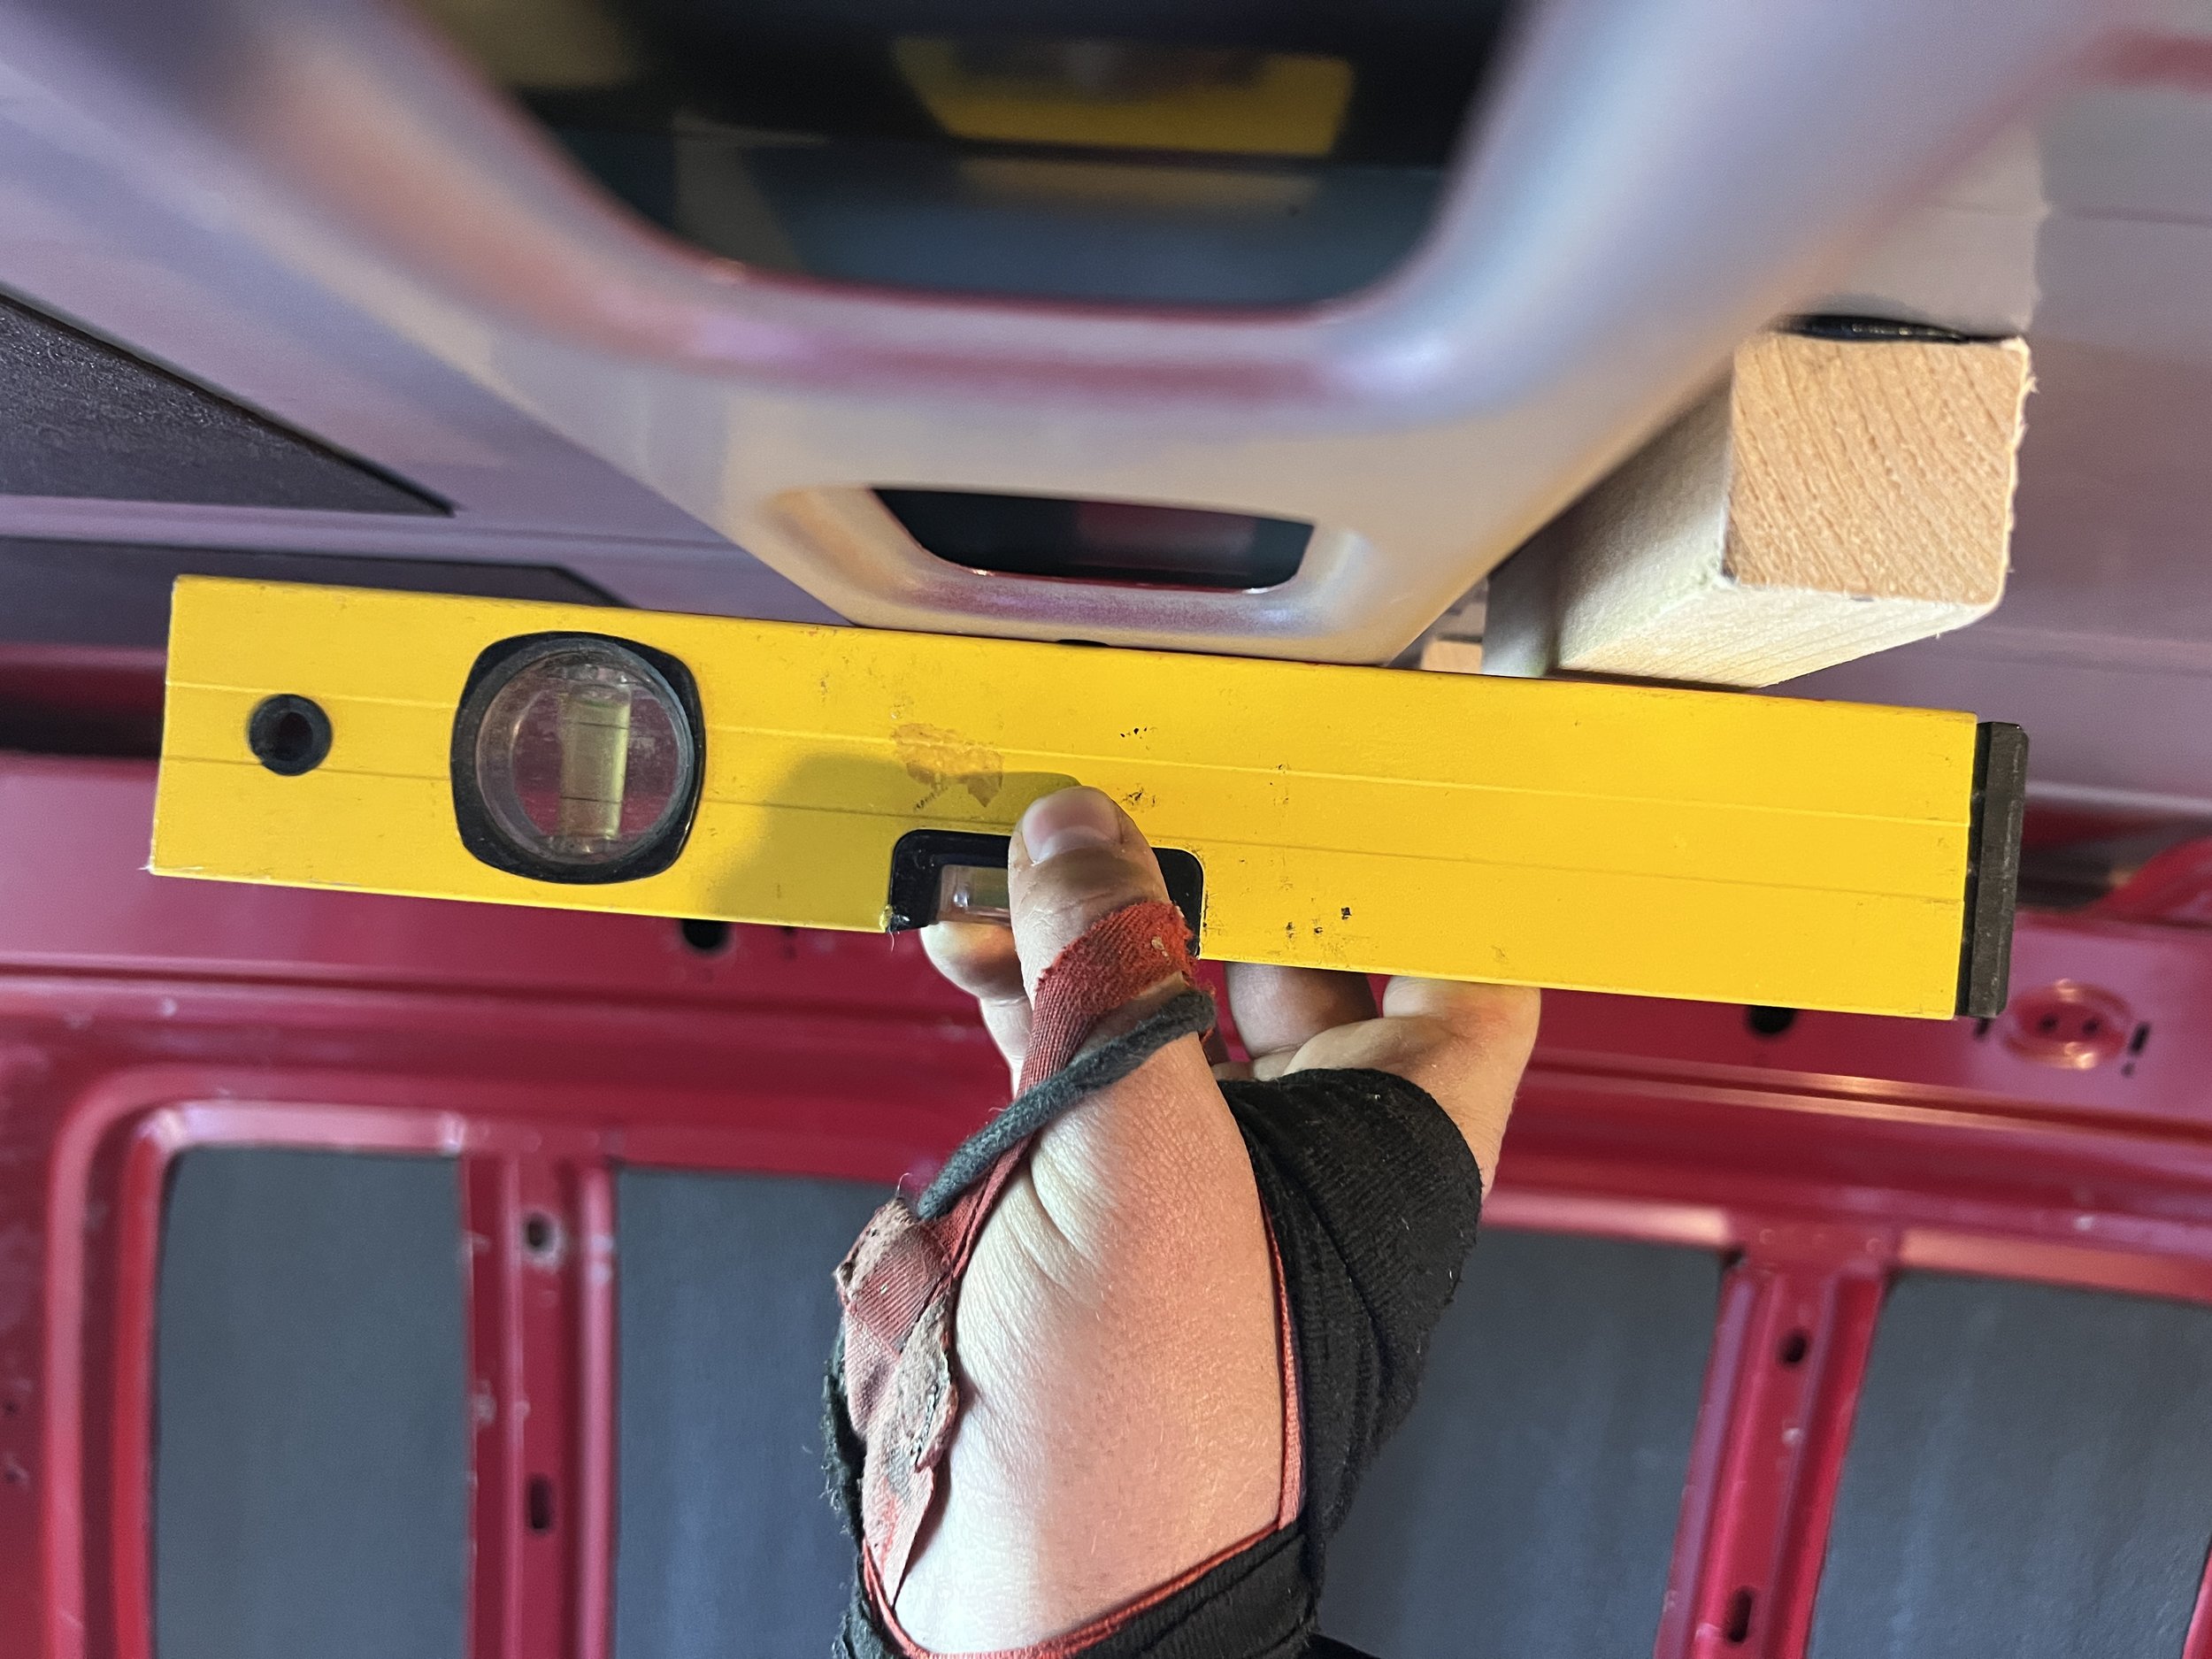
I found a simple and reliable solution is using wooden slats, glued to the roof with Sikaflex, a high-quality adhesive produced by a trusted German company. (Click here to see the glue I used)
Choose the thickness of the wood slats to align exactly with the height of the inner metal frame bridges. This ensures maximum use of space in your mini camper. For example, using a wood slat 3cm thicker than the inner metal frame bridges of the roof results in a loss of 0.0756 m³ volume.
Lost Space Calculation: Length × width × height = 1.8m × 1.4m × 0.03m = 0.0756 m³ (or 75600 cm³)
My Recommendation:
Whenever possible, use glue instead of screws. For best results, use Sikaflex glue. Before gluing, sand the wood and degrease all surfaces. Ideally, apply about 3mm of glue between the surface and the object being glued. You can find an in-depth guide for creating a simple yet effective roof base in my conversion book (click), allowing you to install a beautiful roof panel easily without the need for holes and screws!
13. Telescopic Rails (Heavy Duty)
Have you ever searched for something under your bed? Remember how hard it was to reach items right under the middle? Repeatedly doing this is no fun, especially when you need to remove objects. If it has just rained, you can't quickly relocate some items around the car. There must be a better way to solve this issue!
Think about it: a mini camper is almost like a driving bed, so special care is needed to ensure every inch of space is easily accessible. I found a solution with heavy-duty telescopic rails from a German company (click here). These telescopic rails can be ordered with a mounting set and all screws needed for installation. Plus, they support over 200kg per pair – unbelievable!
On their homepage (click), you can select the desired length and weight capacity. Options include self-locking rails and more. I chose pairs with a locking mechanism (click to see), which lock when closed and fully opened. Just mount them, place a drawer, and you're ready! You don't even need to build drawers; place a hard plastic box on top, and you're done!
In my last Ducato Camper build (click), I used cheap telescopic rails without a locking mechanism that I found online, and I regretted it every single day.
My Recommendation:
I highly recommend the telescopic rails with a self-locking mechanism from this German company (click). The quality and stability are exceptional, and I only recommend products that I've personally tested and compared. The prices are affordable. For in-depth installation guidance on these telescopic rails, check out my conversion book (click). Additionally, I'll guide you through building drawers from start to finish, including many pictures to make the process even easier for you.
14. Felt Fabric (Walls/Floor)
Building a spacious and efficient mini camper is largely about maximizing space, so it's important that the camper wall covering don't take up too much of the available room. The optimal solution for this is:
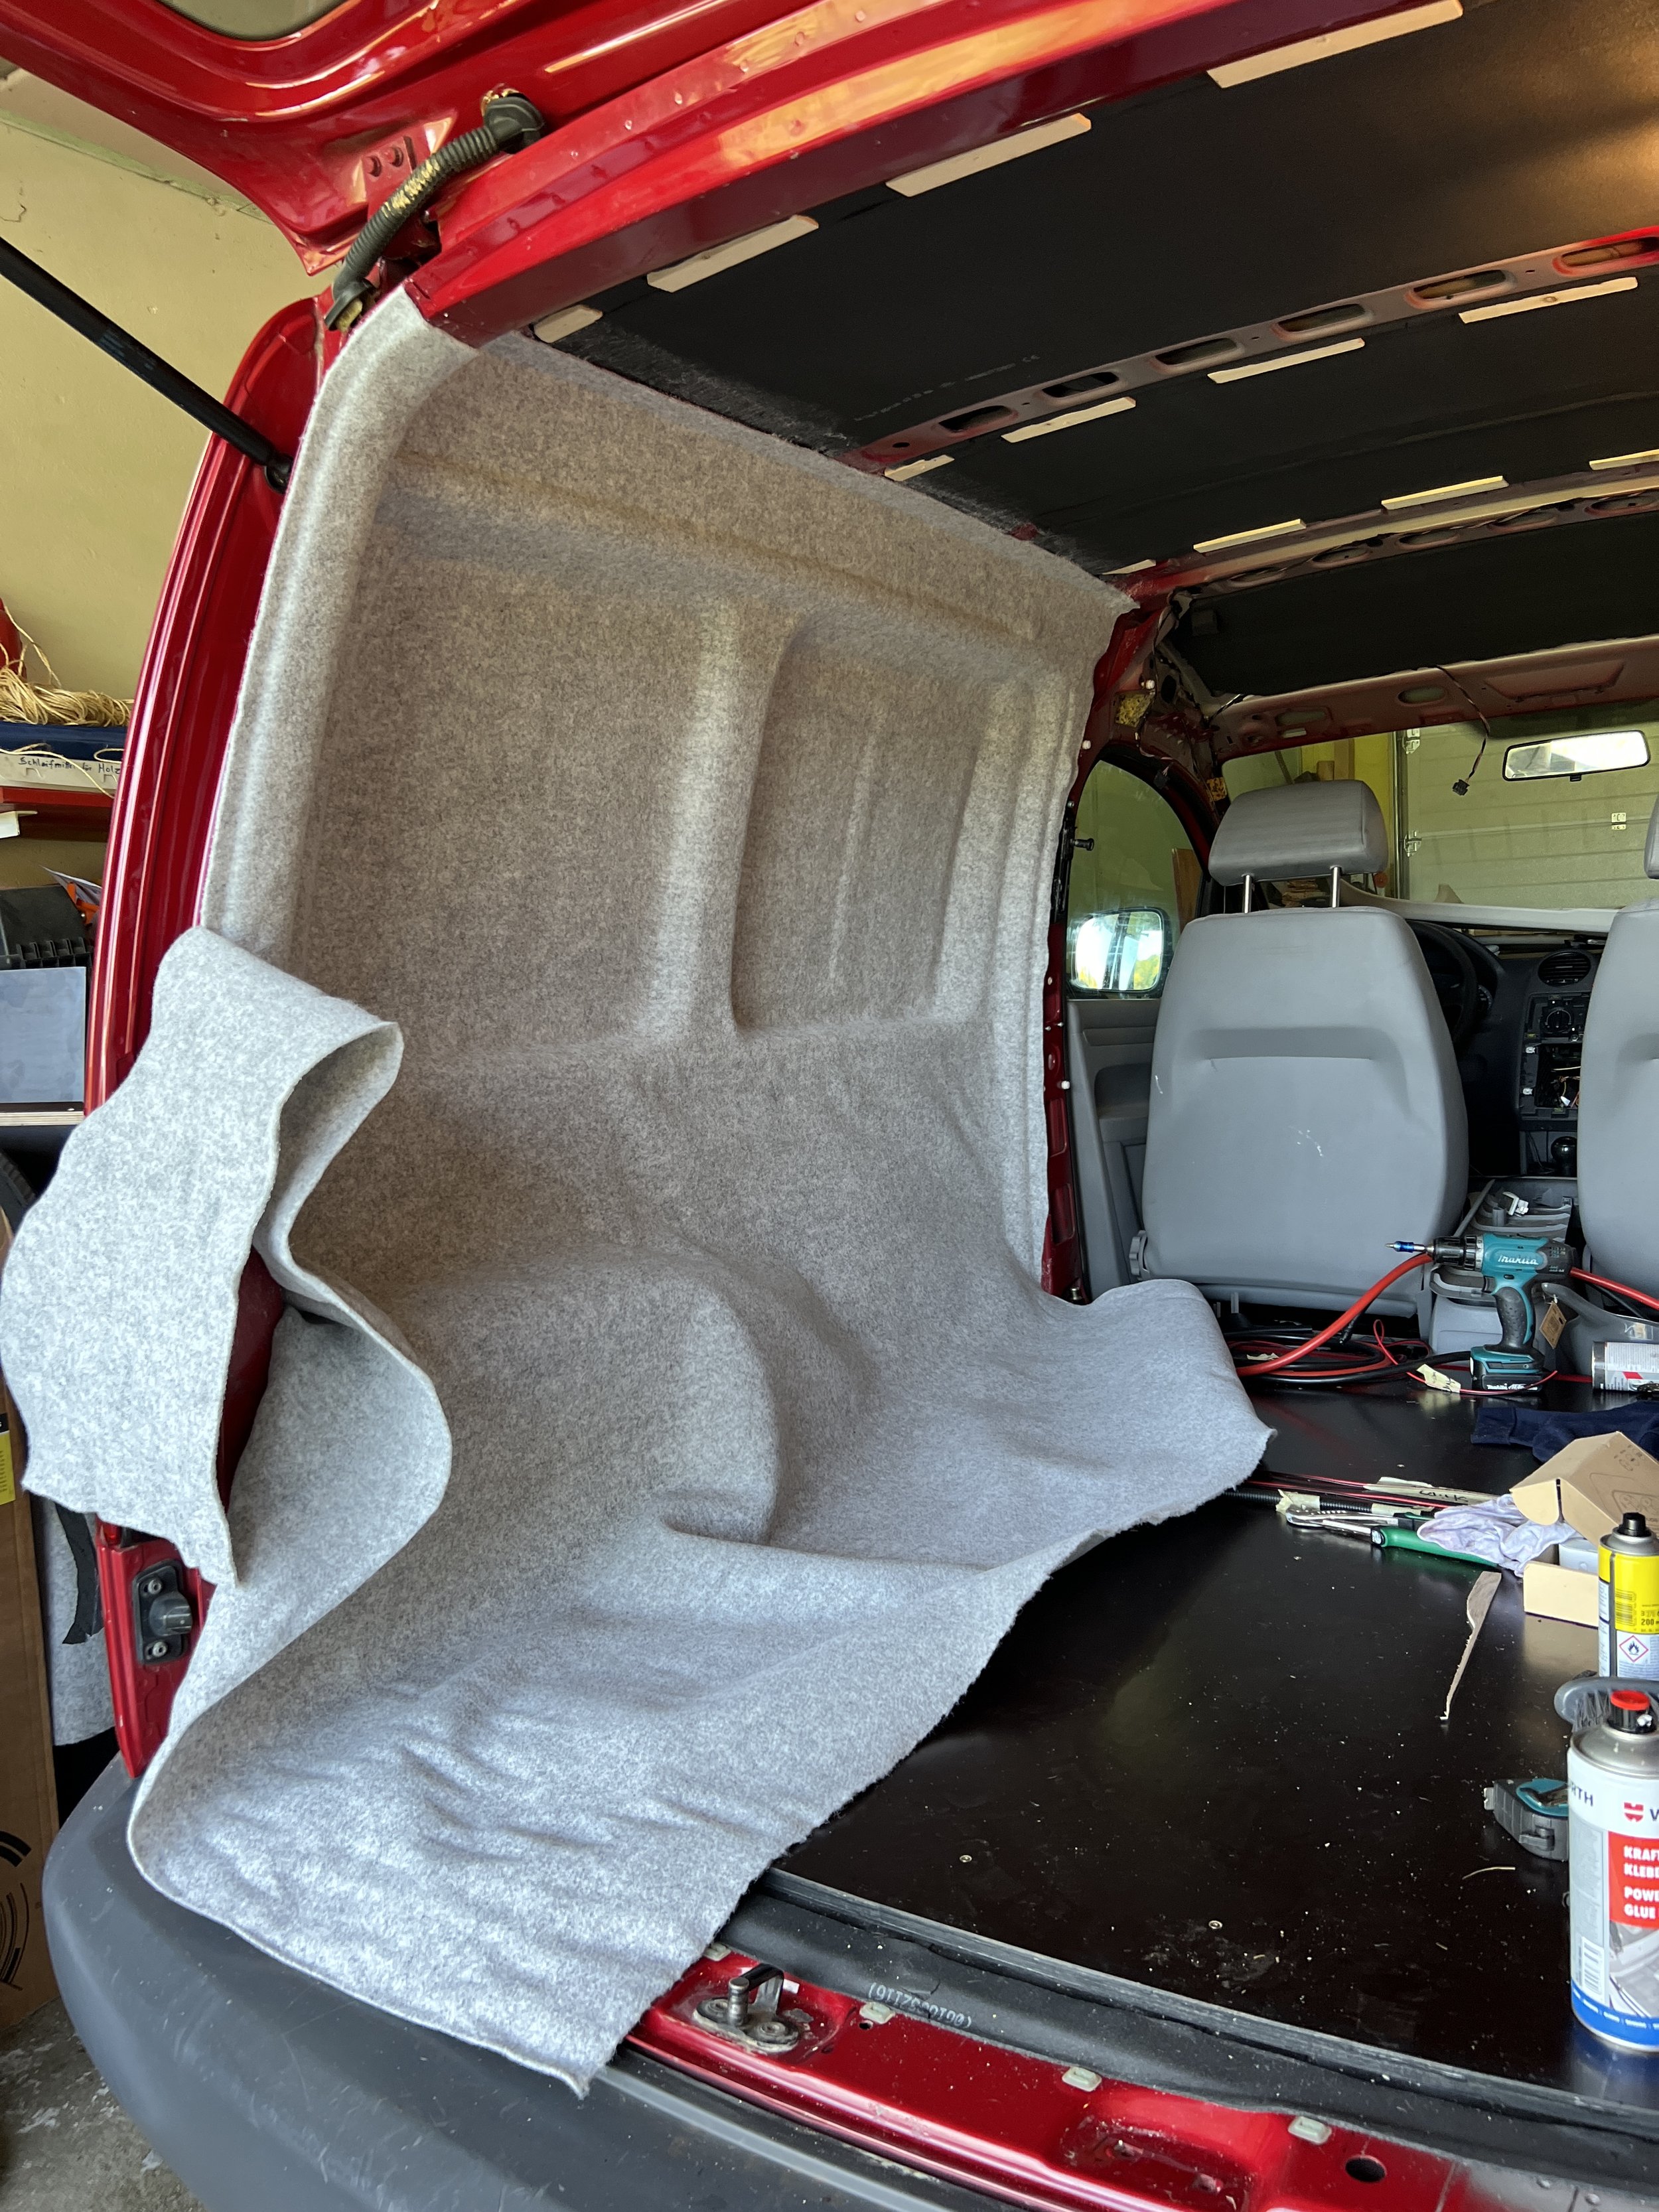
4-way stretch Felt Fabric (click here to see where I bought my felt fabric). "4-way stretch" means the fabric can expand in four directions, making it perfect for covering the uneven interior surfaces of a car.
The process of applying this felt fabric is fairly simple:
Degrease surfaces. I like using brake cleaner as a degreaser (click).
Cut the felt fabric to the approximate size needed. Cutter knives are also available on the page where I ordered the felt fabric (click).
Spray glue on both the car surface and the fabric, then wait 10 minutes before applying the fabric for optimal bonding. Use only the recommended spray glue available on their page (click).
Press the felt fabric (click) against the glued surface, working patiently across the entire area.
What is also really helpful is a carpet hook cutter knive like this one (click); with it you wont damage your car paint while cutting. Also you can turn it and use the hard metal end to press in the felt, but be cautious of the sharp blades to avoid injury.
Find a clear felt fabric installation guidance with step-by-step pictures in my conversion book (click).
My Recommendation:
Use only high quality 4-way-stretch felt fabric like the one I used (click) to get stunning results. There are a variety of felt fabric options available online, but it is important that the fabric comes with a high stretch technology. I have seen camper conversion projects where felt fabric was being applied that was not designed for camper building and naturally the fabric was not as “stretchable” which left many ugly folds and the owner of the camper too frustrated in removing the fabric as it would have mean a lot of effort pulling it all off again and purchasing fabric again.
Safe yourself some headache and go with a proper felt designed for the very uneven car interior surfaces. A proper guide to the felt fabric installation is included in my “How to Build a Mini-Camper book” (click).
15. More Felt Fabric (Trunk)
Again, think about space at every step of your conversion. Instead of building a thick wooden camper cover for the trunk, consider also using the thin 3mm felt fabric here.
Placing the felt on the trunk follows the same process as for the walls. But make sure when using spray glue, to protect all surfaces that won't be covered with felt. Removing the glue is difficult. A blue protective window film, like the ones used for new windows, would be ideal to stick to the car window before using the spray glue. If you don't have this film available (like me), you can use ordinary transparent tape to cover the window before spraying. And most of us have transparent tape for packing cartons at home.
I wrote the steps again for you:
Degrease the surfaces.
Apply a protective film to the window (package tape is sufficient).
Spray glue on the trunk surface and felt fabric.
Let the glue air for around 10 minutes before applying.
Apply the fabric to the trunk surface.
Press and cut to the desired shape.
To achieve professional-looking and watertight corners and a watertight seal, you need to take extra care when cutting the outermost corners of your trunk felt fabric. Once the trunk lid is closed, it's protected from rain and water by the thick and puffy rubber sealant, which is automatically pressed in-between the trunk lid and the loading area. If you cut the felt fabric in a way that makes it overlap with the rubber sealant joint, water can enter your car even when the trunk is closed. However, if you cut too much, you may create unsightly gaps that can be seen from within the car when the trunk is closed. Cutting the felt perfectly is not as easy as it seems, but there is a technique that can help:
Leave some extra felt fabric overhanging at the edges of your trunk surface. Then, close the trunk and use a felt marker to paint the perfect cut line all around the trunk edges, using the trunk rubber sealant as a guide. Additionally, you can cautiously cut the areas that are easily accessible from within when the trunk is closed. Use your hook cutter and slowly cut along the rubber sealant without damaging it. The inaccessible areas are marked by the felt marker and can be easily cut with an open trunk. The results are professional and guarantee a tight seal.
My Recommendation for Professional-Look and Watertight Edges:
For professional-looking and watertight edges, I recommend leaving some felt fabric to overlap all the outermost edges of the trunk. Then, close the trunk and use the black rubber sealant as a guide for your hook cutter. For the areas that are not easily accessible from within the car, mark them with a felt marker, and open the trunk to cut them with greater freedom. With this technique, achieving professional-looking and watertight edges will no longer be a problem.
More tips on a perfect felt fabric installation with step-by-step pictures in my conversion book (click).
Good luck, and don't forget to change the hook razor blade regularly, as the felt fabric dulls it quickly, and for clean cuts, you need a super-sharp blade.
16. Custom Interior Panels (Roof & Walls)
There are only a few things that can drastically change the look of your car towards a camper, like changing the original interior panels.
But before you start, be aware that your mini camper is exposed to fairly extreme fluctuations in humidity and heat. The car interior can easily reach temperatures from minus 10°C to plus 70°C within the same year (latitude: Germany), with humidity ranging from 20% to 90%. It's not surprising why car manufacturers commonly avoid placing humidity/heat sensitive parts like wood in a car interior. To be fair, a car interior is basically made of plastic. If you do find parts made of humidity/heat sensitive materials, they are treated with an effective surface treatment like polyurethane, varnishes, or even epoxy and the like. Another factor is UV radiation; think of a day at a sunny beach with wide open doors and trunk. This could be enough to bleach some of your interior, which is why manufacturers use car materials with UV-resistant properties.
What does this mean for us DIY mini camper builders?
Most of us like to use wood in building the camper interior as it is fairly cheap and easy to shape and form with common tools. But, as we learned, just like car manufacturers, we need to protect these surfaces.
So it's generally best to:
Choose a material that can naturally resist extreme fluctuations in heat and humidity.
Choose lightweight materials (as materials add up quickly).
Apply UV-resistant paint.
Not leave humidity-sensitive surface materials untreated.
Treating all panel surfaces yourself not only takes time but also costs a considerable amount of money. Think about sanding paper, primer, UV-resistant paint, brushes, etc.
The Solution:
Look for companies dealing with large printed panels! It's even possible to find panels that are printed on both sides, making them highly resistant to any humidity-related damages or mold growth. Such panels are light as a feather, and the pressed core with the printed surface creates a very flexible yet stable surface. In short: they are the ideal camper panel material.
I have found such a supplier and included it in my conversion book (click). They even offer delivery options.
Now, you are ready to create your own custom car interior panels. It is fairly simple once you have chosen the right material. Use the original car trim panels as templates, and don't forget to also treat all cut edges with a surface treatment, as humidity can also enter through the cuts.
But a quick side note: Also, try not to make a science out of each step. I have seen several camper builds that chose whatever they found and are still doing fine. 'Done is better than perfect'. (Good ventilation when camping is very crucial as well, and so is not storing wet clothes or spilling drinks. These allow the use of inferior materials. I have also included a ventilation chapter in the book (click), where you can find very simple tricks for ensuring a mold-free interior).
17. Electrical Set-Up
I made a list for you, including the electrical components used in this mini camper (click).
A mini camper is indeed small, but is it possible to include all the electrical ins and outs of larger campervans, like in my previous conversion (click)? Let's find out!
Firstly, having it all doesn't necessarily mean having it better. You need to specify what is important to YOU when planning the electrical setup. The best way to figure out which electrical components YOU really need is by renting a camper for a week and going on a camping road trip. You'll quickly learn what you favor in your own mobile home. For me, it's very clear, as I have spent almost a decade driving a mini-camper as my daily commuter. However, in this project, I wanted to add a cherry on top and include a slightly more powerful battery and inverter combo than what I really need, just to prove that a mini-camper does not need to compromise; on the contrary, it can even outperform larger campervans.
Induction Stove: To avoid gas examinations.
230V Outlets: Powered by a 2000W 12V to 230V inverter and a 200Ah LiFePO4 body battery.
Charging Booster: Minimum 30 amps to power the lithium body battery from the alternator.
2kW Heater: For all-year-round trips, maintaining 21°C to below -20°C.
LED Lighting: Direct and indirect, smartphone-controlled (personal preference).
Solar Charging: Ideal for extended stays at a single location.
Gas Alarm: Alerts to various gases (narcotic, carbon monoxide, LPG) for safety.
Main Electric Switch: Useful for extended periods of non-use.
My Recommendation:
If you feel somewhat lost in the world of camper electrics, you might find my conversion book (click) helpful. I've tried to provide an easy start to your camper electrics adventure. Additionally, I've included a simple overview of wires and the like to give you a quick understanding and more confidence in setting up your own camper electrics. Alternatively, if you already know you want to skip the electrics entirely, I have written a chapter about an “All-in-One” device solution. Here's a link to the “Everything Device” (click). This means you can simply skip the entire wiring and ordering of parts – one order, place it inside your vehicle, and all your electrical worries are gone.
18. Electrics Placement (Hidden Away)
In case you use a VW Caddy as a base for your conversion, I've found a great place to hide the electrical components: below the driver's seat! But no matter which car you choose for your mini camper conversion, the electrical control center needs to be:
Easily accessible (for changing fuses, maintenance, main on/off switch)
Ventilated (as some components get hot and need access to airflow)
Secured (in case of an accident/emergency braking)
Also, think about the wiring, meaning there should be some space left to lay wires to the electrical components.
Note: Make sure to read the installation manual of the components you choose as some have special requirements. For example, the charging booster I installed (Orion Tr-Smart 12-12 30) needs to be installed vertically as it uses passive cooling, and in a horizontal position, it could overheat. Another example is the Ective Si 20 (2000 Watts) Inverter, which requires a minimum of 10 cm space between the ventilation openings.
Find a more in-depth guide to create an under-seat electrical unit in my conversion book (click).
My Recommendation:
Even if you don't intend to install the components yourself, it's a good idea to briefly review the component list and understand what each device does. I hope this article and my conversion book (click) can provide some clarity in this often feared area of camper building – the electrics. In any case, for peace of mind, I recommend showing your wiring and electrical plan to a local electrician. Or, consider skipping it altogether with the portable all-in-one device (click). More on this device is also in my conversion book.
19. The Benefits of Heat Shrink Tubing
Heat shrink tubing is a versatile and essential tool in the electrical industry. It is a type of plastic tubing that shrinks in size when exposed to a heat gun, creating a snug and protective fit around wires, cables, and other components. It can shrink up to three times its original diameter and is used to insulate, protect, and organize cables and wires in a variety of applications, from automotive and marine to aerospace. Here are the advantages of using heat shrink tubing:
Excellent electrical insulation (preventing electrical shorts).
Protection from damage (such as abrasion and heat).
Protection from moisture and dust.
Insulation from heat and cold.
Increased durability and longevity of electrical connections and components.
Improved cable management (bundles cables together within seconds, reducing clutter and increasing serviceability, making troubleshooting easier).
Easy installation (quickly shrunk using a heat gun, making it a daily-used product for electricians and other professionals).
Heat shrink tubing with adhesive (glue) provides an additional layer of protection and security for electrical connections. The added adhesive melts during the shrinking process when exposed to your heat gun, creating a watertight seal between the cable and tubing, preventing moisture and other contaminants from entering the connection. It is especially recommended for outdoor or marine applications where exposure to water is a concern.
My Recommendation:
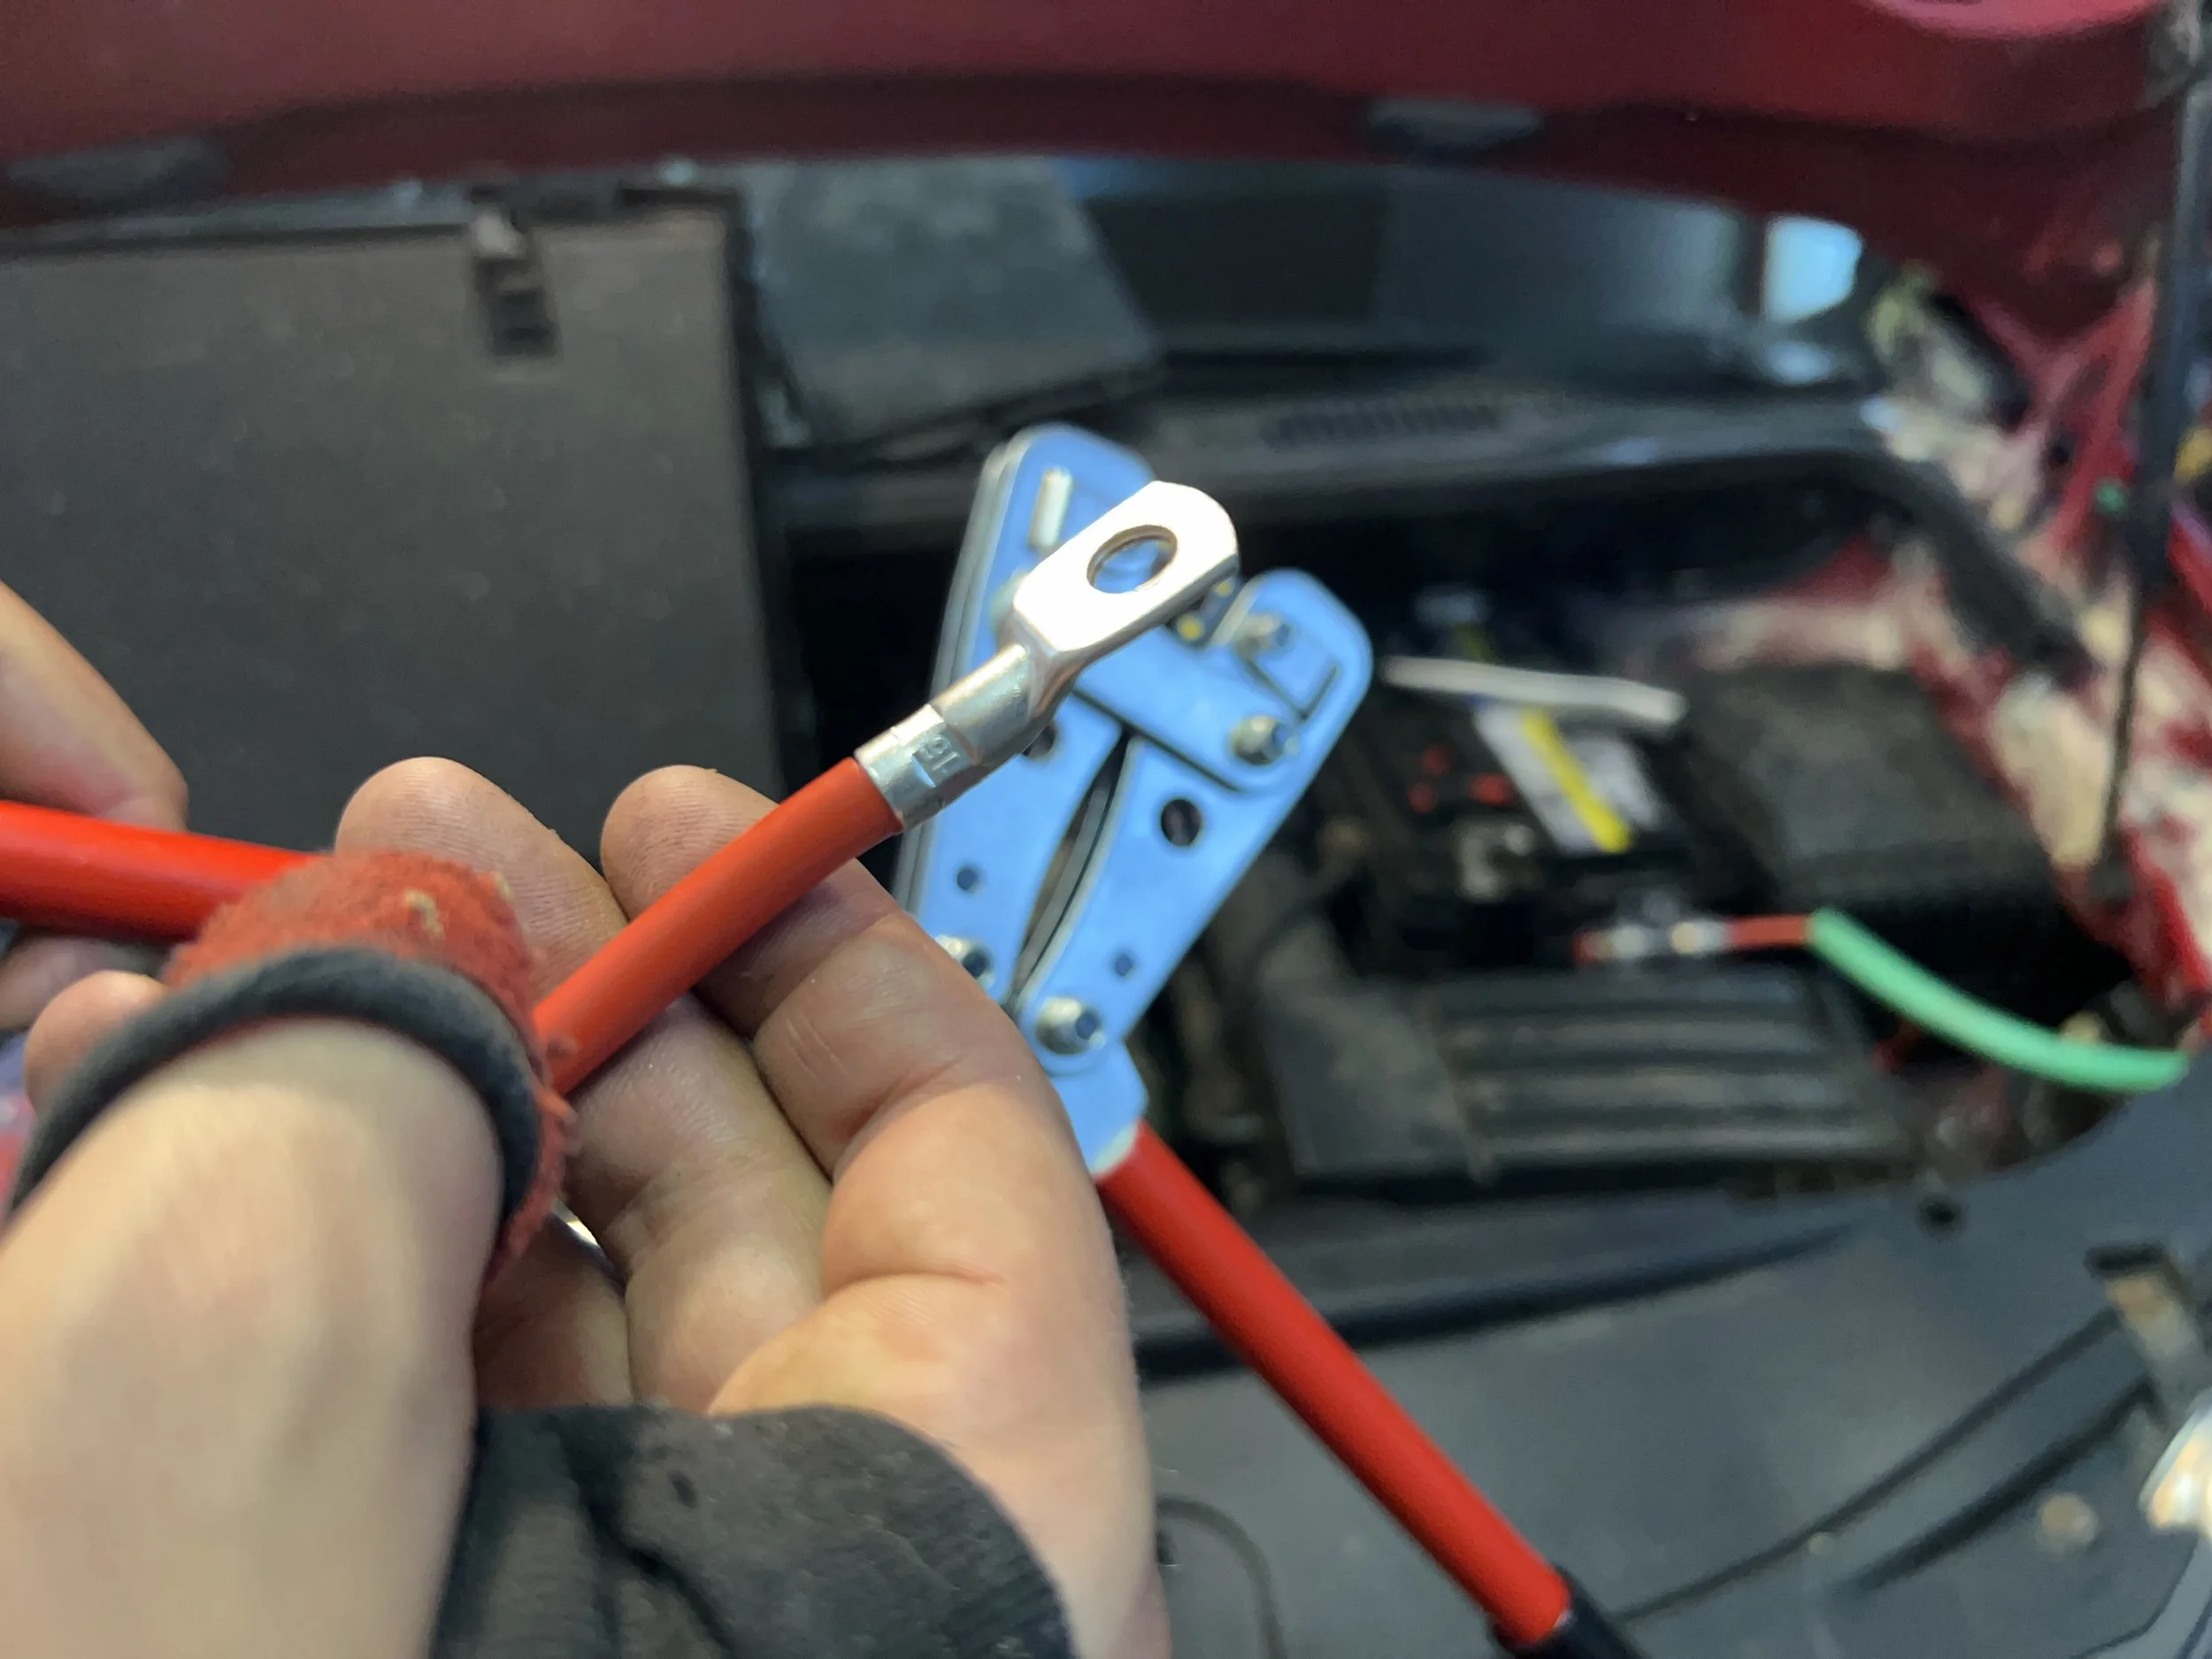
If you use heat shrink tubing, it's best to order a set that comes with adhesive for maximum safety. The heat shrink set is included in the mini-camper shopping list (click). More on the right wire choice and how to crimp cable shoes to the wire endings in my conversion book (click).
20. Camper Battery (Lead-Acid vs. Lithium)
When it comes to building a camper, one of the most crucial components to consider is the body battery. The body battery, also known as the camper battery, powers all the appliances, lights, and electronics in the camper when it's not connected to an external power source.
There are two main types of batteries used as body batteries in campers:
Lead-acid batteries
Flooded lead-acid
AGM lead-acid
Gel lead-acid
lLithium batteries
LiFePO4
Each type of battery has its own unique way of functioning, which means they all have their own benefits and disadvantages that must be considered before making a decision.
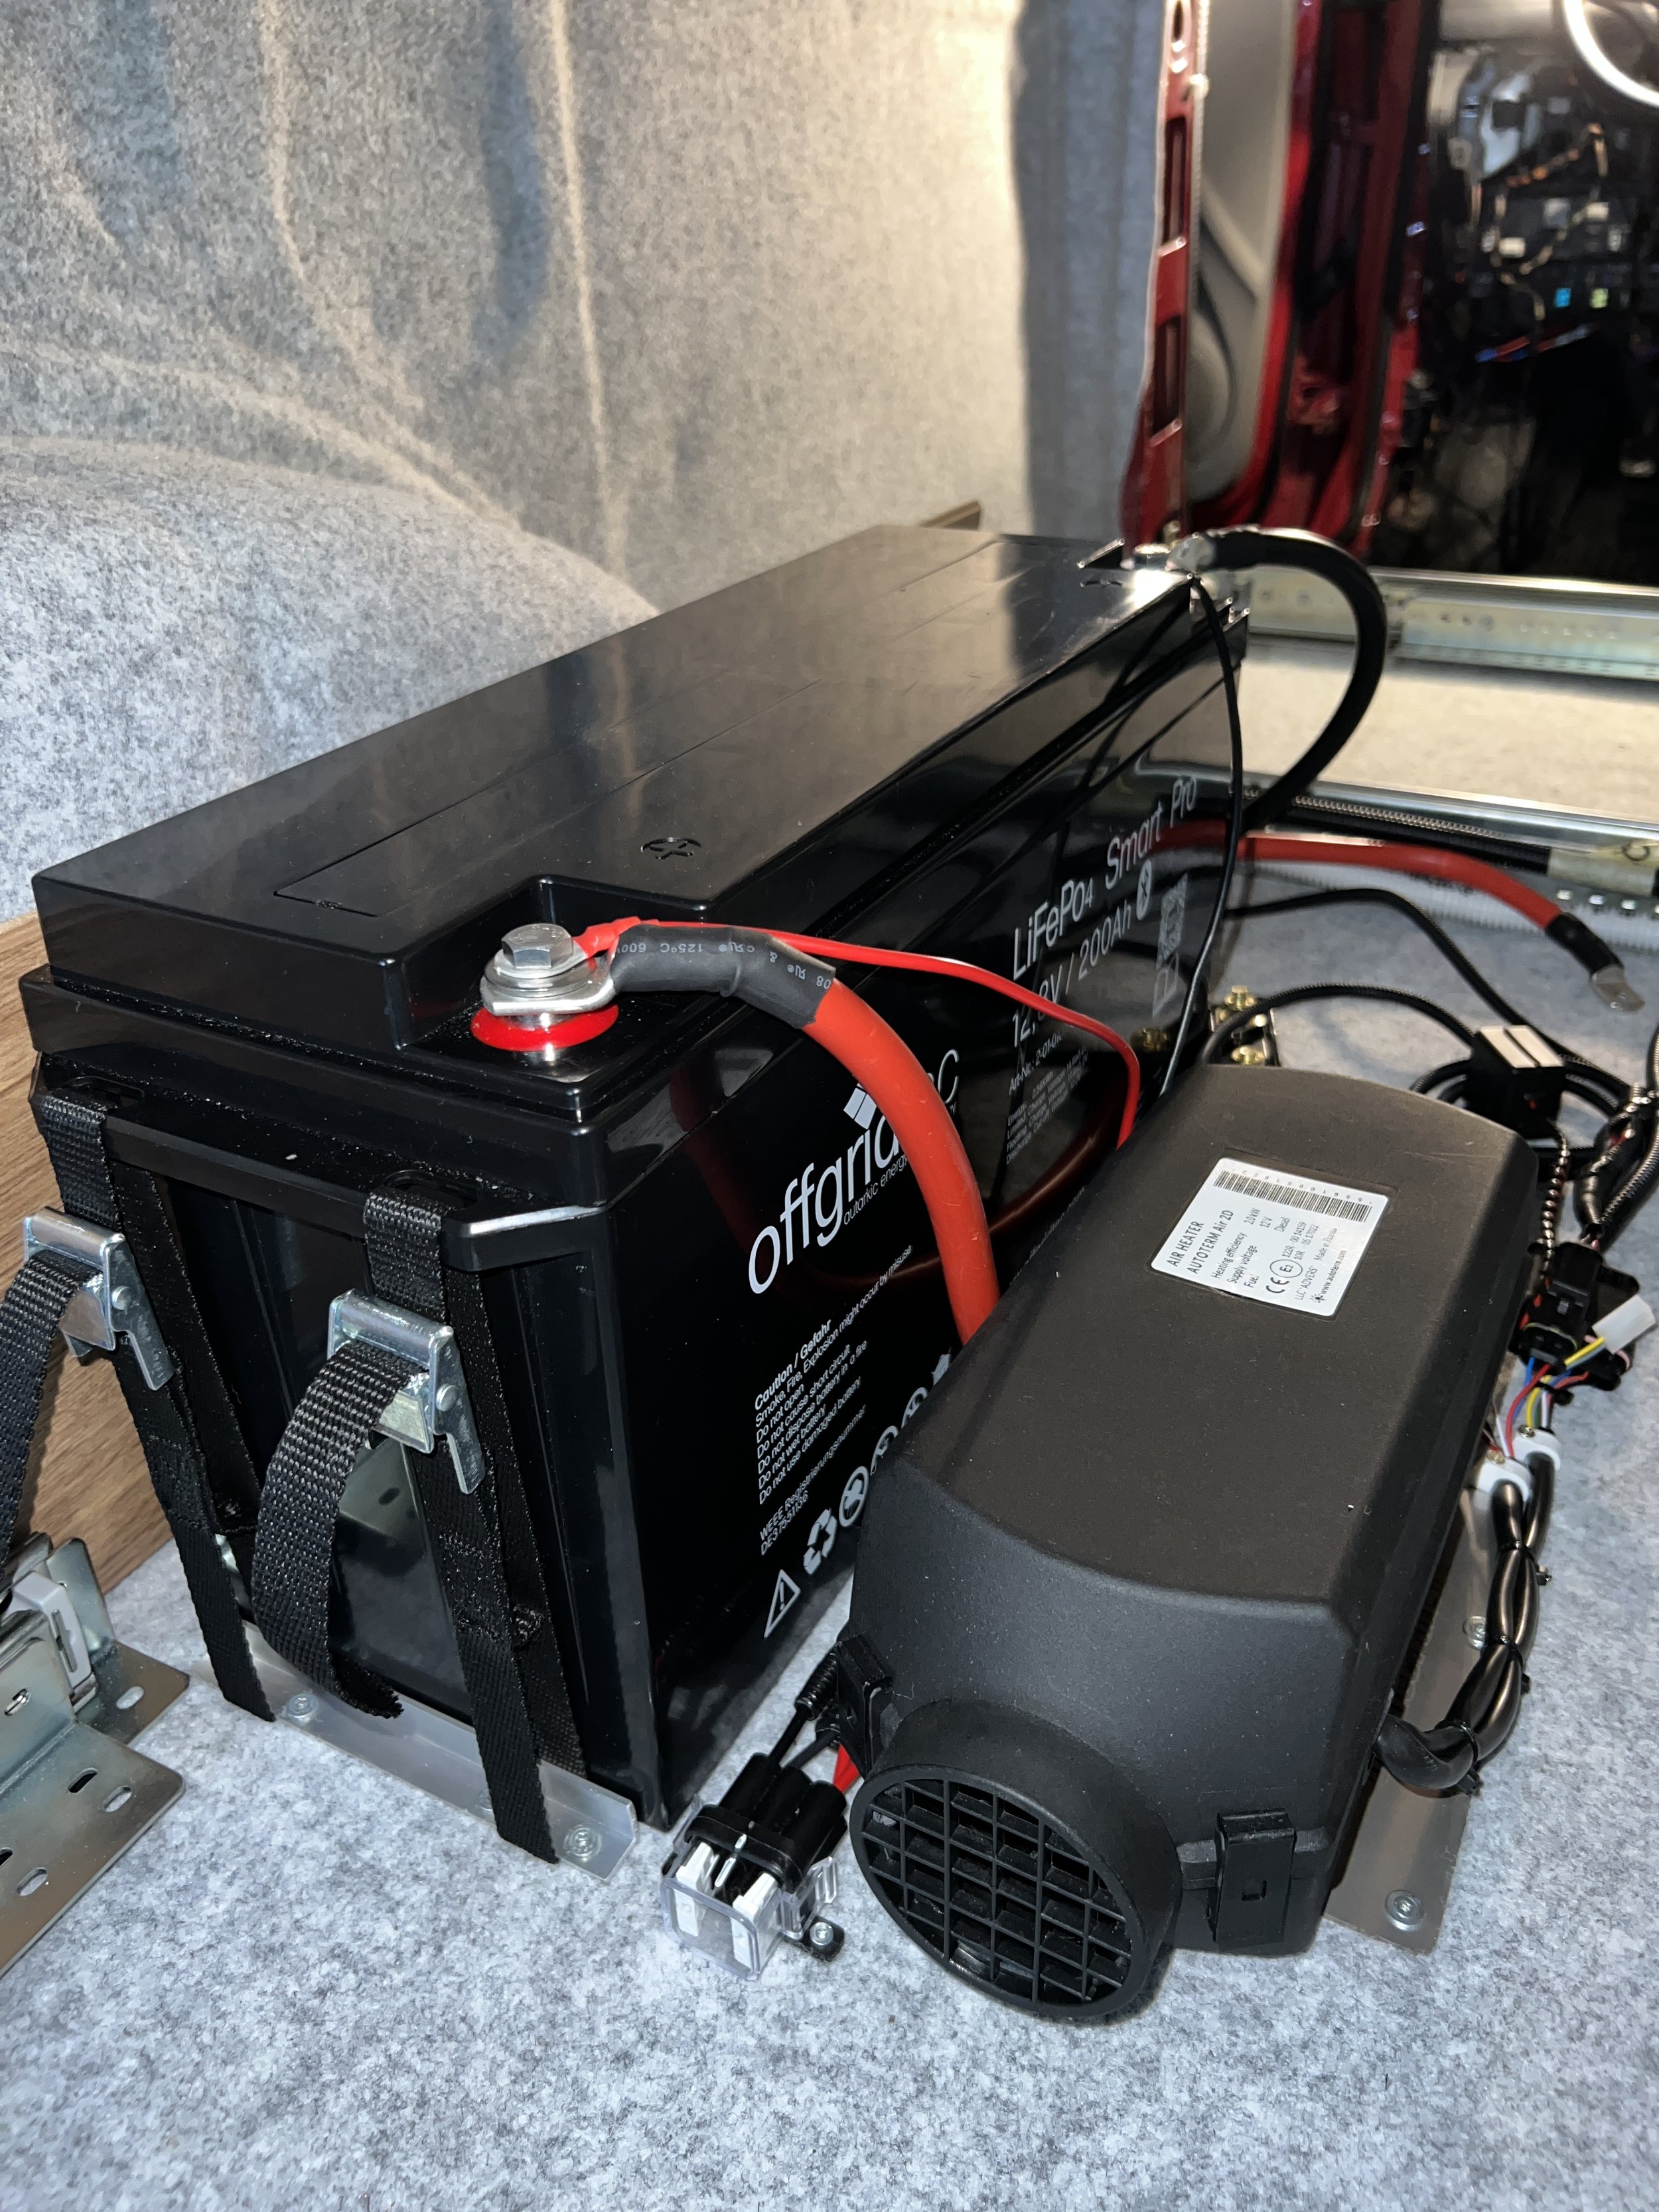
For my project, the most suitable option was a LiFePO4 (lithium) battery from the company Offgridtec, one of the leading suppliers in the field of self-sufficient power supply, energy storage, and electronics.
In my ebook (click), you will find a chapter on different types of batteries, detailing the advantages and disadvantages of each battery system to help you make an informed decision. I also included a chapter on how to safely and easily mount a battery in your mini-camper, complete with step-by-step pictures for easy replication.
My Recommendation:
Making an informed decision on which battery to purchase for your own camper conversion will literally set you up for charged adventures. In the battery chapters, I included links to batteries that I personally have tested and can attest to their utility. It might seem that a lithium battery is not worth its price compared to standard lead-acid batteries, but you might be surprised what you can learn in my book regarding this topic. Also, you will find a tip to find good deals on batteries in the conversion book (click).
21. Charging Booster (Smart via Bluetooth)
What is a charging booster, and do you really need one?
The name is a bit misleading, in my opinion. In truth, nothing is being "boosted" here; it's a simple charger for your camper battery (body battery). Every car comes with a battery; otherwise, it wouldn’t have the potential energy to start the engine when you turn your keys. The car battery is charged by the alternator through the running engine.
When building a camper, most of us want to install a second battery, also known as the "body battery." So, when you park your mini camper for some days and turn on the interior camper spotlights, charge your phone, let the parking heater run, or make use of the 12V to 230V inverter, etc., the energy is supplied by the second “body battery” and not the car battery.
Now, suppose your mini camper was parked at the same camping spot for some days and your lights went off…accidentally, you have drained your body battery (camper battery).
Can you still start the engine, or do you need to call the closest car workshop?
Yes!, you can still start the car because your standard engine battery can't be discharged when using your camping electrical components, thanks to the charging booster.
Now the car is running, and the camper lights went back on! Why? Because the alternator charges not only the standard battery but also the body battery, again thanks to the charging booster.
Imagine electrical energy is a river. The river starts at the alternator (engine) and flows into your standard car battery. After that, it flows to the charging booster. The charging booster checks if the car battery is sufficiently charged before allowing the energy to flow into the camper battery (body battery). Normally, the car battery would block the flow as it is fully charged, but the charging booster intervenes and says, “Don’t stop the flow yet; we still need more for the camper battery”. The energy keeps flowing until the charging booster sees both batteries are fully charged and then either stops the flow or reduces it significantly.
Keep in mind that the alternator does not always produce the same amount of energy. It actually requires more fuel consumption for your engine to let the electricity flow at maximum capacity to charge the batteries.
And your charging booster can do even more! You can connect to it via Bluetooth and tell it which type of battery you have installed as your camper battery (body battery). Different battery types (e.g., Lithium vs. Acid batteries) need different charging curves, and your charging booster supplies your body battery with the right charging curve, drastically increasing the lifespan of your battery.
My Recommendation:
A charging booster is a wonderful component, and I would recommend everyone to install one. It is worth the effort and helps avoid “charging headaches”. Find more in-depth information in my conversion book (click).
22. All-In-One Camper Electric Innovation
This device makes the entire camper electrical installation possible without any previous knowledge!
It truly offers an all-in-one plug-and-play solution that replaces so many other components that would have to be set up and wired together. Therefore, it eliminates the need for weeks of research and elaborate electrical studies. The device is designed to be user-friendly, requiring zero dedication and no previous electrical knowledge. In size, it resembles an electric guitar speaker. There are different power versions available, but the one I bought for the T5 family camper conversion (click to see conversion) is so powerful that it can generate up to 6000 watts and maintain a constant 3000 watts. This makes it able to power even high-energy appliances like hairdryers, heat guns, angle grinders, jigsaws, and many more.
This device includes the following components:
Lithium Battery
12V to 230V Inverter
Battery Monitor & Bluetooth Smartphone Battery Monitoring
Charging Booster
Solar Charger
Induction Smartphone Charging
Fuses
Distribution Blocks
Ability to Jump-Start Engine Battery
Mounting Brackets
Another useful features of this device is its ability to jump-start an engine battery. In case of a drained battery, the device can be used as long as it has above 45% battery charge, avoiding a costly emergency roadside service.
For me, it's not just a device for camping but also offers several other use cases, like powering a barbecue, providing electricity for tents, or powering machinery in the garden.
My Recommendation:
Compared to a self-built system, the AccuBox can be a more cost-effective solution, especially since it saves time as everything is already interconnected inside this box. Also, it requires no professional help, meaning one saves the labor costs of an electrician if having a system set up from individual components. Overall, the Ective AccuBox is a game-changer, and that is exactly why I purchased one for the VW T5 family camper conversion (see conversion here).
23. Invisible Solar System
The coronavirus pandemic, which started in 2020, not only brought drastic changes to our society but also to the world of camping. For this reason, I am now a big fan of solar bags, rather than solar panels.
But what does this have to do with the solar system?
Most of us lived under restrictions regarding our daily activities, especially vacation plans and travels, which were severely impacted. How could freedom, adventure, and new experiences still be achieved under such circumstances? We were advised to avoid large groups of people to minimize our risk of infection/spreading the virus. Many people found an escape in the world of camping: Bringing an entire mini-apartment from your doorstep all the way to a distant warm beach became the ultimate peace of mind.
Similar thoughts have brought countless people to the same conclusion: “camping”. Additionally, Vanlife clips surged in popularity on social media, further boosting the vanlife movement.
A significant problem emerged due to the increased number of campers parking everywhere, sometimes even leaving trash behind. As a result, a record number of height barriers were installed to ensure larger vehicles, especially campers, couldn't access certain parking lots. Additionally, more and more signs appeared, such as:
No camping beyond this point
No overnight camping
Camping prohibited
You can find an in-depth solar bag and solar charger installation guidance in my conversion book (click).
The Solution:
The more car-like your mini camper looks from the outside, the better. Fixed solar panels on the roof would technically classify your car as a camper, potentially resulting in a ticket on your windshield.
Fortunately, companies have developed foldable solar bags (click). If your camper battery and charging booster are sufficiently sized and your engine runs now and then, a solar system is mostly not even needed. However, if you find a nice spot to park for several days or weeks, being able to charge your mini camper with the help of the sun is a convenient option. Bella kindly showcased the solar bag in the final mini-camper room tour video (click).
24. Mini-Camper Furniture Crafting
The “Mini” in mini-camper stands for:
M: Manage
I: Intelligently
N: Non-existing
I: Interior
Okay, so we really have not much space in a normal car... Does that stopp us? Of course not! It just means we need to be more creative. Let's go!
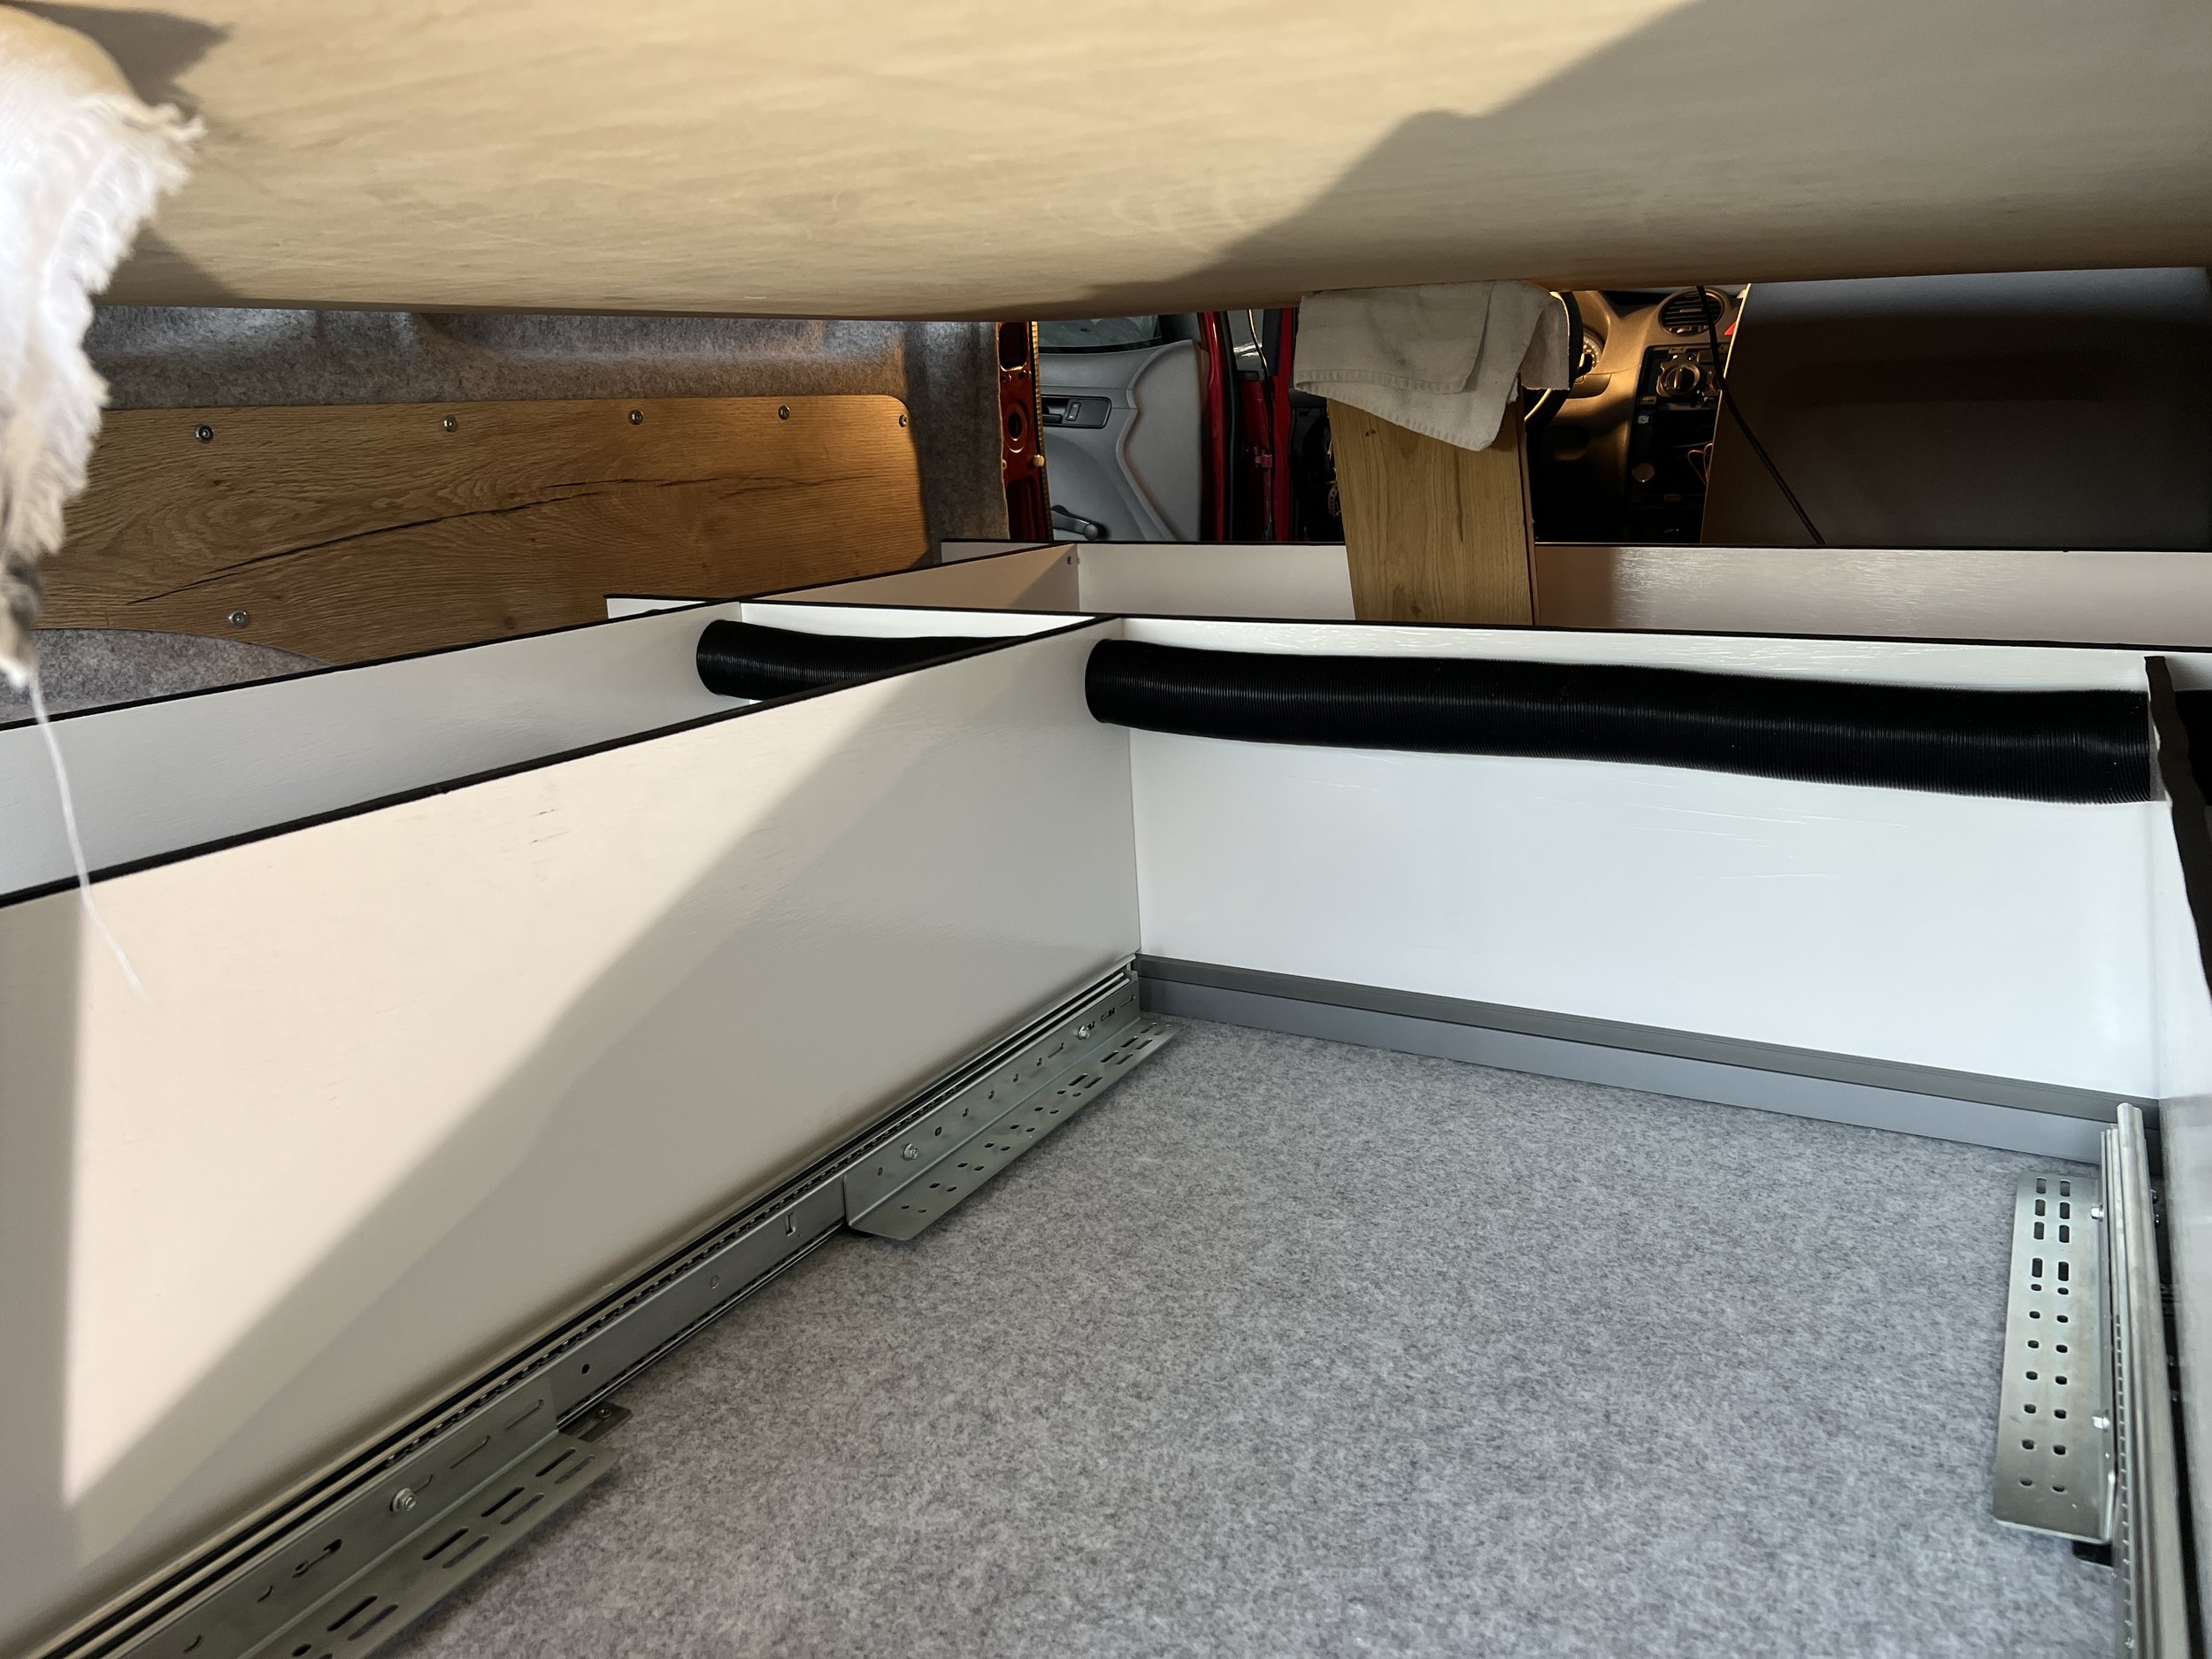
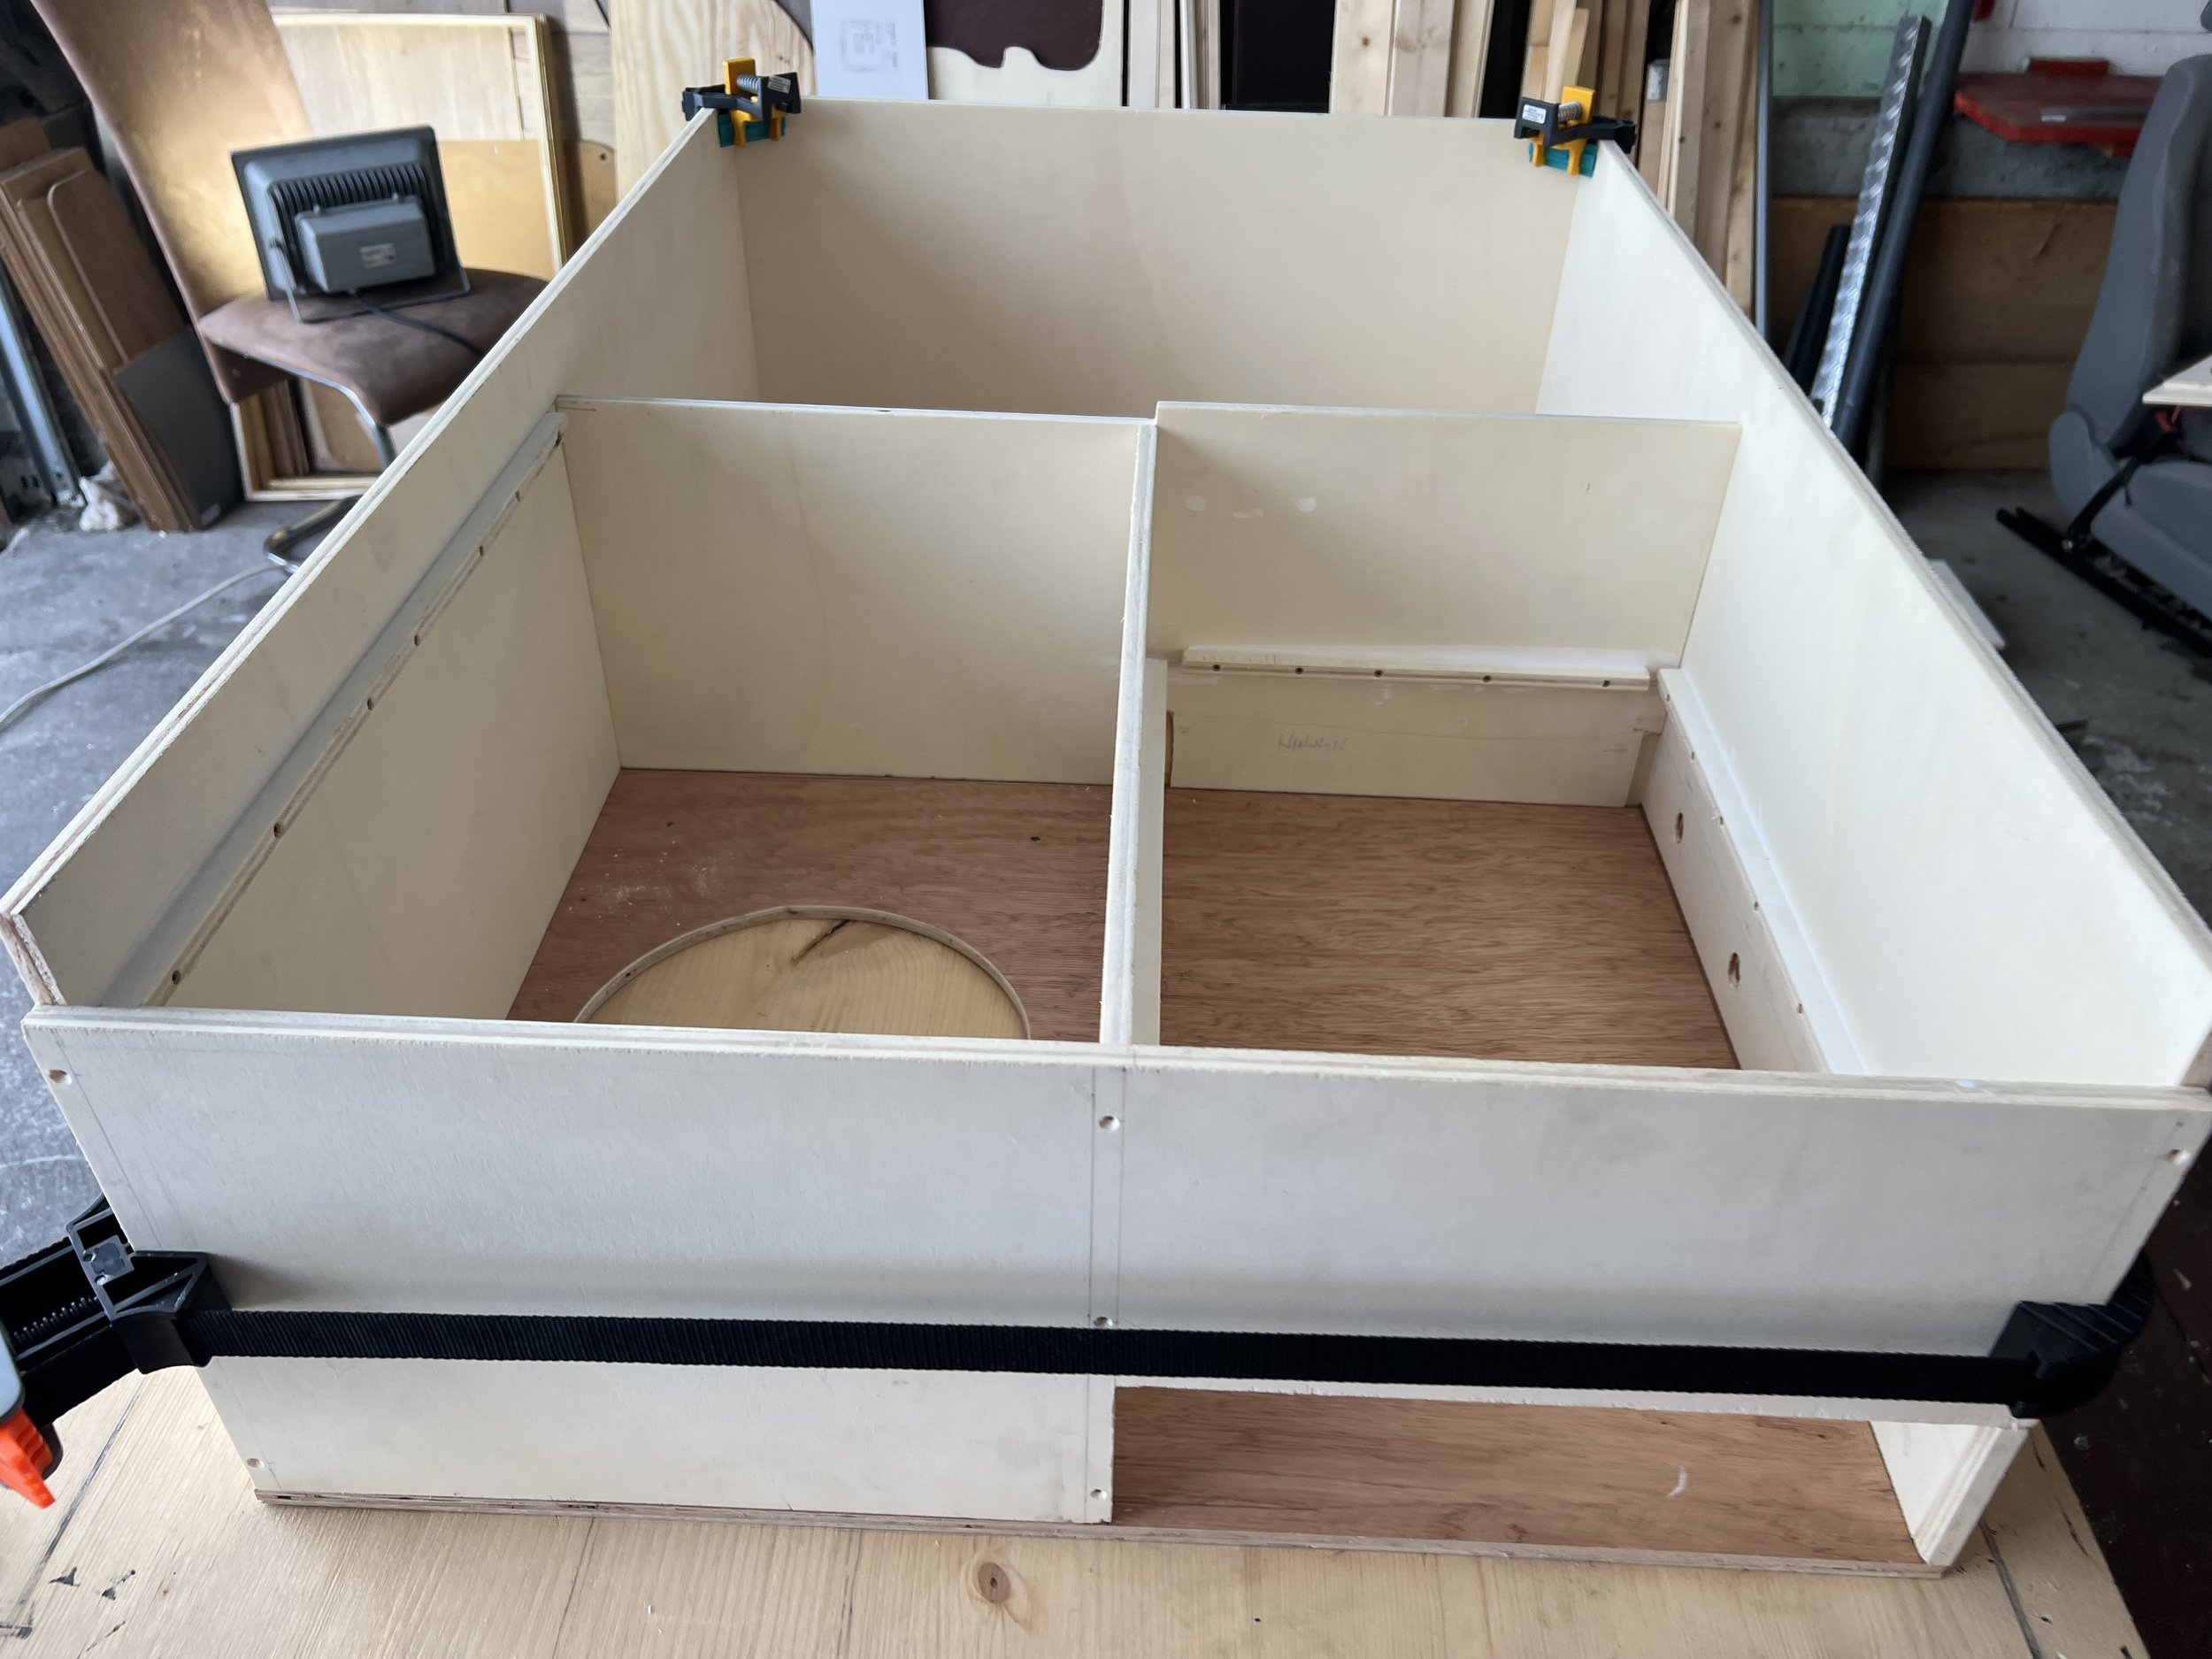
My advice is to cut a 10mm wood panel and place them vertically (standing) on your floor. The 10mm wood boards form a strong foundation that is robust enough to hold the bed plate, mattress, and several people on it without a problem. Using wood panels as columns for the bed construction creates a huge scope for attaching all sorts of accessories.
Then, before the surface treatment, modify the vertical wood panels to fit the other components:
Holes for cable routing
Holes for heating pipes
Service holes for easy access to all mounted components
Preparing attachment points to secure all panels together to form a stable unit
You can find detailed guidance and step-by-step pictures for creating a mini-camper interior in the “How to Build a Mini-Camper” book (click).
My Recommendation:
There is not much space in a mini-camper, but with good planning, one is surprised by how much can actually fit. In my conversion book (click), you can get insights on every step of the interior building, with each part focused on how to make the most out of the little space available.
Tip: Build the construction in a way that all air pockets (drawers; compartments) are interconnected and that an air-flow between each is guaranteed. This prevents trapping moisture and therefore degreases the risk of mould by a great amount! More ventilation tips can also be found in the book.
25. Muffler (Sound Absorber)
For a good night's sleep, we need five things:
Stable Temperature
Quiet Ambience
Comfort
Safety
Ventilation
We need to make sure that all five are well addressed:
Stable Temperature: Good insulation is key. It protects from extreme heat and retains warmth when heating. (Find the insulation installation guide in my conversion book [click]).
Quiet Ambience: A combination of properly placed insulation, felt fabric, and noise-blocking curtains helps create a quiet sleeping environment. (See the dedicated chapters in the conversion book [click]).
Comfort: Simply lying in a warm car is not enough for a relaxing night. Creating a cozy interior is important. Applying felt fabric to the walls and adding custom-made camper paneling instead of the original car panels can make a big difference. (In-depth guidance is available in my book).
Safety: The car's locking mechanism provides a great sense of safety. Consideration of fresh air while sleeping is also important.
Ventilation: Fresh air is crucial for a good sleep. The book includes techniques for effective ventilation without needing to install camper windows or cut holes in your car. (Details in my conversion book).
However, there's a potential issue: The Parking Heater.
It can be surprisingly loud. For example, I can sleep with an open window next to a street, but the diesel heater affects my sleep quality.
The solution to a Noisy Parking Heater:
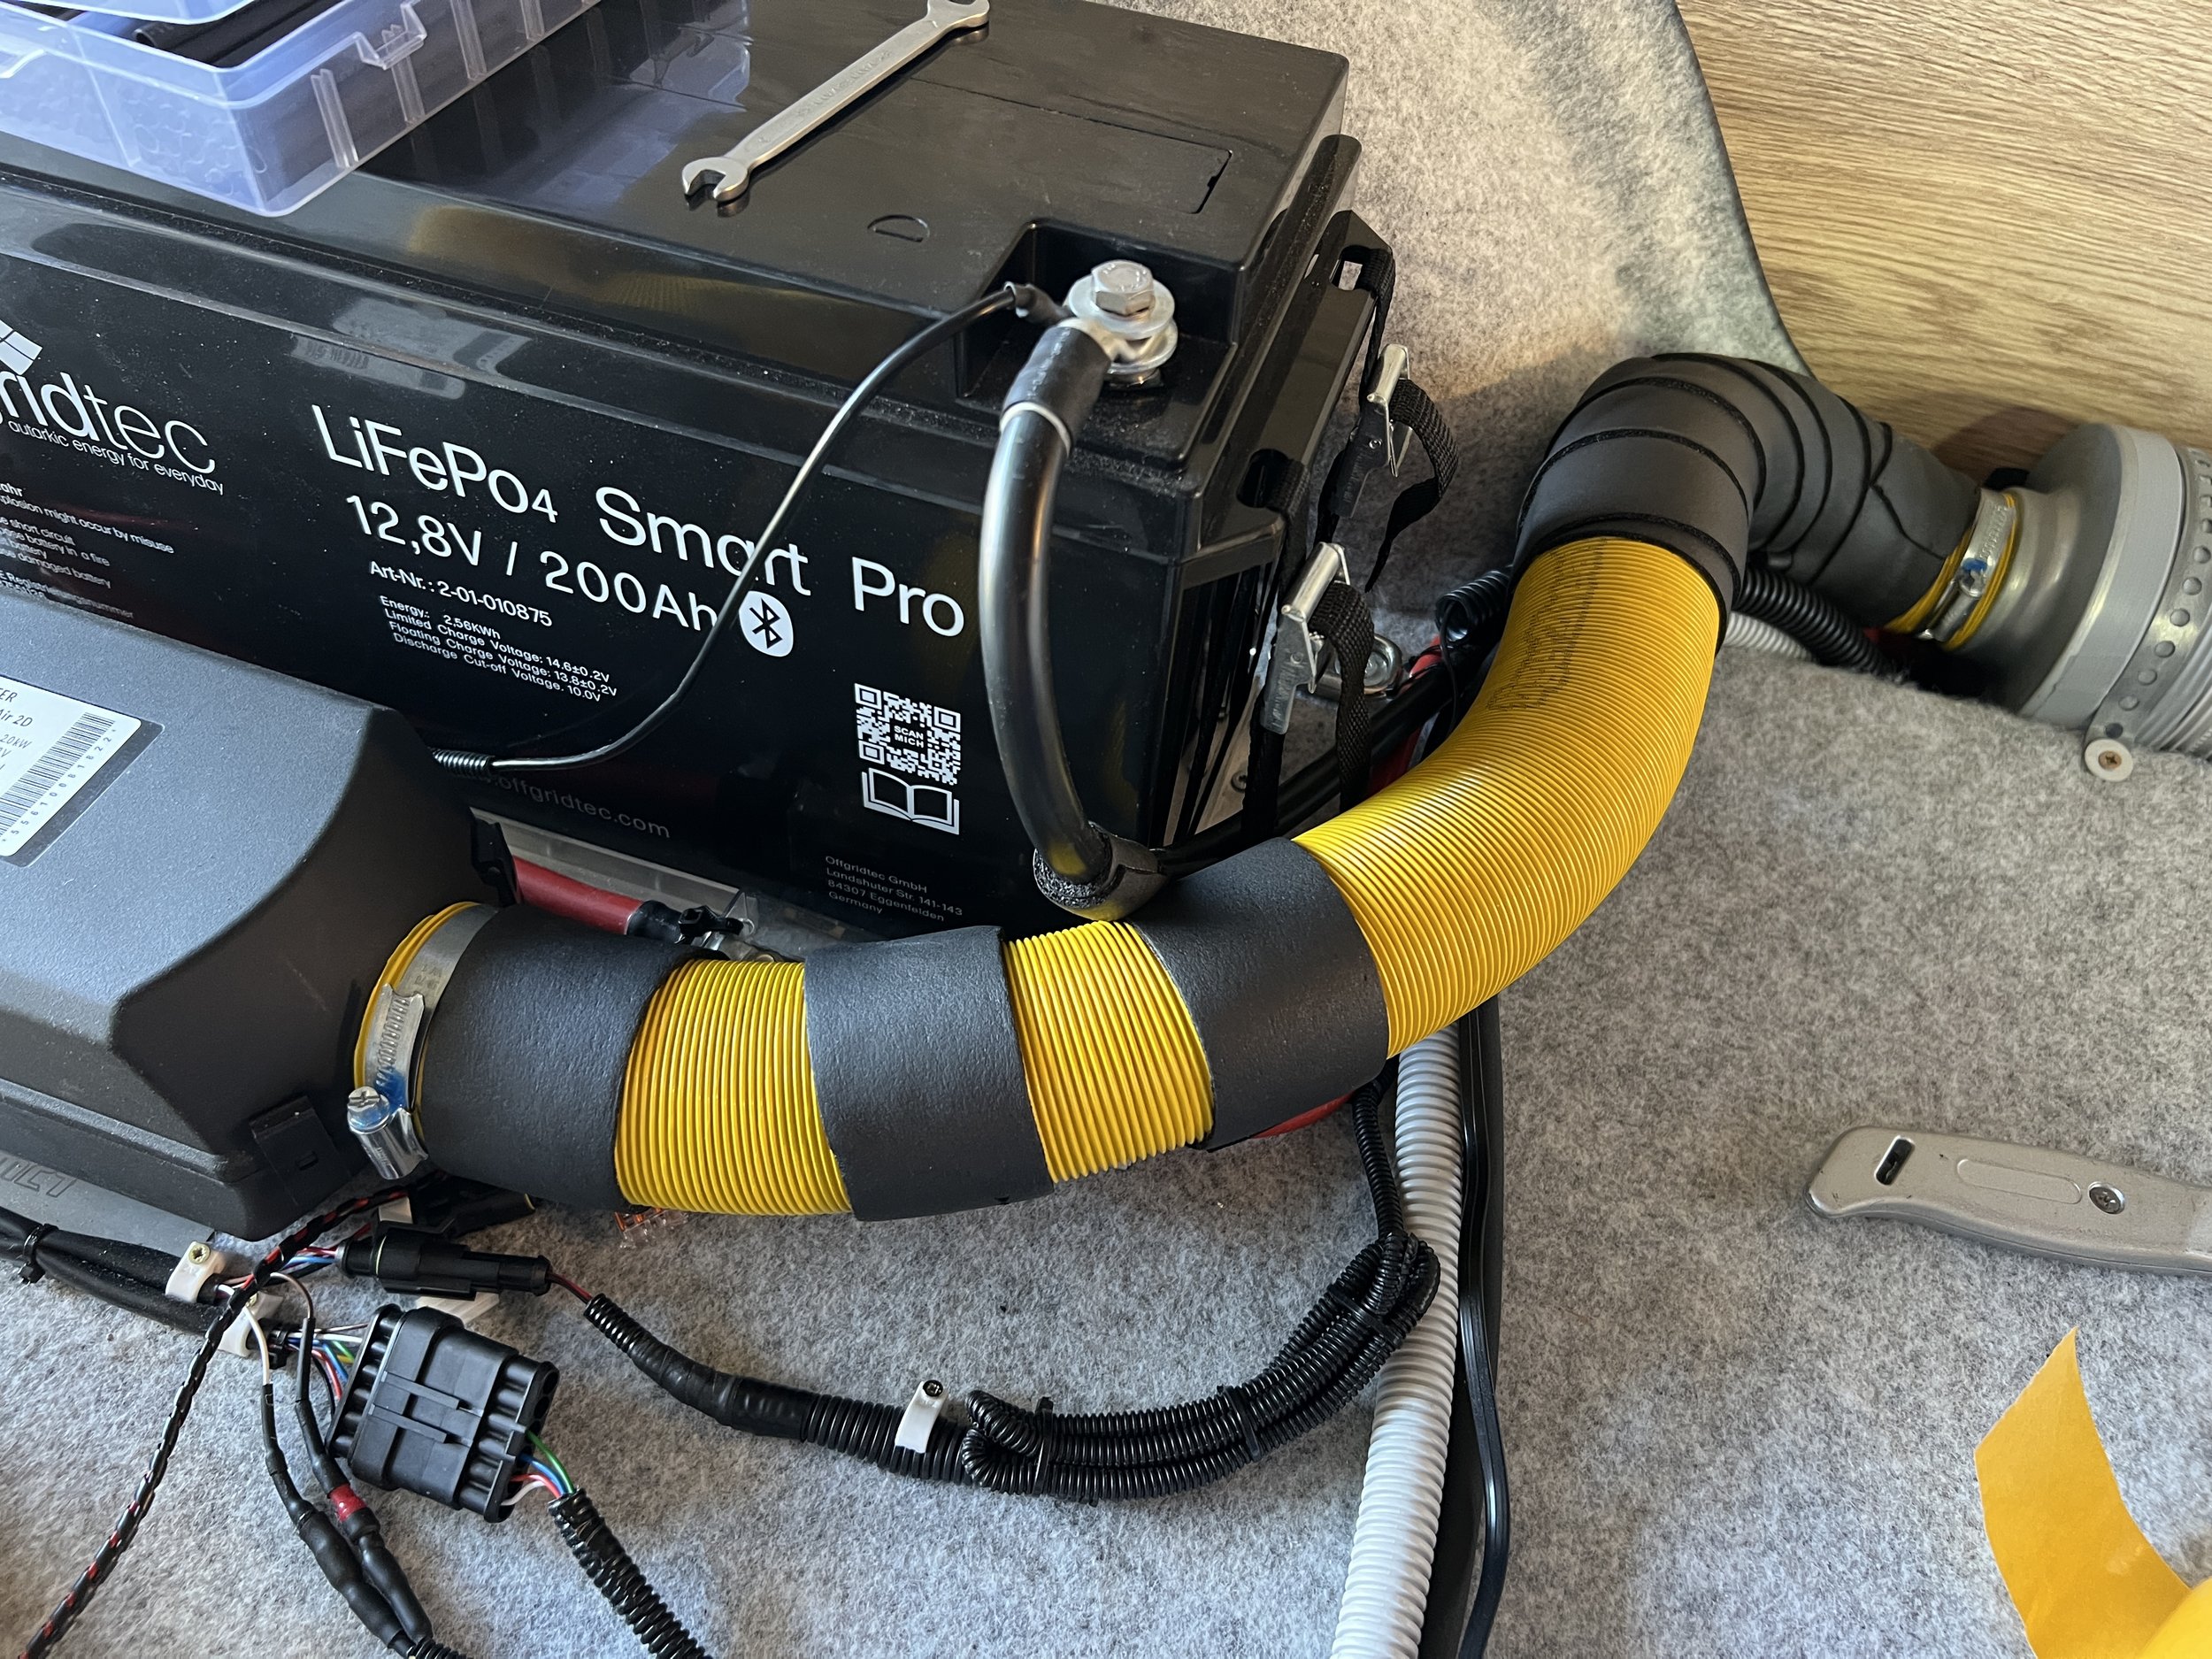
Install a muffler designed for the diesel heater. Installation is easy: cut the flexible heating pipe where needed and insert the silencer into the 60mm heating pipes. Find an in-depth installation guide in my conversion book (click).
My Recommendation:
A parking heater is essential for colder periods, but it can be loud. Installing a silencer has solved this issue for me. Now, I have no complaints about heater noise. (More information in the conversion book (click).
26. Surface Treatments
As mentioned in Chapter 10 about the right insulation, your car's interior is exposed to high humidity fluctuations. The risk of water damage and mold can be drastically reduced by using the proper materials. Therefore, it's important to focus on protecting surfaces from water-related damages throughout the build.
Possible Scenario: Simply leaving wet swimwear close to untreated wood surfaces could cause irreversible damage within hours.
The benefits of treating all exposed wood surfaces far outweigh the costs and time required for treatment!
To achieve a great finish, I proceeded with the treatment as follows:
Sand paper grit 120: Sand surfaces with a sanding machine
Degrease & dust off sanded surfaces
Apply 1st surface treatment: Wood primer-sealer
Sand paper grit 240: Sand primed surfaces
Degrease & dust off sanded surfaces
Apply 2nd surface treatment: Color of your choice
Sand paper grit 240: Sand coloured surfaces
Degrease & dust off sanded surfaces
Apply 3rd surface treatment: Color of your choice
The results should look good by now. If the surface isn't perfectly even yet, repeat the sanding with 240 grit sandpaper and then apply the paint again. With three layers of color after the primer, the results must be satisfying.
Find a dedicated surface treatment chapter in the “How to Build a Mini-Camper” guide (click).
My Recommendation:
Do not skip the wood primer, as wood contains tannins that can bleed through the paint, causing ugly stains and poor paint results. The primer seals the surface to prevent this. Also, choose a color that is shockproof and scratch-resistant to prevent damage caused by objects vibrating due to the nature of car use. For more guidance, see the conversion guide (click).
27. Installing the Bed plate
Finally! The bed plate! The mini-camper will suddenly look like a real camper. Let me give you some tips for the bed plate:
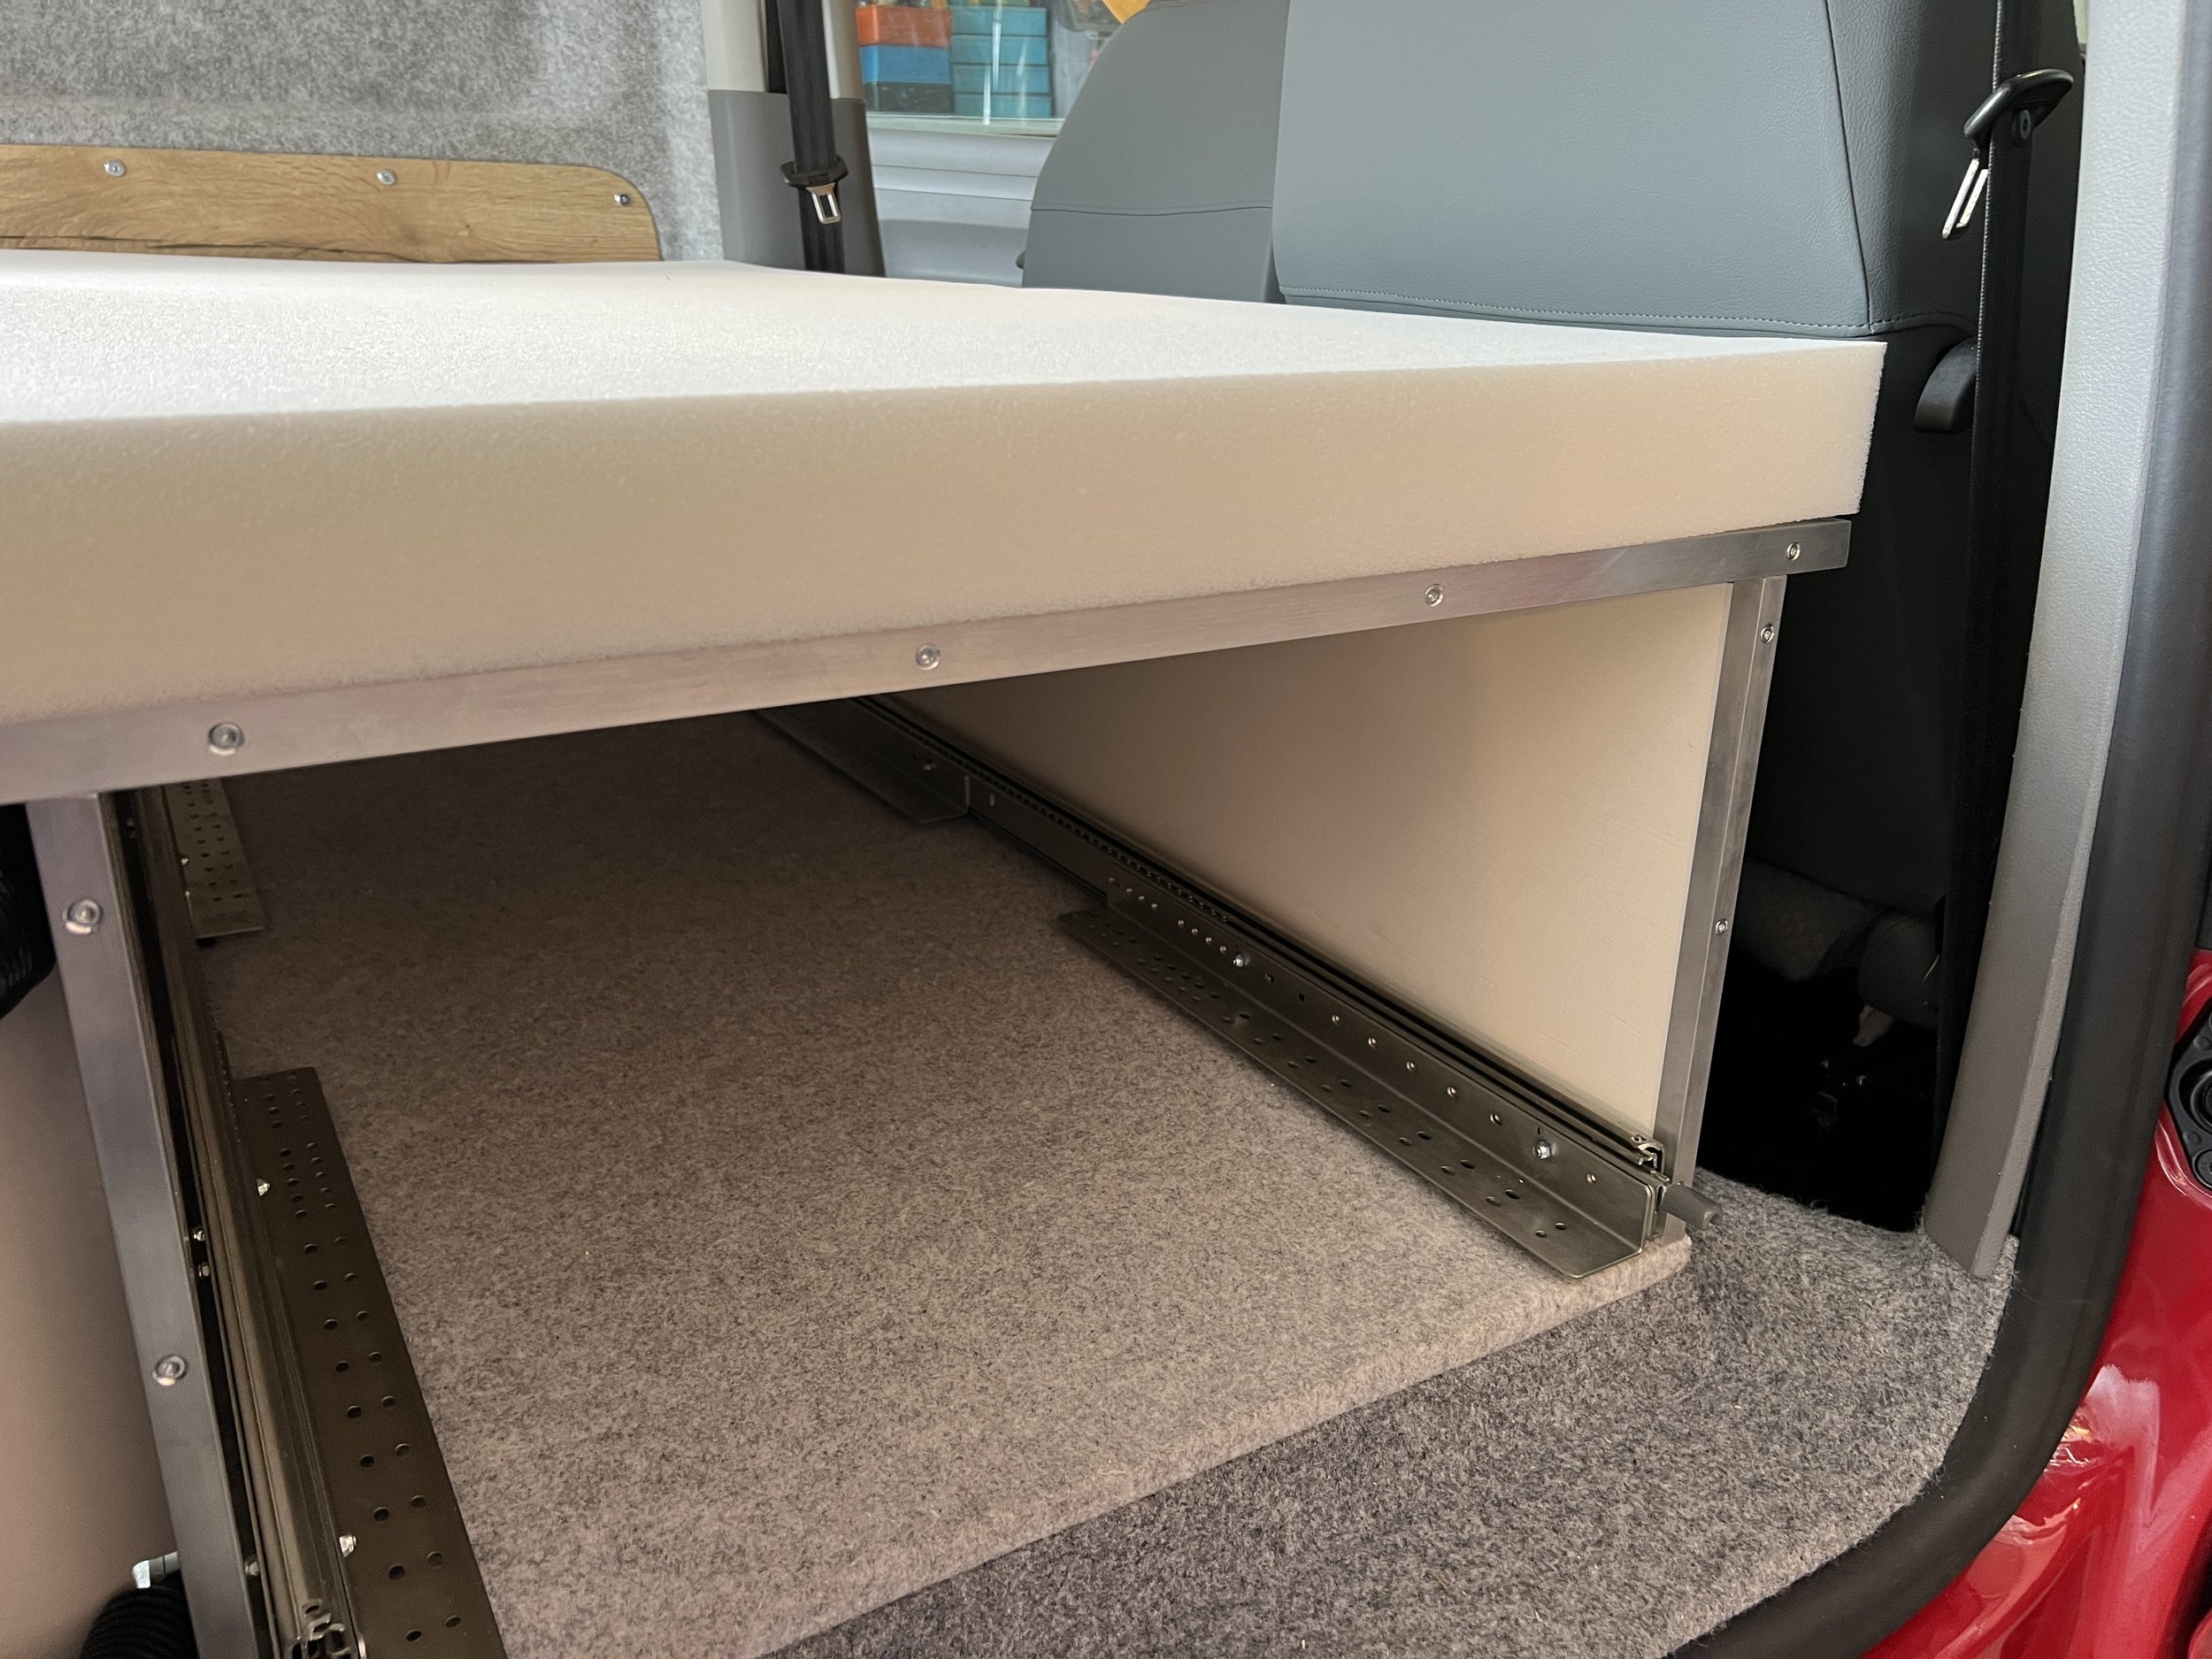
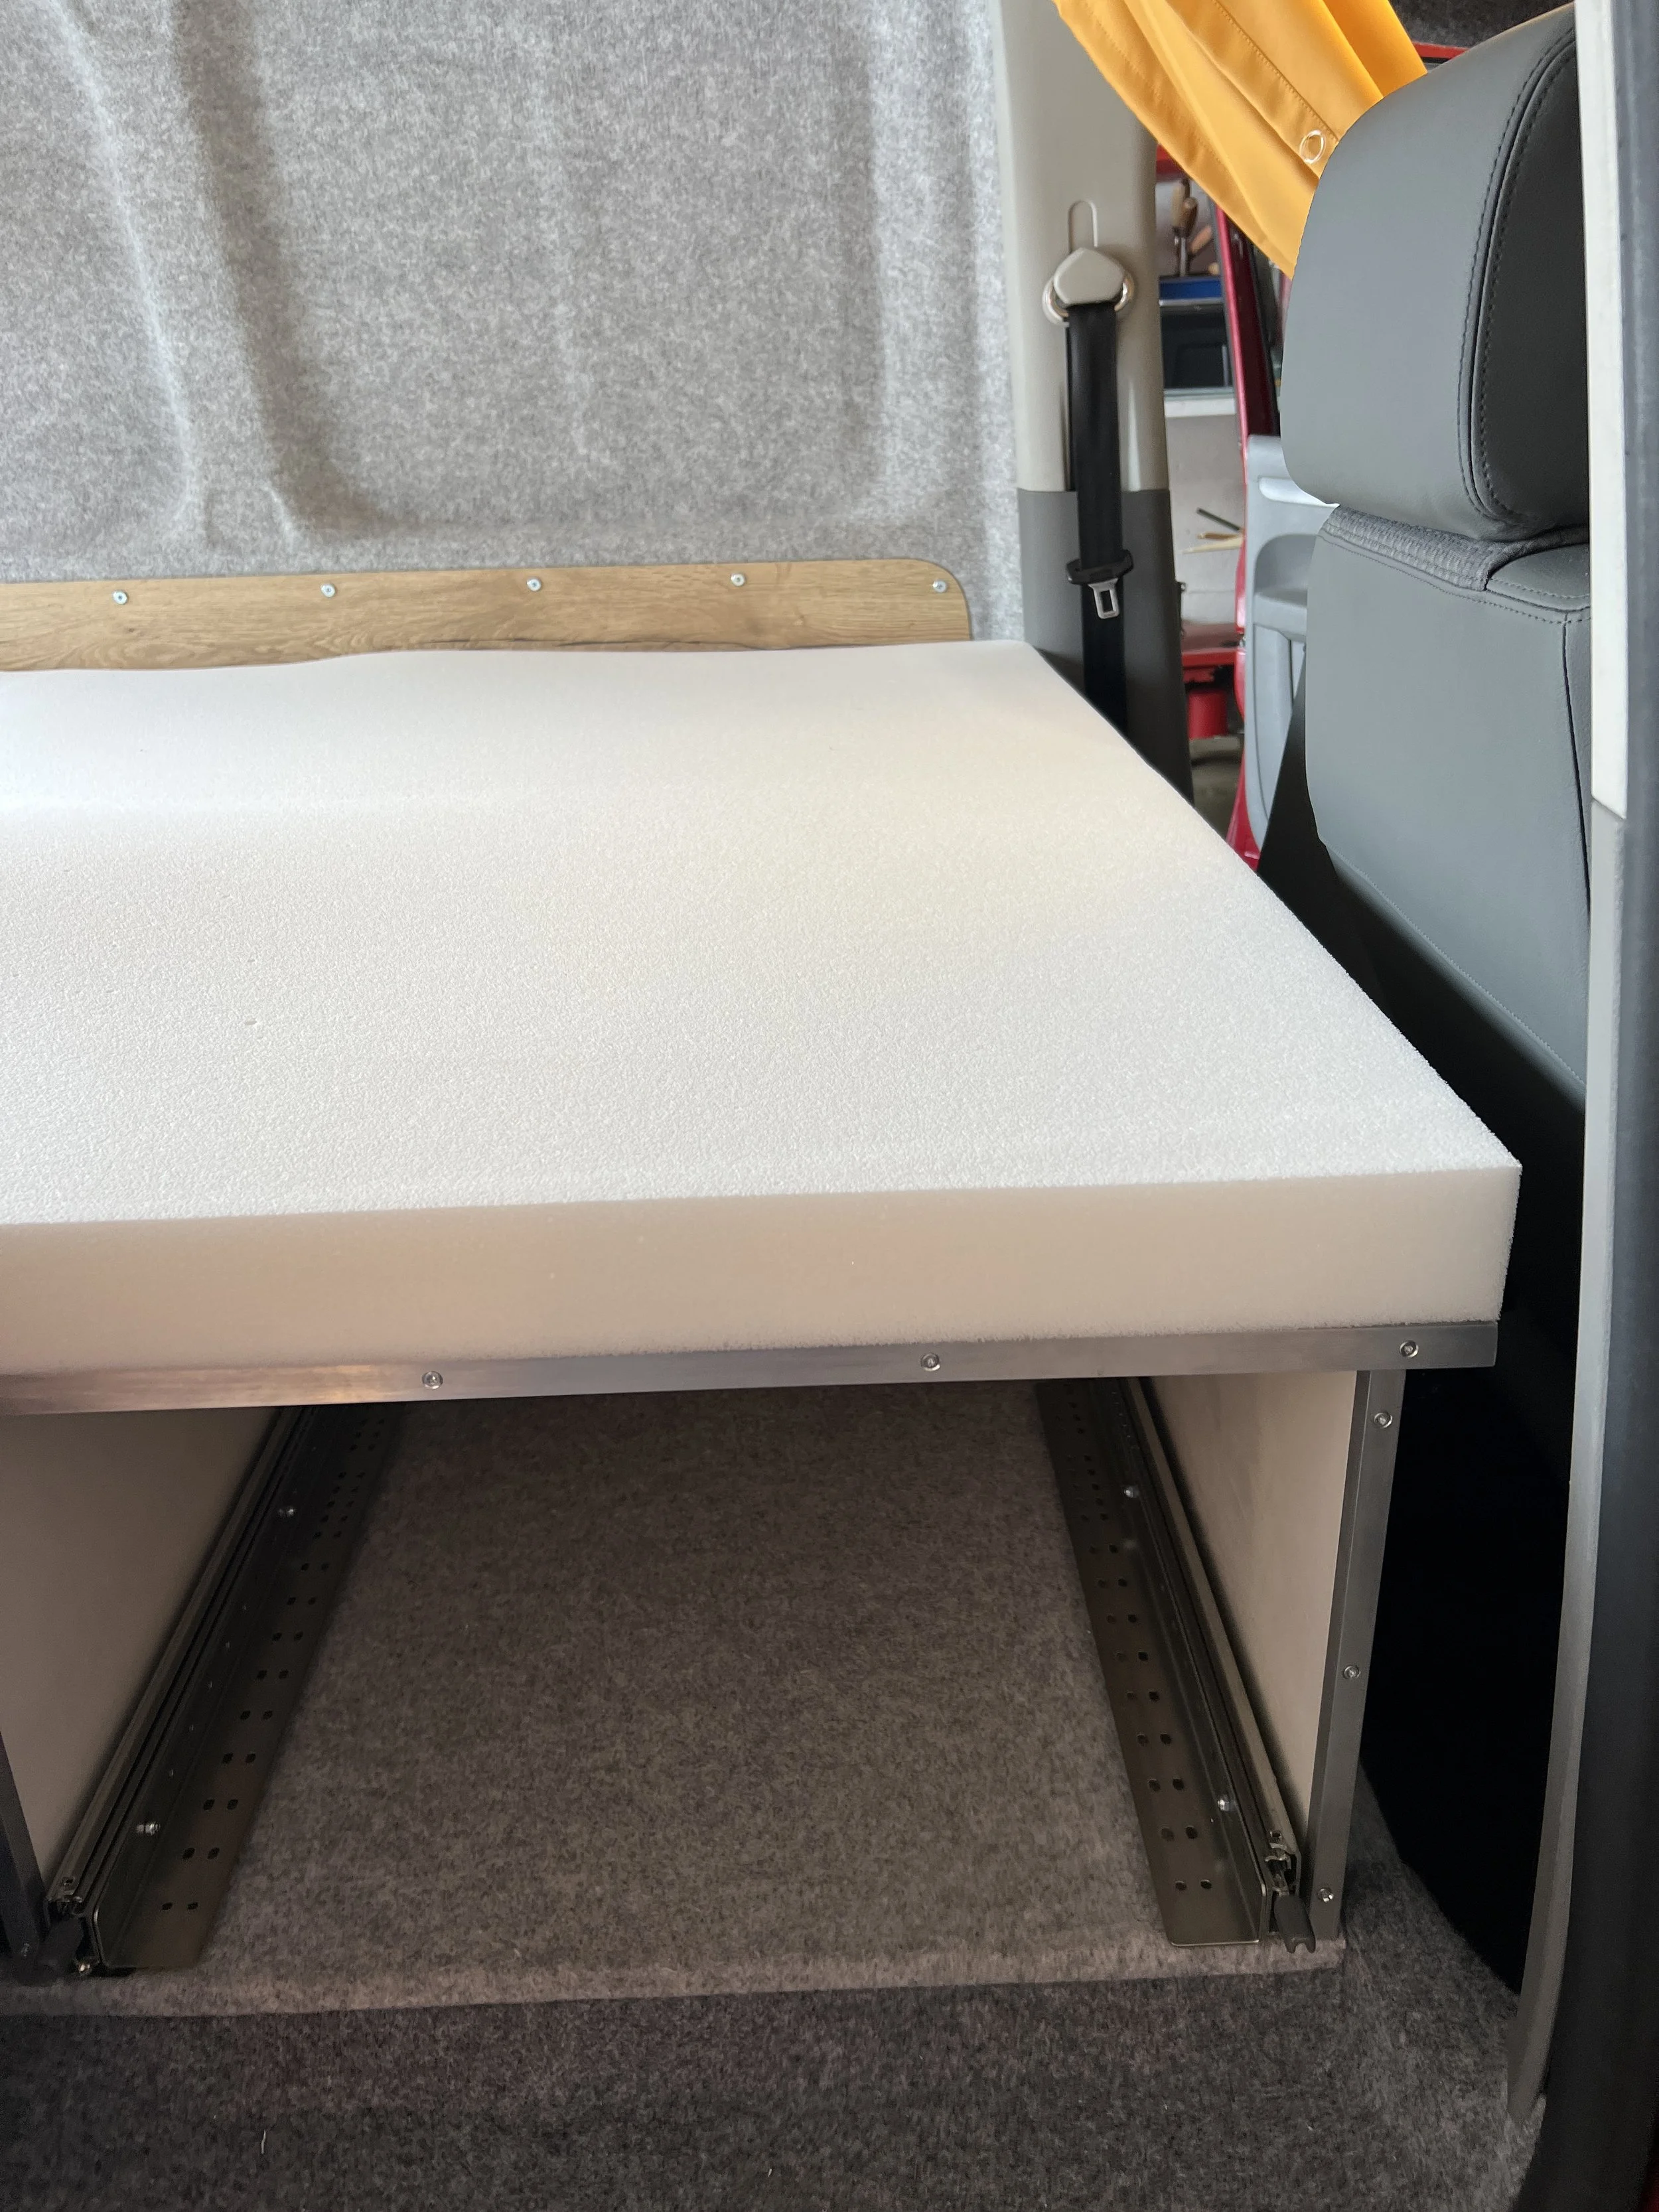
To maximize space utilization, use 10mm thick wood panels standing vertically on the floor as a bed plate base construction (just like I did). I recommend a minimum of 12mm and a maximum of 20mm thickness for your bed plate. I used a 15mm plywood board for my bed plate (see pictures).
Definitely use plywood for your bed plate. Plywood is made of several wood layers that are press-glued together, making it durable and robust. Consider how skateboards are made using the same technique to withstand thousands of jumps while maintaining flexibility. However, I advise against using the same plywood as the floor (water-resistant trailer plywood) because it is heavier.
Apply a good surface treatment. The mattress can leak humidity, potentially causing mold on the bed plate below. Also, cutting several holes out of the bed plate can improve airflow to the mattress and reduce the bed plate's weight.
Try to avoid a slatted frame mattress foundation, as it decreases the usable space above/below the mattress. It needs to be thicker than a simple plate to ensure the same stability.
Before cutting your bed plate, set your driver seats in a comfortable position and mark the maximum length to ensure a large bed-plate area combined with a comfortable driving position.
The mattress foam can be slightly longer/wider than the bed plate if needed. A few centimeters more or less won't hurt, but for aesthetic reasons, it's best to cut it to the same length as the bed plate and use aluminum edge covers (see conversion book on how to create edge protecors for long lasting furniture).
The bed plate must be securely fastened in case of an accident or emergency braking. Connect it with the base construction and the car body frame using metal angles and a rivet nut tool.
Wood on wood can create annoying sounds due to pressure or temperature changes. Place some insulation tape between the base construction and the bed plate to prevent this. I have done the same (see attached pictures), and there's no sound when moving on the bed, ensuring a good night's sleep.
My Recommendation:
For in-depth guidance on creating and installing a bed plate, check out my “How to Build a Mini-Camper” conversion guide. Easy-to-follow instructions and over a thousand step-by-step pictures can save you weeks or even months of intensive research in DIY camper building. Click here to access the book (click).
28. Aluminium Edge Protector
Loading the car; unloading the car; transporting a cabinet; having kids play around the camper; etc…
There are more than enough reasons why the edges of your wood interior need enforced protection to withstand the ravages of time. The answer to this problem is not only simple and cheap to implement but also a great upgrade to the design of your mini camper:
Metal U-Beams
In most hardware stores you can find u-beams made out of stainless-steel; steel and aluminium. While stainless-steel is by far the heaviest option and due to its hardness makes cutting of no fun, try to avoid stainless steel. The second option would be u-beams made of steel, however this option is still very heavy. Cutting steel is of more fun but still strenuous. The biggest problem is that it can/will start rusting over time (depending on the quality of its surface treatment). The last option are u-beams made from Aluminium. Not only is aluminium by far the lightest of those 3 metals but it is also very easily cut. On top it can not rust!
My Recommendation:
Protect all exposed edges with aluminium u-beams. They are easy to cut, do not rust, can be easily polished and are very affordable. Additionally they will act as an upgrade to your design and keep your mini camper looking modern and fresh. There is almost nothing that destroys the optics of your mini camper as much as worn edges.
For an in-depth guide on creating and installing aluminium edge protectors, have a look at the “How to Build a Mini-Camper” conversion guide (click).
29. The Mattress (Foam)
Instead of a heavy standard mattress, consider using high-quality foam approved for mattress use. When I visited local mattress suppliers, the thinnest mattress I could find was 10cm thick, which I felt was still 2-3cm too thick (every centimeter counts).
So, I searched online and found a foam supplier that produces high-quality foams. These foams offer the comfort and performance of thicker mattresses in a much thinner profile. Plus, they are lighter and very easy to cut. Remember, each DIY camper interior is different, and so is the bed plate shape. Using an easy-to-cut foam mattress has great benefits over a standard mattress, not to mention the weight savings. To summarize:
Advantages of using foam as a mattress:
Very easy to cut
Lightweight (compared to standard mattresses)
Thickness can be chosen when ordering online
Some suppliers allow custom length/width orders, making the foam mattress a perfect fit for your custom project
Ökotex standard certified foams are available (free of harmful substances; purity of raw materials, etc.)
Disadvantages of using foam:
The price can be higher than for a standard mass-produced mattress
For custom sizes, delivery times may be longer (depending on the supplier)
My Recommendation:
A foam mattress saves weight and can be cut within minutes to fit your custom bed-plate dimensions. This also saves fuel costs. I definitely recommend it! For a detailed mattress chapter, have a look at my conversion book (click).
30. Central Control Station & Charging station
A wide range of technological components and charging options, from 12V to 230V, make the mini camper a surprisingly powerful travel companion.
The idea behind the control station was to create a multifunctional hub placed centrally, allowing for easy control from both outside – whether at the trunk or sliding door – and from within.
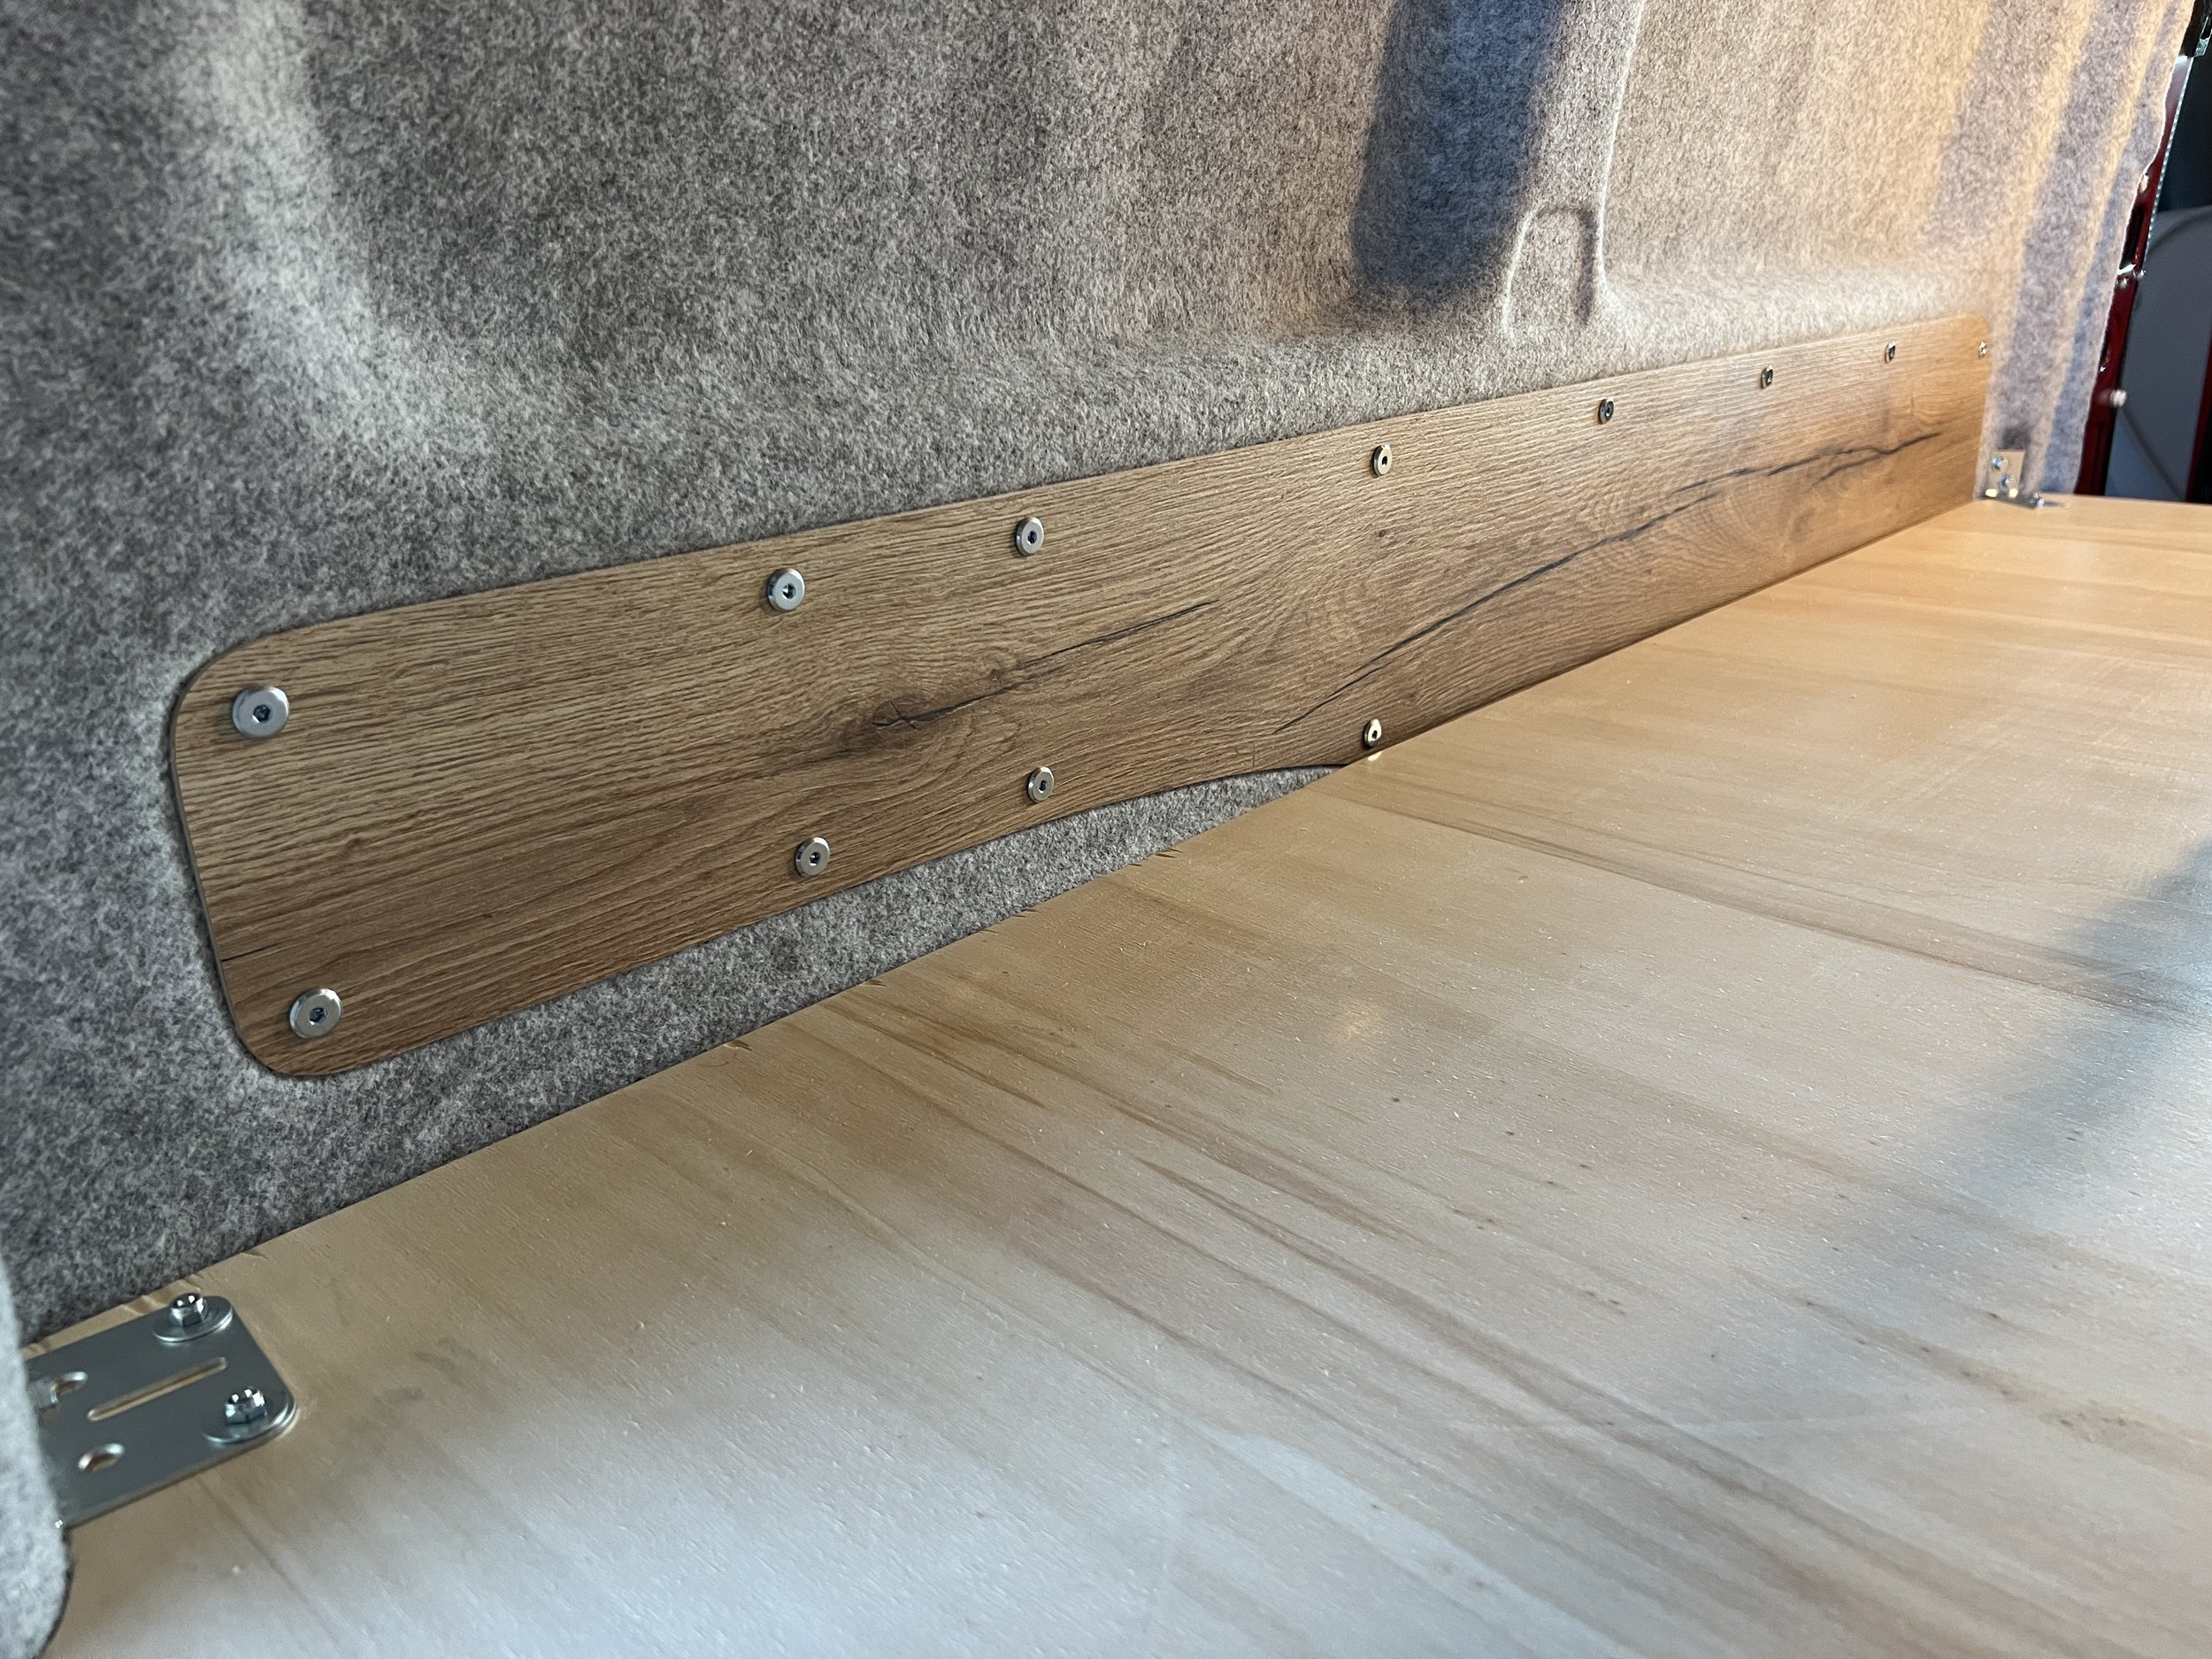
Placement Suggestion: Even with a 1.40m wide bed plate (to ensure comfortable sleeping space for two people), there is still some room left before utilizing the entire width of the car. In the case of the VW Caddy, the remaining space (approximately 15cm) is perfect for a modern nightstand. For this, I used the same wood surface for the multifunctional nightstand station as what was used for the interior panels and the electrical station plate below the driver's seat, creating a harmonious interior design. You can find the supplier of this wood in the conversion guide (click). A great benefit is that it comes with a water- and mold-resistant, wood-printed surface, allowing for direct installation without the need for surface treatments or paint application.
It's crucial to plan your build thoroughly before starting your conversion. For example, this nightstand was planned from the beginning, so all necessary cables were prepared and integrated in the earlier steps. Adding this station spontaneously would require enormous effort to lay the cables afterward.
My Recommendation:
Consult the “How to Build a Mini-Camper” conversion guide (click) to ensure you don't overlook any conversion steps. Remember, a mini-camper is like a puzzle; minor adjustments can always be made. However, missing an entire step in the wiring could delay your planned finish date by days or even weeks. Therefore, don't skip the conversion book.
32. Radio; Speaker; DAB+; Antenna-Upgrade
Owning a camper is like owning freedom. It's an escape from everything, leaving it all behind with just the road, your loved ones, and the challenges of a bad radio signal and an outdated radio interface.
I recommend adding a touch of comfort by upgrading to crystal clear radio reception, Apple Car Play functionality, and better speakers. Let's quickly go over these upgrades:
DAB+ is a step up from FM radio as it uses higher frequencies, offering superior audio quality with fewer interferences like crackling or fizzing. However, DAB+ transmitters aren't available everywhere. Thankfully, the antenna I recommend supports both DAB+ and FM, allowing you to switch between them as needed.
An active antenna is ideal, which means it needs a 12V connection. Its advantage lies in an integrated signal amplifier, enhancing the quality of reception.
Apple Car Play is a fantastic feature that connects your iPhone to your radio, transforming the radio screen into an extension of your phone. It makes accessing maps, music, and apps on your car radio screen incredibly easy!
And don't forget about the speakers. In my case, they were over 17 years old. If you're upgrading the radio and antenna, why stop at the speakers?
Installation Instructions and Tips:
For detailed step-by-step guidance covering all the mentioned topics, please refer to my mini-camper conversion book (click).
My Recommendation:
For crystal clear radio reception, I recommend an active DAB+ antenna that also receives FM, ideally installed on the roof for optimal reception. Always deburr and apply an anti-corrosive treatment to the installation hole. While a radio capable of Apple Car Play is a great addition, a simple phone holder combined with a standard radio can also offer a comfortable travel experience. In my conversion book, I guide you through all the necessary steps to upgrade your radio, antenna, and speaker setup (click).
33. More Rust Prevention & RAPTOR Surface Treatment
Every car was once brand-new and rust-free. However, over time, usage and environmental exposure lead to metal oxidation (rusting), with some areas being more prone to rust than others. If you observe a variety of cars in a large parking lot, you'll notice that rust commonly occurs in specific areas. A prime example is the wheel housing, where two metal sheets are welded together. The tire treads pick up debris from the road, and the tire's rotation can act like a catapult. This often results in paint damage around the wheel housing, making it susceptible to rust due to high water exposure.
Rust Prevention is Key:
It's advisable to apply a surface treatment to the joint where the metal sheets of the wheel housing meet. In this project, I used Owatrol Oil (click), which penetrates about three times deeper than water and hardens within 24 hours. Alternatives like a grease (click) or a cavity sealing (click) are also effective.
Check under all floor mats for trapped water or moisture that might have caused oxidation. If you find rust, treat it and seal it with a surface treatment. If there's no rust (as in my case), applying a protective surface treatment preemptively can prevent future rust issues.
RAPTOR Surface Treatment:
For further protection, consider applying a RAPTOR treatment to areas that are very prone to rust. This paint is ultra-resistant to almost everything (which is why it's used on pickup loading surfaces) and also gives a more 'off-road' appearance to your vehicle.
Find a detailed step-by-step guide in my conversion book (click) on how to apply it. I also guide you through using this paint to upgrade faded plastic bumpers around the car (see the attached pictures). The results are stunning!
My Recommendation:
Treat all areas most prone to rust development with a surface treatment. Lift all car mats and ensure you're building on a rust-free foundation. If you want to go further, apply RAPTOR surface treatment for ultra protection and an off-road vehicle appearance.
Remember, prevention is far easier and cheaper than treating extensively rust-infected chassis parts!
34. Drawer Building
As this article is already quite lengthy, serving merely as a brief sneak peek into mini-camper conversion, I encourage you to explore the “How to Build a Mini-Camper” conversion book (click). It offers valuable tips and instructions, covering everything from the initial purchase to project completion.
The book also includes a complete drawer-building guide, providing clear instructions on how to replicate the process of building such drawers.
My Recommendation:
For space-efficient mini-camper drawer building, refer to the mini-camper guide (click). These drawers are not only head-turning but also easy to replicate with the guidance provided in the conversion book
35. Final Results
Looking at the completed conversion, one wonders how everything fit into such a small car (VW Caddy L1).
My partner and I could not be happier. The mini-camper combines its compact size with all the amenities one would expect in a much larger camper. Spontaneous trips have become a breeze, and parking is no longer a challenge. We've started to enjoy budget-friendly weekend getaways to local spots that we used to overlook.
Overall, we've gained a new sense of freedom. Work breaks and quick trips to the supermarket have become absolute highlights. Just a glance in the rearview mirror at the camper interior while driving fills me with immense joy.
If you are dreaming of owning your own mini-camper, there is nothing holding you back anymore. With my in-depth conversion guide (click), which includes thousands of step-by-step pictures, including many close-ups of the building process, you can start building today. And most importantly, you will save yourself weeks or even months of research on how to build a mini-camper.
Need more Help in Your Own Conversion?
You can discover the comprehensive guide to constructing your mini-camper in my book “How to Build a Mini-Camper” (click). Each chapter provides clear and concise instructions for a smooth mini-camper conversion process.
While the book spans 372 pages, it may seem extensive; however, it is structured in a way that allows you to jump directly to the required chapter, such as “Camper Insulation.” Here, you will quickly find an overview, not only of the various insulation options available but also guidance on how to apply them. This approach ensures that individuals at any stage of their build can find practical advice within these pages.
I have also made a point to price the book affordably, making this valuable resource accessible to most. If you choose to purchase it, leaving a review would be incredibly beneficial to others in need of help, aiding them in finding this guide more easily.
Thank you sincerely for everything. Even if you do not require the book at this moment, I am immensely grateful that you have visited this page and read through to the end. My heartfelt thanks to you.

